 Skip to content
Branding & Labels for Custom Plush Toys: Embroidery vs Printing, Woven Labels, Hangtags, and Barcodes—What a Ready Manufacturer Needs
Most plush projects don’t fail because the character is “not cute enough.” They fail because the brand system breaks in real life: the logo looks great on screen but turns stiff on plush fabric, the woven label scratches, the hangtag tears off in transit, the barcode won’t scan at the warehouse, or the cartons arrive with missing marks and your 3PL can’t sort SKUs fast. That’s when a simple plush order turns into late launches, rework, and extra costs you never planned for.
Branding is not only about how your plush looks in a photo. It’s about how your plush moves through a supply chain: sampling → approvals → bulk production → packaging → labeling → carton marking → scanning → storage → shipping → retail/eCommerce handling → returns → reorders. The more SKUs you have, the more “small” labeling mistakes become expensive. And if you’re selling across channels (boutique retail + Amazon + wholesale), your label system needs to be repeatable and auditable, not improvised.
A -ready plush branding system includes the right method for logos and faces (embroidery vs printing), the right label type (woven/printed/heat-transfer), and retail-ready packaging items like hangtags and UPC/EAN barcodes—plus clear carton marks for logistics. The best choice depends on plush size (mini plush vs plush doll), fabric, channel requirements, and scan reliability. Lock files, placement maps, and approval rules early to keep bulk consistent and avoid delays.
If you want a branding plan that looks premium and works in warehouses, you’re in the right place.
What “branding & labels” do a plush actually need?
Plush branding means building a complete system: what goes on the plush, what goes on packaging, and what goes on cartons. Brands want premium look + consistency; distributors want fast sorting; retailers want shelf-ready hangtags; Amazon sellers need barcode accuracy and strong SKU logic. Decide ownership early (brand vs importer vs retailer), then standardize files, placement rules, and approval records to reduce rework.
A practical way to think about plush branding is: brand-facing items, facing items, and warehouse-facing items. Brand-facing items are what your customer notices first: the face method (embroidered or printed), the logo placement, and the “feel” of the branding (soft vs stiff). facing items are what customers touch and read: woven labels, printed labels, hangtags, and simple product info. Warehouse-facing items are what keeps operations clean: UPC/EAN barcodes, SKU labels, inner pack labels, and carton marks.
Who needs what depends on your channel. A boutique retail customer often cares about hangtag look, paper thickness, a small brand story, and clean barcode scanning at checkout. A distributor cares about cartons: correct carton marks, consistent SKU naming, and packing lists that match. Amazon and marketplace sellers care about scan accuracy, label placement that survives shipping, and consistent SKU mapping so returns don’t blow up your metrics.
Here’s the “ownership trap” that causes delays: the brand assumes the factory will “handle labels,” while the importer assumes the brand already has barcode files, and the retailer assumes the hangtag will include SKU and UPC. Then late-stage changes happen. The fix is simple: decide up front who provides (1) barcode numbers (UPC/EAN), (2) label content and language, (3) compliance text, and (4) dielines and print-ready files. When ownership is clear, timelines become predictable.
Now add product type: Mini Plush vs Plush Doll. Mini plush (keychains, small mascots, promo items) usually sells on impulse, bundles, or collections. That means you need faster SKU scanning and simpler labeling—because space is limited, and the plush itself can’t carry too much readable text. Plush dolls (larger characters, collector items, premium gift) can support more detailed hangtags, nicer finishes, and extra branding features like woven labels with fold types and soft edges. The product size changes what is realistic: a tiny plush can’t carry a large woven label without feeling scratchy or bulky.
A “ready branding kit” should include:
- Logo/face method decisions (embroidery vs printing, with notes)
- Label type decisions (woven/printed/heat-transfer, with fold and placement)
- Hangtag plan (type, size, content blocks, barcode placement)
- Barcode/SKU rules (naming, file list, print specs, scan test plan)
- Carton mark rules (template, required fields, examples)
If you want Heyzizi to build this with you, you can share your channel (retail, Amazon, wholesale), your SKU count, and your preferred branding style. We’ll help you choose a setup that holds up in bulk production and real shipping.
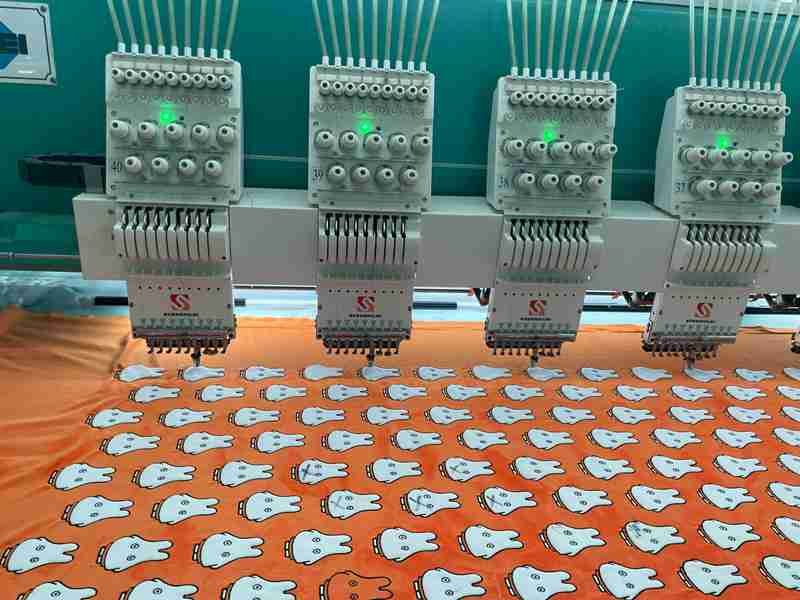
Embroidery vs printing: which is best for plush logos and faces.
Embroidery usually looks premium and lasts well, but can feel stiff and may blur tiny details on plush pile. Printing handles gradients and fine artwork better, but needs the right base fabric and durability spec to avoid fading or edge fuzz. The best method depends on plush size (mini vs doll), fabric pile, logo complexity, and how the product will be handled (daily use vs display).
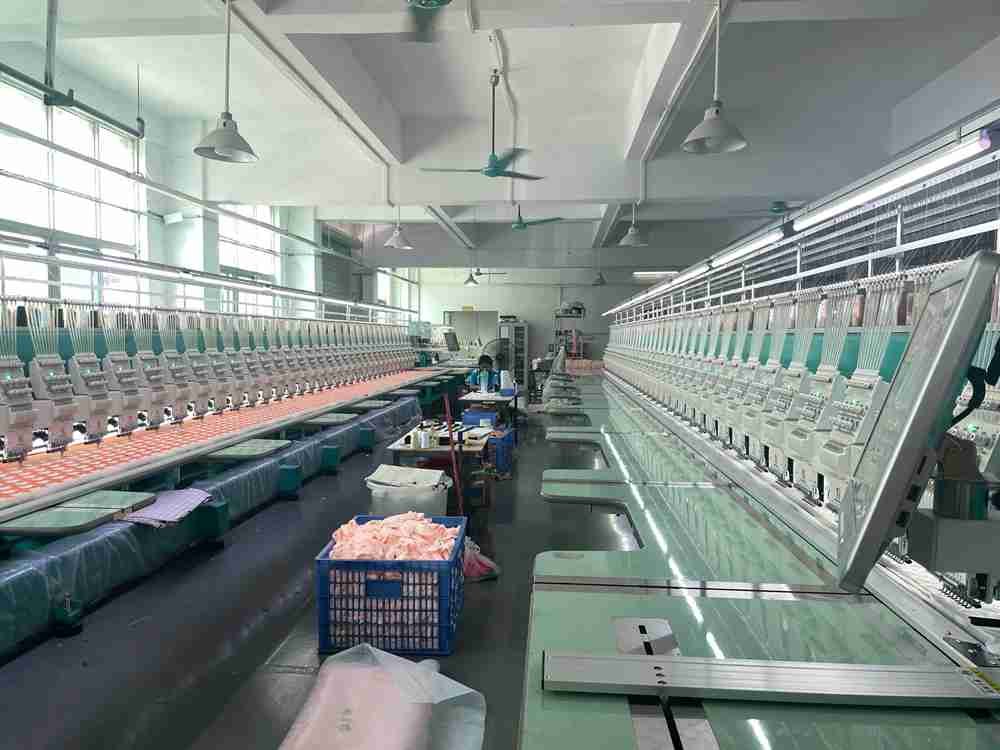
In plush work, “best” isn’t a single answer. It’s a trade-off between visual quality, handfeel, durability, and bulk repeatability. Embroidery gives texture and a classic premium signal: you can literally feel the branding. That’s why embroidered plush faces have stayed popular for years. But embroidery has a cost: stitch density adds stiffness, especially on small areas like mini plush cheeks or tiny logo patches. If you overbuild embroidery on a plush surface, the logo can feel like a hard plate.
Printing is the opposite strength. It can keep tiny lines, gradients, and complex art readable—especially if your brand uses illustration-heavy designs or soft shading. Printing can also reduce thickness on small parts, which helps mini plush stay soft. The risk is that printing on pile fabric can lose crisp edges if the pile is too long, or if the print method isn’t matched to the fabric. In bulk, the wrong combination creates “fuzzy edges” and inconsistent color appearance.
A useful way to decide is to separate faces and logos. Faces often need consistent expression, and embroidery can deliver strong outlines, but it can also distort if the fabric stretches or pile direction shifts. Printing faces can preserve illustration style, but you must manage pile and durability. Logos often need readability at small sizes—here, printing can win for small text, while embroidery wins for simple icons.
Now layer in Mini Plush vs Plush Doll. Mini plush compresses every decision: the same logo becomes tiny, the same stitches become dense, the same label becomes bulky. For mini plush, a common strategy is: keep embroidery simple (bold shapes, fewer colors) or use printing for fine details. For plush dolls, you have more surface area and can use embroidery without stiffness feeling as severe, especially when backing and stitch count are controlled.
Here’s a practical comparison use:
| Decision Factor | Embroidery | Printing |
|---|---|---|
| Premium look | Strong | Strong (depends on art style) |
| Fine gradients | Weak | Strong |
| Tiny text readability | Medium | Strong |
| Soft handfeel | Medium (can be stiff) | Strong (thin layer) |
| Wear durability | Strong | Medium–Strong (depends on method/spec) |
| Bulk repeatability | Strong if controlled | Strong if base fabric is consistent |
What makes embroidery “too stiff”? Usually high stitch density, too many fill stitches, and heavy backing. A factory can control this by adjusting stitch types, reducing fill areas, using outlines, and selecting the right support layer. What makes printing fail? Usually the wrong base fabric, unclear print specs, and no durability check for your channel.
If you tell Heyzizi your plush size range, fabric choice, and whether your product is daily-use or display, we can recommend a branding method that matches your real-world handling and avoids rework later.
When should you use woven labels vs printed labels vs heat-transfer labels?
Use woven labels for a premium, long-lasting look; printed labels for flexible content and lower setup; heat-transfer labels for a “no scratch” feel on small plush or sensitive skins. Price depends on label size, fold type, color count, MOQ per design, and placement labor. Match label type to fabric and product size to avoid comfort complaints—especially for mini plush.
Labels are small, but they quietly decide whether your product feels “high-end” or “annoying.” often focus on logo method first, then discover later that the label scratches, curls, or becomes unreadable. A -ready label plan solves three problems: comfort, readability, and repeatability.
Woven labels signal premium. The texture is clean, the edges can be finished, and the label tends to stay readable. Woven labels are great for plush dolls and mid-to-high priced items. The trade-off is that woven labels require setup and have constraints: tiny text may not be as crisp as print, and certain fold types cost more. Printed labels are flexible: you can print more text, change content faster, and often reduce setup complexity. They can be a smart choice when you have many SKUs, many languages, or frequently changing product info. Heat-transfer labels (or similar “no-sew label” concepts) can be a comfort solution for mini plush or products where scratch risk is high. They remove bulky edges, which helps when your plush is small.
Now embed the subtopic: Which Plush Fabric Is Better for Brands? Not all fabrics “accept” labels the same way. A soft plush body paired with a stiff woven label creates a comfort mismatch. If your plush has sensitive-touch positioning (sleep plush, baby-style plush, daily cuddle plush), the label strategy must prioritize comfort. That can mean using a softer fold, moving the label to a less-contact zone (bottom seam), reducing label size, or using a heat-transfer approach on packaging instead of the plush.
Placement and fold types matter more than many expect. A side seam label might rub against the hand or cheek. A bottom label might be less noticeable. A loop label can look premium but adds bulk if overbuilt. For mini plush and keychains, the label can become disproportionately large. In those cases, the best practice is: keep the plush label minimal (brand name), move detailed info to hangtag or packaging, and ensure edges are soft.
Cost drivers are predictable when you list them clearly:
- Label size (larger = more material)
- Fold type (end fold, center fold, loop)
- Color count and complexity
- MOQ per design (one label per SKU vs shared label across SKUs)
- Placement labor (extra sewing steps, reinforcement)
If your branding goal is “premium feel,” the fabric and label should work together. A glossy short-pile plush plus a clean woven label can look very high-end. A fuzzy long-pile plush might hide label details but can still support a woven label if placement and size are smart. The point is: label choice is not separate from plush fabric. It is part of the same customer touch experience.
What information should be on a plush label or tracking label?
Label requirements depend on market and product features. At minimum, should plan for brand identification, origin, and any required warnings or traceability info that applies to their channel. For mini plush, readability becomes harder, so it’s common to keep the on-plush label minimal and move more details to packaging or hangtags. Decide content ownership early to avoid late-stage relabeling.
Label content is where branding meets real-world selling. If you sell across markets, you’ll hear a lot of advice—some accurate, some not. Here’s the grounded approach: treat label content as a channel + market + product-feature decision. Your importer, compliance partner, or retail client may specify exact text. Your job in product development is to build a label system that can carry the required content without breaking comfort and readability.
Many plush programs include basic identification: brand name, origin, and sometimes batch/lot or production coding for internal traceability. If the product is intended for kids or has specific attachments (small parts, magnets, electronics), label and packaging may need additional warnings. The key is not to guess. Instead, ask: which market, which age grade, which retail channel, and which features. Then build content blocks that fit.
Mini plush makes this harder. You simply don’t have space for readable text on a tiny label. If you try, you end up with micro text that nobody can read and a label that feels uncomfortable. This is why many brands do a split strategy: the plush carries a small brand label, while the hangtag or packaging carries the richer content (SKU, barcode, warnings, story, QR). That’s not “cutting corners”—it’s realistic design for size constraints.
Legibility matters operationally too. If staff can’t read labels easily, sorting and quality checks become slower. If customers can’t read basic info, trust drops. The simplest best practice is: keep essential info readable, avoid overcrowding, and place labels where they won’t irritate the user. For plush that will be hugged or used daily, label placement should avoid face-contact zones.
Responsibility is the other big issue. In , the factory can execute your label plan, but the brand or importer typically owns the correctness of market-specific content. The factory needs clear instructions and approved artwork files. If you change copy late, you change timelines. So, lock label content early—even if you keep some content modular.
If you want help structuring your label content blocks for multiple markets, Heyzizi can work from your channel requirements and build a label layout that stays clean, readable, and consistent in bulk.
What makes a hangtag “retail-ready” for plush toys?
A retail-ready hangtag is easy to scan, hard to tear off during shipping, and designed for the channel: boutique gift needs premium paper and clean branding; eCommerce needs durable attachment and clear SKU/barcode; wholesale needs fast sorting info. Mini plush often uses header cards or compact tags, while plush dolls can support larger tags with story, QR, and richer finishes.
Hangtags do three jobs at once: they sell, they identify, and they help operations. Brands often over-focus on design and forget durability and scanning. A hangtag that looks beautiful but tears off in cartons is not retail-ready. A hangtag with a barcode on a curved surface that won’t scan is also not retail-ready.
Hangtag types include classic string hangtags, loop tags, header cards (common for small items and keychains), and card formats that integrate with bagging. The right choice depends on channel and product type. For boutique gift, hangtags often carry brand story and material touchpoints. For eCommerce, hangtags may lean toward SKU clarity, barcode scanning, and a clean look that doesn’t snag packaging. For wholesale, the hangtag often needs strong SKU logic and clear variant info.
Now connect to Mini Plush vs Plush Doll: mini plush tags need to be compact and durable. Header cards work well for keychains and small plush because they provide a flat surface for barcode printing and a stable hanging method. Plush dolls can use larger hangtags with nicer finishes (soft-touch lamination, spot effects, thicker paper) because the price point can justify it and the surface area allows better readability.
A hangtag content block that works well in :
- Brand name + logo
- Product name or character name
- SKU + variant (color/size/version)
- Barcode (UPC/EAN)
- Brief story or “what this is”
- QR code (optional) pointing to brand page or authenticity check
- Warnings or simple care notes where required
The fastest way to avoid rework is to design a hangtag template that supports multiple SKUs. Keep a stable front layout, then vary SKU/barcode/variant fields in a consistent location. That makes production and operations easier. Also: place barcode on a flat zone with enough quiet space and avoid heavy gloss that causes scan issues.
If you want, Heyzizi can help you set hangtag templates that are both brand-strong and warehouse-friendly.
Barcodes for plush: where should you place UPC/EAN?
Barcodes scan best on flat, matte or semi-matte surfaces with proper quiet zones and strong contrast. For plush, barcodes typically belong on hangtags, polybag labels, or color boxes, not on fuzzy fabric. Scanning fails when barcodes are placed on curves, near edges, on glossy laminations, or printed too small—especially on mini plush where space is tight.
This section is a deal-maker for . If your barcode doesn’t scan reliably, everything slows down: receiving, put-away, picking, and retail checkout. And if you’re doing multi-SKU, scanning is not optional. The good news: barcode failures are usually predictable and avoidable.
First: don’t put UPC/EAN on fuzzy fabric. Plush pile breaks edge clarity and creates poor contrast. Instead, place barcodes on a hangtag, a polybag sticker, or a color box. These surfaces are controllable. Most brands choose hangtags because they stay attached and are easy to scan. Polybag labels are also common for warehousing and FBA-like flows.
Now embed the subtopic: Barcode/SKU Labeling for Plush: Placement and Rules. The basic rules that prevent scan failure:
- Keep barcode on a flat area; avoid tight curves and corners.
- Respect quiet zones around the barcode (space matters more than many people think).
- Use strong contrast; avoid busy backgrounds.
- Avoid extreme glossy finishes unless you scan-test them.
- Print at a size that matches scanning needs (mini plush often needs careful planning).
Mini plush creates special challenges. The tag area is small, and people try to shrink barcodes too far. That’s a common mistake. For mini plush, header cards or a slightly larger hangtag is often the practical solution. It gives you enough area to print UPC/EAN cleanly, keep quiet zones, and include SKU text for manual backup. Plush dolls can carry larger tags and often have fewer constraints.
Scanning fails for another reason: placement. If the tag bends, barcode edges deform. If tags are stacked in a bag, scanning becomes slow. A clean, flat tag with barcode in a consistent location is easiest for warehouse staff. If you use polybag labels, keep the label away from heavy wrinkles and seams.
Friendly barcode checklist:
- Barcode placed on a flat printable surface
- Quiet zone preserved
- Barcode printed at reliable size
- Scan-test performed with real scanner (or at least a phone + retail scanner where possible)
- SKU text printed near barcode as a manual fallback
If you send Heyzizi your barcode list and channel plan, we can recommend placement and packaging that supports reliable scanning without ruining the look.
How do you build a label system for multi-SKU programs?
A -ready multi-SKU system uses consistent SKU naming rules, standardized barcode placement, and clear carton marks that match your PO and packing list. Add inner pack labels if you need faster sorting. Provide carton mark templates and confirm what your warehouse expects. This prevents mis-shipments, reduces returns, and keeps reorders clean.
When SKU count goes up, chaos grows faster than you expect—unless you design a system. A multi-SKU plush program needs one consistent language across: product, tag, barcode, polybag label, carton label, carton marks, and packing list. If any part uses a different naming format, warehouse errors appear.
A strong SKU naming logic often includes: brand code + product line + character + size + colorway + version. It doesn’t need to be long, but it must be consistent. Also decide where the human-readable SKU lives (hangtag and carton label) so staff can troubleshoot without scanners.
Now embed the subtopic: Carton Marks and Carton Labels: Templates and Examples. Cartons are not “just boxes.” They are your logistics interface. Clear carton marks reduce receiving errors and speed up sorting. A good carton mark includes: PO number, item number/SKU, carton count (e.g., 1 of 10), quantity per carton, gross/net weight, carton dimensions, country of origin, and any required shipping mark.
Here’s a simple template you can adapt:
Carton Mark Template (Example Block):
- SHIP TO: [Warehouse / 3PL Name + Address]
- PO NO.: [PO12345]
- ITEM/SKU: [BRD-PLSH-CHAR-20CM-BLK-V1]
- QTY/CTN: [24 PCS]
- CTN NO.: [1/10]
- G.W./N.W.: [12.5/11.8 KG]
- MEAS: [60×40×45 CM]
- ORIGIN: [MADE IN CHINA]
- MARK: [Optional shipping mark / customer code]
Carton labels (stickers) and carton marks (printed) can work together. Many programs use labels for flexibility (different PO, different SKU), and printed marks for stable items. If your program needs inner packs (for easy sorting), add inner pack labels with SKU and quantity.
If you sell through Amazon-like flows, you may also need outer labels and warnings specific to that channel. Plan those early. It’s cheaper to build them into the process than to relabel cartons at the end.
This is where a factory that understands execution helps. Heyzizi can follow your carton mark template, apply barcode rules, and keep packing lists aligned to your SKU mapping so your receiving runs smoother.
What affects branding cost the most?
Branding cost is driven by embroidery stitch count, number of placements, label setup (woven loom, fold types, MOQ per design), hangtag materials/finishes, and packaging complexity. Mini plush can cost more per unit when branding is dense because space constraints push higher stitch density or more complex tags. Lock branding scope early to keep quotes stable.
If you want stable pricing, you must understand the levers. Most quote surprises come from late branding changes: “Can we add a zipper pull logo?” “Can we add a second label?” “Can we upgrade hangtag paper?” Each one changes labor steps, sourcing, and QC.
Embroidery cost scales with stitch count and placements. A large filled logo on the back plus a detailed face can add significant machine time. Small details can also be expensive if they require high density to look clean. Printing cost scales with color complexity, durability spec, and base fabric prep. Woven labels cost depends on size, yarn colors, fold type, and MOQ per design. Hangtags cost depends on paper stock, printing finish, lamination, die cuts, and attachments.
Mini plush has a hidden cost pattern: because everything is smaller, embroidery can become denser, and tags must be engineered to fit. That can increase unit cost even when the plush is small. Plush dolls often have more area, making branding easier to execute with less density and less rework.
Here’s -friendly cost driver table:
| Branding Item | Main Cost Driver | What Can Control |
|---|---|---|
| Embroidery | Stitch count, placement count, color changes | Simplify fills, reduce placements, use outlines |
| Printing | Color complexity, durability spec, base fabric | Simplify gradients, choose stable base fabric |
| Woven label | Size, yarn colors, fold type, MOQ per design | Standardize label across SKUs |
| Hangtag | Paper stock, finishes, die cuts, attachment | Keep one template; vary SKU fields |
| Barcode labels | Sticker material, size, placement labor | Standardize placement and label size |
| Carton labeling | Label types, carton marks changes per PO | Use consistent templates |
If your goal is premium branding without runaway cost, the strategy is: standardize the label system, simplify embroidery where possible, and use templates for hangtags and cartons. It’s not about being cheap; it’s about being predictable.
How long does it take to develop branding items?
Branding development timelines depend on approval speed and file readiness. Labels and hangtags can often run in parallel with plush sampling, but delays happen when dielines are missing, barcode formats are wrong, or copy changes late. Mini plush tends to need extra rounds because space is limited. Lock key fields early (SKU rules, barcode list, placement map) to prevent rework.
often ask “how long” branding takes, but the real answer is: it depends on your readiness. If you already have a logo vector file, barcode list, and hangtag layout, branding is quick. If you’re designing everything during sampling, timelines stretch.
The smart approach is parallel development. While plush sample is being built, you can finalize hangtag template, decide label type and placement, and prepare barcode list. What slows projects is late decisions: “We changed the logo,” “We added a new SKU,” “We want different hangtag copy,” or “We want to add QR and story.” Those changes are normal, but they must be controlled with version labels.
Mini plush projects often need more rounds because designers try to fit too much info into too small a space. This is why you should separate the content: keep plush label minimal, and put operational info on hangtag or packaging. Also, barcodes need enough space to scan. If you shrink them too much, you lose time in respec and reprint.
A practical timeline planning table:
| Item | Can run parallel with sampling? | Typical slowdown cause |
|---|---|---|
| Label type + placement | Yes | Comfort concerns discovered late |
| Woven label art approval | Yes | Fold direction not confirmed |
| Hangtag template | Yes | Missing dieline, late copy edits |
| Barcode list + placement | Yes | Wrong format, barcode too small |
| Carton mark template | Yes | PO fields unclear, 3PL rules missing |
If you want speed, lock these first: SKU naming logic, barcode list, placement map, and one hangtag template. Then you can update minor content without breaking the system.
What files should you send to a plush manufacturer for branding?
Send vector logos (AI/PDF), color specs (Pantone if needed), placement maps with sizes in mm, label/hangtag dielines, a barcode number list, and SKU rules. Rework happens when files are low-res, placement is unclear, fold direction isn’t specified, or barcode quiet zones are ignored. A clean “branding pack” speeds up sampling and keeps bulk consistent.
The fastest projects usually have one thing in common: sends a clean file pack. It doesn’t need to be complicated. It just needs to be complete.
For logo and brand marks, vector files are the standard because they scale without blur. If you provide only screenshots, the factory will rebuild artwork and you risk small shape changes. For embroidery, the factory may convert your art into an embroidery file format, but conversion still needs a good vector source. For printing, you want clean artwork, correct color intent, and clarity on what is acceptable (for example, if slight color shift is okay on pile fabric).
Placement maps are where many mistakes happen. Saying “logo on the chest” is not enough. Provide a simple image with arrow + location + size in mm + distance from seam. Also provide orientation rules: centered, aligned to seam, or aligned to eye line. For woven labels, specify fold type and which side faces out. For hangtags, include dielines with bleed and safe area. For barcodes, ensure quiet zones and sufficient size. For cartons, provide a carton mark template and required fields.
Here’s a “branding pack” checklist you can copy:
- Logo file: AI/PDF (vector)
- Colors: Pantone or defined CMYK intent (if applicable)
- Embroidery preference: outline/fill style, size limits
- Printing preference: finish, durability expectation
- Label file: artwork + fold type + size + placement
- Hangtag dieline: bleed, safe area, hole position, paper choice
- Barcode list: UPC/EAN numbers mapped to SKUs
- SKU rules: naming format and variant mapping
- Carton mark template: required fields, example block
- Approval method: who signs off and how changes are tracked
This pack prevents 80% of rework. It also makes your factory look more competent internally because production teams can follow a stable reference.
What is the history of plush branding methods?
Embroidery became the default in plush because it adds texture, durability, and a “classic” premium signal. Printing grew as brands wanted gradients, illustration-heavy faces, and faster customization—especially for modern character art. Today, the best choice depends on your customer.
Expectation: tactile premium feel vs graphic fidelity. Many successful brands use a hybrid approach: embroidered outlines plus printed detail.
Plush branding has always followed two forces: what customers expect to see and what factories can repeat in bulk. Embroidery became the default for faces and simple logos because it was durable and read well on plush textures. An embroidered face also feels “crafted,” which matters in gift products. It tolerates handling and still looks recognizable after time.
Printing expanded because brand art evolved. More brands used illustration-style characters with fine shading, gradients, and small details that embroidery struggles to reproduce cleanly without stiffness. Printing also supports fast iteration: change a color, update a line, run a new strike-off. For brands doing seasonal launches or many character variants, printing can be operationally attractive.
But printing is not “better” for every plush. Plush fabric pile affects how edges look. If your pile is long, you can lose line clarity. If your product is daily-use, you need to plan durability so the print doesn’t degrade or look tired. This is why the best modern strategy is often hybrid: embroidery for bold outlines and structure, printing for inner color and fine detail.
The history lesson isn’t nostalgia—it’s a decision tool. If your brand wants that classic plush vibe, embroidery may match the expectation. If your brand wants illustration accuracy, printing may match. If you want both, hybrid is often the clean solution.
Embroidery vs Printing vs Hybrid (Decision Summary)
| Use Case | Best Pick | Why it works |
|---|---|---|
| Mini plush with tiny logo text | Printing or Hybrid | Tiny embroidery can get stiff or unreadable |
| Premium gift plush doll | Embroidery or Hybrid | Tactile premium signal + durability |
| Illustration-heavy character art | Printing | Preserves gradients and fine lines |
| Long-pile faux fur plush | Embroidery (bold) | Printing edges can get fuzzy on long pile |
| Many seasonal SKUs | Printing | Faster updates and variation control |
Carton Marks & Carton Labels (Template + Example)
| Field | Template | Example |
|---|---|---|
| Ship To | [Warehouse/3PL Name] | ABC 3PL Warehouse |
| PO No. | [PO Number] | PO12345 |
| SKU/Item | [SKU] | HZY-CHAR-20CM-BLK-V1 |
| Qty/CTN | [Units] | 24 PCS |
| Carton No. | [x/y] | 1/10 |
| G.W./N.W. | [kg/kg] | 12.5/11.8 KG |
| Meas | [L×W×H] | 60×40×45 CM |
| Origin | [Country] | MADE IN CHINA |
Ready to Build a Clean, Scannable Brand System?
If you’re planning custom plush with your logo—private label, OEM/ODM, mini plush collections, or premium plush dolls—Heyzizi can help you set up branding that looks good and runs smoothly in bulk: face method, labels, hangtags, barcodes, and carton marks.
Email us your concept (art + SKU count + channel + barcode needs): info@heyzizi.com
Quick Tables (for faster decisions)
Table 1 — Branding Method Quick Match
| What you need | Best pick | Why it works | Common mistake |
|---|---|---|---|
| Premium tactile look | Embroidery | Looks “crafted,” durable | Too dense → stiff handfeel |
| Gradients / illustration art | Printing | Keeps fine graphics | Printing on long pile → fuzzy edges |
| Tiny logo on mini plush | Hybrid or Printing | Avoids dense stitching | Shrinking embroidery until unreadable |
| Classic plush face | Embroidery or Hybrid | Strong outlines, stable expression | Not controlling fabric stretch/pile |
| Fast multi-SKU refresh | Printing | Faster updates | No strike-off approval |
Table 2 — Barcode & Label Placement Rules (Fast Checklist)
| Item | Best placement | Why it scans/works | Fail reason |
|---|---|---|---|
| UPC/EAN barcode | Flat hangtag / polybag label / box | Flat + contrast | Curves, edge placement, glossy glare |
| SKU text | Near barcode + carton label | Human fallback | Hidden SKU causes picking errors |
| Woven label | Bottom seam / side seam (low-contact zone) | Comfort + branding | Scratchy edge near face/hand zone |
| Carton mark | 2 sides + top label | Easy receiving | Missing carton number (e.g., 1/10) |
FAQs
Embroidery vs printing: which is best for a plush logo?
If you want a logo that feels premium in the hand, embroidery usually wins—because it adds texture and looks “built-in,” not pasted on. If your logo includes gradients, tiny lines, or detailed illustration, printing often wins because it keeps graphic fidelity without turning stiff. Quotes vary because embroidery cost is tied to stitch count and placement count. A small logo can still be expensive if it’s dense, filled, or has many color changes. Printing quotes vary with color complexity, base fabric prep, durability coating, and whether you need a strike-off approval.
A reliable factory won’t just say “embroidery is more expensive.” They’ll explain what drives cost and offer options: outline embroidery instead of fill, a hybrid method (embroidered outline + printed interior), or a size adjustment that keeps readability without stiffness. If you tell Heyzizi your plush size, fabric type, and where the logo sits, we can recommend the most stable method for bulk repeatability—not just the cheapest method.
Procurement tips
- Ask for stitch count estimate or “dense vs light” embroidery plan
- Confirm placement map (mm size + position)
- Decide if you need lab dip/strike-off for printed elements
When does embroidery feel “too stiff,” and how can a factory fix it without ruining the look?
Embroidery turns stiff when the design relies on heavy fill stitches, high density, and thick backing—especially on smaller plush panels. This is common on mini plush where logos are tiny and the machine “packs” stitches tightly to keep edges clean. The result: the logo feels like a hard plate, and the plush loses that soft cuddle feel. It can also cause distortion: the fabric puckers, the outline warps, or the face looks slightly “pulled.”
A factory can fix stiffness by changing how the logo is built: reduce fill area, use a clean outline, switch stitch types, adjust density, and choose a lighter support layer. Sometimes the best fix is a hybrid approach: embroidery for bold outlines, printing for internal color. Another practical trick is moving the logo to a location that doesn’t impact handfeel—like a lower body panel or a tag patch area—while keeping the main cuddle zones soft.
At Heyzizi, we usually treat “softness” as a spec. We align on your handfeel target first, then tune embroidery structure to match it.
Procurement checklist:
- Define a “no” list: no stiff logo, no puckering
- Ask for a stitch-test panel on the real fabric
- Approve with touch + visual, not photos only
Woven label vs printed label vs heat-transfer label: which is best for comfort and premium brand feel?
Touches the plush a lot, comfort matters as much as looks. Woven labels feel premium and stay readable, but can feel scratchy if the edges are not finished well or if the placement is in a high-contact zone. Printed labels are flexible for content (multiple languages, longer text) and can feel softer if the label material is chosen carefully. Heat-transfer labels (or other “no-sew” label approaches) are great when you want a cleaner feel—especially for small plush—because there’s no edge to scratch.
The “best” choice depends on product type and positioning. For premium gift plush dolls, a small woven label placed at the bottom seam can look classy without irritating the user. For mini plush and keychains, heat-transfer or very small printed labels often make more sense, because large woven labels feel bulky on a tiny body. For programs with many SKUs, printed labels may reduce cost and simplify updates—while woven labels can be standardized as a single brand label across variants.
If you tell Heyzizi your channel (retail vs marketplace) and who the end user is, we’ll help you pick a label system that looks premium and avoids comfort complaints.
Procurement checklist:
- Confirm fold type and edge finishing
- Choose placement: bottom seam > high-contact zones
- Standardize one brand label across SKUs when possible
Where should I place UPC/EAN barcodes for plush so they actually scan in warehouses and stores?
A barcode scans best when it’s printed on a flat surface with good contrast and enough quiet space around it. For plush, the safest placements are: hangtags, polybag sticker labels, or color boxes. Putting barcodes directly on plush fabric is risky because the pile fuzz breaks edge clarity and makes scanners struggle. Even on a hangtag, scanning can fail if the barcode sits on a fold, near the edge, on a heavy gloss finish, or printed too small.
For mini plush, barcode planning is even more important because try to shrink barcodes to fit. That’s usually when scan failures happen. Many brands use a compact header card or a slightly larger hangtag so the barcode stays readable. Also include human-readable SKU text near the barcode. That way, if scanning fails, warehouse staff can still identify the item quickly—reducing mis-shipments and returns.
Heyzizi can follow your barcode list and place labels consistently across SKUs, then help you pick the best surface and tag format for your channel.
Procurement checklist:
- Barcode on flat tag/label/box, not plush pile
- Keep SKU text near barcode
- Ask for a scan test before bulk packing
Barcode/SKU labeling rules: what causes scan failure, and how do I prevent it before bulk production?
Most scan failures come from simple issues: barcodes printed too small, placed on a curve, placed too close to the edge, or printed on glossy surfaces that reflect scanner light. Another common issue is “busy design” behind the barcode—patterns, gradients, or low contrast. For plush programs with multiple SKUs, scan failure is not a small inconvenience; it slows receiving and can cause picking errors. The cost shows up later as labor time, relabeling, and delayed shipments.
Prevention is about standard rules and a proofing step. Standardize one barcode location across all hangtags or polybags. Use a clean white (or high-contrast) background block behind the code. Keep enough quiet space around the barcode. Print SKU text near the code for manual backup. Then do a real scan check on physical samples—because what looks fine on screen can fail in reality once the tag bends or the lamination adds glare.
If you share your SKU count and packing method, Heyzizi can propose a barcode setup that is stable for bulk, not just “okay for a photo.”
Procurement checklist:
- Use a consistent barcode position across SKUs
- Avoid curves/edges/glare
- Require physical barcode proof + scan test
Carton marks and carton labels: what should be included, and can you share a practical template?
Carton marks are the logistics “language” your warehouse reads. Good carton marks reduce receiving errors and speed up sorting—especially when you have multiple SKUs. A clean carton mark usually includes: Ship To, PO number, SKU/Item number, quantity per carton, carton number (1/10), gross/net weight, carton dimensions, and country of origin. If you’re shipping to a 3PL or retail distribution center, they may also want vendor code, style code, or specific shipping marks.
Here’s a practical template you can copy:
Carton Mark Template (Example)
- SHIP TO: [Warehouse Name / Address]
- PO NO.: [PO12345]
- SKU/ITEM: [HZY-CHAR-20CM-BLK-V1]
- QTY/CTN: [24 PCS]
- CTN NO.: [1/10]
- G.W./N.W.: [12.5 / 11.8 KG]
- MEAS: [60×40×45 CM]
- ORIGIN: [MADE IN CHINA]
Heyzizi can print marks or apply carton labels based on your template, and keep packing lists aligned to the carton numbers so your receiving team doesn’t have to “guess.”
Procurement checklist:
- Confirm if you need 2-side + top carton marks
- Include carton number format (1/10)
- Align carton marks with packing list
Mini plush vs plush doll: which fits my brand, and how does it change labeling and branding choices?
Mini plush usually fits brands that want fast adoption: impulse buys, bundles, promos, capsule collections, and lower price points. Plush dolls fit brands that want storytelling, premium gifting, collector value, and a stronger display presence. This isn’t only a product decision—it changes your labeling and branding plan.
Mini plush has limited real estate. That means you can’t cram everything onto a sewn label. The best practice is to keep on-plush branding minimal (small brand label) and move operational info to hangtags or packaging: barcode, SKU, warnings, QR, story. Mini plush also makes embroidery tricky. Tiny embroidered logos can become stiff or unreadable, so printing or hybrid methods often work better. Barcodes may need header cards to stay flat and scannable.
Plush dolls give you more room for premium moves: woven labels with nicer folds, larger hangtags with richer printing, and embroidery that doesn’t feel stiff because the surface is larger. If you tell Heyzizi your channel (retail vs online) and your target price tier, we can recommend the most realistic product type and branding system for bulk.
Procurement checklist:
- Channel + price tier first, then product type
- Mini plush → focus on scan + comfort
- Plush doll → focus on premium look + storytelling
Which plush fabric is better for brands when we want a premium look and clean logo edges?
“Best fabric” depends on what you want your brand to communicate. If you want a sleek premium look with clean edges, short-pile fabrics like minky or velboa usually support better logo clarity than long pile. Long-pile faux fur can look luxurious, but it can blur printed edges and hide small embroidered details unless you trim or design around the pile.
Fabric also affects label comfort. A super-soft body paired with a stiff woven label creates a mismatch customers notice immediately. For cuddle-focused products, brands often choose softer fabrics and then place labels at low-contact zones (bottom seam) or use softer printed/heat-transfer options. For display or collector items, you can prioritize visual texture and accept slightly more structured branding.
If you share your logo style (simple icon vs detailed art), Heyzizi can recommend a fabric that supports your face/branding method—so you don’t end up with the common problem: “The sample looks okay, but bulk logos look messy.”
Procurement checklist:
- Short pile for clean logo edges
- Long pile for texture, but simplify art
- Match label type to fabric comfort
What should be included in ready branding pack sent to a plush manufacturer?
A -ready branding pack is the fastest way to prevent delays and rework. It should include: vector logo files (AI/PDF), color intent (Pantone or defined CMYK), a placement map with sizes in mm, label artwork + fold direction, hangtag dielines (bleed + safe area + hole position), and a barcode list mapped to SKUs. If you have multiple variants, include your SKU naming rule and a simple table mapping SKU → barcode → colorway → size.
Most problems come from incomplete packs: low-res logos, unclear placement (“somewhere on chest”), missing fold direction for woven labels, and barcodes placed without quiet zones. The factory then has to guess, and guessing is where bulk projects break. A good factory will ask follow-up questions and produce proofs. But it’s still faster and cheaper when the pack is clear.
Heyzizi can also help you build the pack if you only have a logo and a rough idea. The goal is to lock rules early so bulk stays consistent.
Procurement checklist:
- Vector logo + placement map (mm)
- Barcode list mapped to SKUs
- Hangtag dieline + label fold rules
How long does branding development take?
Branding can often run in parallel with plush sampling, but it slows down when key files arrive late or change repeatedly. The most common delays: missing dielines for hangtags, copy changes late in the process, incorrect barcode formats, or trying to fit too much into mini plush tags. The simplest speed strategy is to lock the “non-negotiables” first: SKU naming logic, barcode list, barcode placement, and one hangtag template. Once those are stable, you can adjust minor copy without breaking the system.
Mini plush projects tend to take longer because every element is size-limited: barcode area, readable text, label comfort, and attachment method. Plush dolls are more forgiving. Another hidden delay is internal approvals: marketing approves design, operations approves barcode, compliance checks warnings. If you align those stakeholders early, you cut time.
If you share your launch deadline, Heyzizi can suggest what to lock first and what can be finalized later, so your project moves without last-minute relabeling.
Procurement checklist:
- Lock SKU + barcode early
- Use one hangtag template across SKUs
- Approve physical barcode proofs, not only PDFs
How can I reduce branding cost without making the plush look “cheap”?
Cost control is not about removing branding. It’s about simplifying what drives cost the most. For embroidery, focus on reducing stitch count: use outlines instead of heavy fills, reduce placement count, and avoid micro-details that require dense stitching. For labels, standardize one woven brand label across all SKUs, and put variant info on the hangtag or barcode label instead of creating a new woven label for every variant. For hangtags, use one die-cut template and change only the variable fields (SKU, barcode, colorway). This reduces setup and proofing costs.
Also consider a smart hybrid strategy: embroidered outline with printed interior can look premium and reduce stiffness and stitch time. For mini plush, printing may actually protect softness and lower cost compared to dense embroidery. Packaging upgrades (special finishes, thick cards) can be reserved for premium SKUs, while core items use a clean standard.
Heyzizi can quote multiple branding options side-by-side so you can choose the best balance of price vs premium feel.
Procurement checklist:
- Reduce embroidery fills → lower stitch count
- Standardize labels across SKUs
- One hangtag template, variable data only
Can Heyzizi help us set up a full branding + labeling system for multi-SKU orders? What should we send to start?
Yes. For multi-SKU programs, we help you build a repeatable system: logo method selection (embroidery vs printing), label type selection (woven/printed/heat-transfer), hangtag template design, barcode placement rules, and carton marks aligned with your packing list. The goal is to reduce “late surprises” and make bulk operations smooth—so your warehouse, retailer, or marketplace workflow doesn’t break.
To start, send a simple pack: your logo (vector if possible), product type (mini plush or plush doll), target size, your sales channel (retail/online/wholesale/Amazon), estimated SKU count, barcode status (do you already have UPC/EAN numbers?), and your packaging level (polybag only, hangtag, box). If you don’t have everything yet, that’s okay—tell us what’s decided and what’s not. We’ll propose the most practical route and the key decisions to lock first.
Email us anytime: info@heyzizi.com (include “Branding & Labels” in the subject for faster routing).
Procurement checklist:
- Channel + SKU count + packaging level
- Logo file + placement preferences
- Barcode list (or confirm you need support)