Custom Plush toys Sample
Custom Plush Sample Process | From Sketch to Approved Plush Sample
See how a custom plush sample moves from sketch to approved sample. Learn the plush prototype process, sample stages, timeline, revisions, and how buyers confirm shape, fabric, and final details before production
Custom Plush Sample Development Process
A lot of custom plush projects go wrong for one simple reason: looking at the same design, but imagining different things. A sketch may look clear on paper, yet still leave open many production questions. How round should the head be? How long should the arms hang? Should the body feel more upright or soft? Does the accessory sit flat or stand out? How will embroidery look once sewn onto plush fabric? These are not small details. They directly affect sample approval, sample cost, revision rounds, and later bulk consistency.
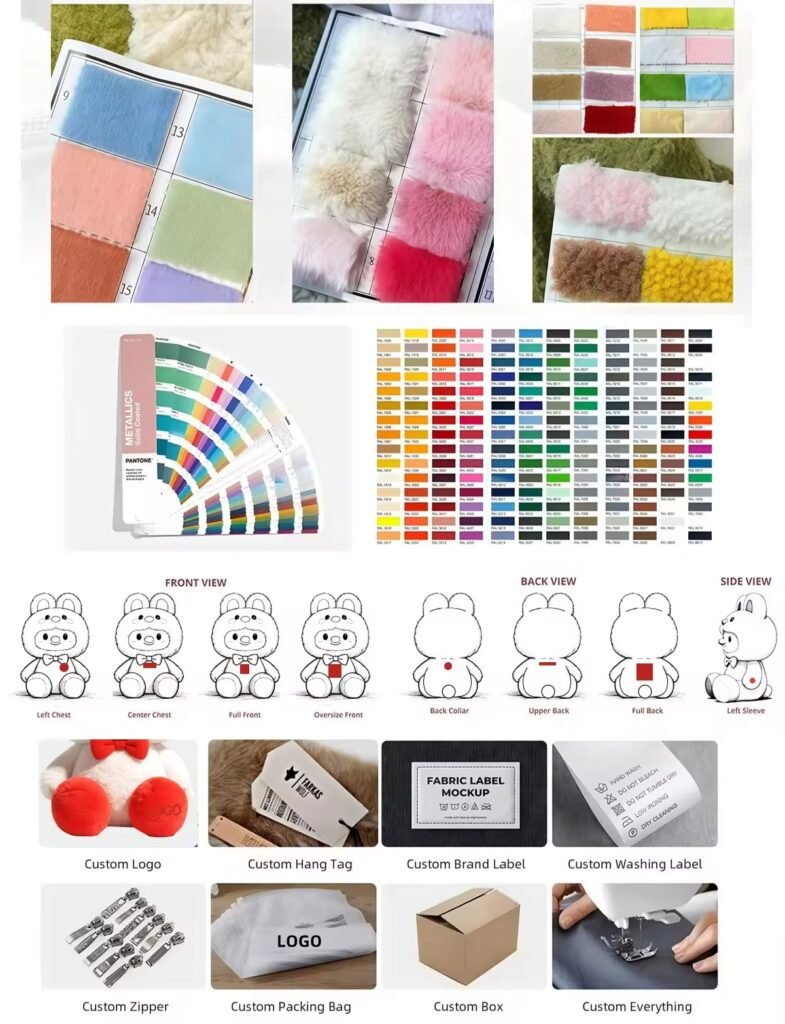
That is why our sample is built around one core message: sampling is not one action; it is a controlled decision process. At Heyzizi, we treat sampling as a staged conversion from idea to product. The customer may provide a hand sketch, digital artwork, reference image, mood board, three-view drawing, Pantone color note, size request, logo file, or packaging request. Based on that input, the work moves through a structured path: design review, 3D visual confirmation, pattern development, material planning, first mock-up using available materials to confirm shape, second sample using the right fabric for white-body confirmation, and then the final sample with embroidery and finished details.
This staged method solves a problem that many have already experienced with other suppliers: they pay for a sample, but what they receive is already too “finished” to fix structural issues cheaply. If the head is wrong, if the body proportion feels off, if the plush volume is not cute enough, or if the accessory balance looks awkward, the whole sample may need to be rebuilt. That wastes time. It also confuses communication, because may be commenting on shape, color, fabric, and embroidery all at once. Our method separates those decisions so approval becomes cleaner and faster.
This staged method
Another point care about is cost transparency. We make this clear: the sample fee is charged once, and it already covers the early model development stages, including the first shape-confirmation sample and the second corrected fabric sample. That gives a clearer view of what they are paying for. It also shows that the goal of sampling is not to create extra billing rounds, but to get the product right in a practical way.
Time is also a major buying concern. For custom plush sampling, timing depends on the style, structure, accessories, and embroidery complexity. In most cases, sample making takes about 5–14 days, while shipping usually takes about 3–9 days depending on the destination country. do not just need fast work. They need a process that is fast and stable. A rushed but unclear sample path often causes more delay later. A staged process usually gives better control.
Below is the clearest way to understand what will cover:
| Stage | What Confirms | Why It Matters |
|---|---|---|
| Design Input Review | Sketch, 3D idea, size, colors, details | Aligns expectations before making |
| 3D Visual Draft | Overall look and proportion | Reduces misunderstanding early |
| Paper Pattern Development | Construction logic and sewing breakdown | Makes the design producible |
| First Model Sample | Shape, silhouette, proportion | Checks form before final fabric |
| Second White Sample | Correct fabric structure and body feel | Improves accuracy before decoration |
| Final Finished Sample | Embroidery, face, details, finish | Creates approval-ready sample |
Design Input Review
Sketch,3D Idea,Size,Colors,Details
Aligns Expectations before Making
3D Visual Draft
Overall Look And Proportion
Reduces Misunderstanding Early
Paper Pattern Development
Construction logic and sewing breakdown
Makes the design producible
First Model Sample
Shape, silhouette, proportion
Checks form before final fabric
Second White Sample
Correct fabric structure and body feel
Improves accuracy before decoration

Final Finished Sample
Embroidery, face, details, finish
Creates approval-ready sample
What to Send Before Plush Sampling Starts
Better input creates faster sampling, fewer revisions, and a more accurate plush result.
Many plush sample delays do not start in the sewing room. They start much earlier, when the factory receives a design package that is attractive but incomplete. A sketch may show personality, but still leave open questions about size, side view, accessories, embroidery, fabric direction, color placement, or intended use. For custom plush development, the quality of the factory matters, but the quality of the input also matters. That is why this module explains exactly what should send before sampling starts. The goal is simple: help clients provide the right information from the beginning, so the project can move into 3D confirmation, pattern making, material planning, and prototype development with fewer misunderstandings and better speed. At Heyzizi, we support projects from rough sketches to more technical files, and we help convert visual ideas into a workable sample path through design-to-manufacturing review, pattern development, material selection, and sample confirmation support.
One of the biggest differences between a smooth plush sample project and a frustrating one is not whether the design is “beautiful.” It is whether the design is actionable. In other words, can the factory understand what the plush toy should look like, how it should be built, what details matter most, and which parts are flexible? If that information is missing, the factory has to guess. And when a factory guesses, often end up spending extra time correcting avoidable errors.
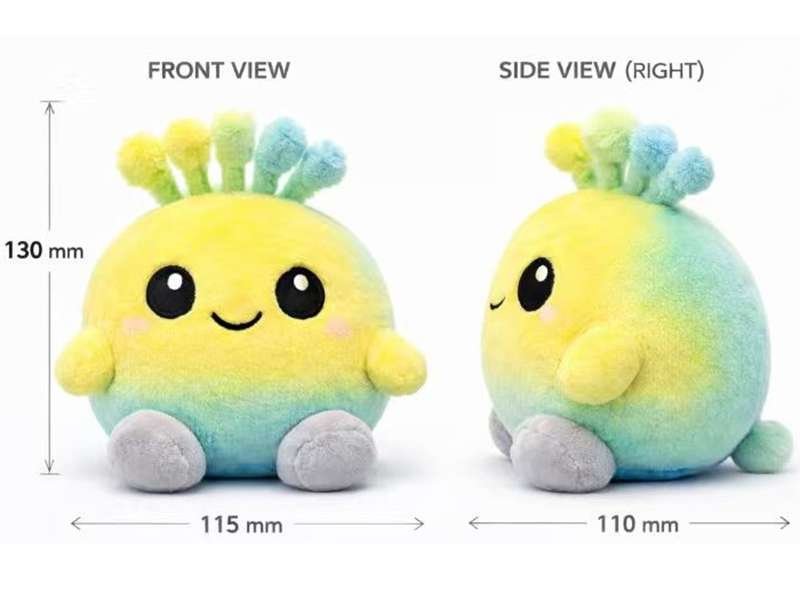
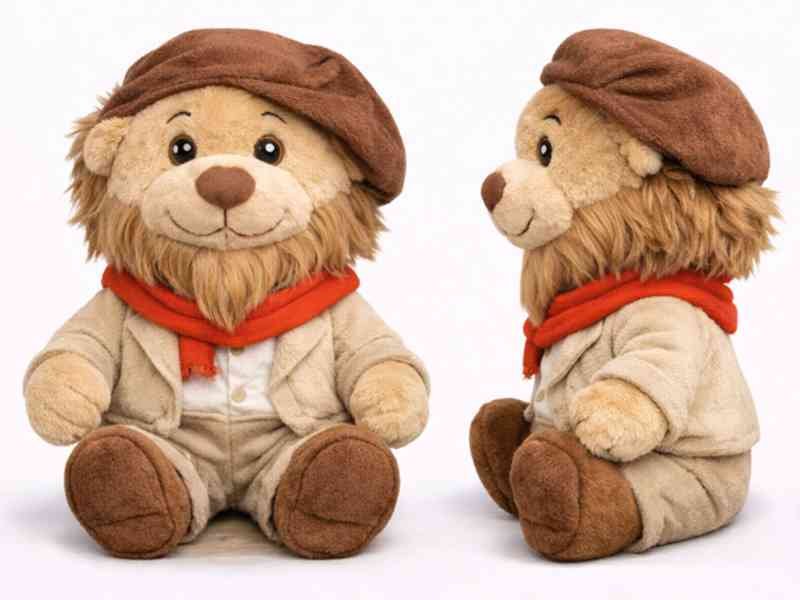
For a strong start, should think of their design submission as a sample development brief, not just a picture file. The best submissions usually contain several layers of information. The first layer is the visual concept. This may be a hand sketch, digital illustration, character sheet, three-view drawing, or reference image set. A front view alone is helpful, but a front + side + back view is much stronger, because plush is a three-dimensional product. A side view helps define head depth, nose projection, belly shape, tail angle, and overall body balance. A back view helps clarify hair panels, wing shapes, backpack positions, outfit closure placement, and other details that disappear in a flat front drawing.
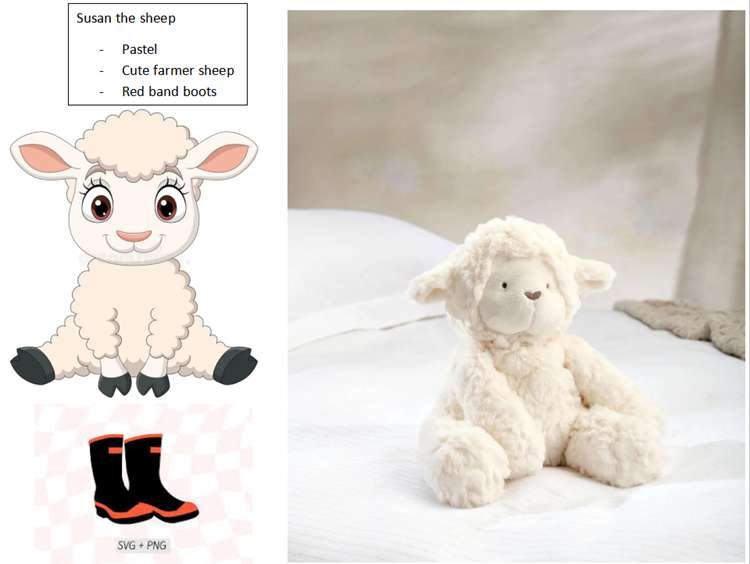
The second layer is the specification layer. This is where explain size, target market, intended use, fabric preference, logo placement, accessories, packaging expectations, and any safety or channel requirements. A plush made for a gift shop may have very different priorities than a plush made for a baby line, a collector launch, an e-commerce drop, or a promotional campaign. who says “I want a soft plush toy” is giving a style preference. who says “I need a 20 cm sitting plush, embroidered face, short-pile velboa body, separate T-shirt, woven label, hangtag, and polybag” is giving a producible brief. The second type of input leads to faster and more accurate factory action.
The third layer is the priority layer, which many forget to explain. Not every design element has equal importance. Some parts are non-negotiable, while others can be adjusted for better production. For example, maybe the exact face expression matters most, but the body proportion can be slightly refined. Maybe the customer needs a very specific Pantone match for the outfit, but is open to fabric alternatives for the shoes. Maybe wants the key visual identity preserved, but welcomes advice on embroidery, appliqué, seam layout, or shape control. This kind of information helps the development team make smarter decisions during design-to-manufacturing conversion, material selection, and prototype review.
At Heyzizi, we work with many who are at different levels of readiness. Some send polished character packages. Some send only a rough drawing plus a few comments. Both can be workable, but the process becomes stronger when includes as many of the following as possible:
| What to Send | Why It Helps | Best Format |
|---|---|---|
| Front / Side / Back View | Defines 3D shape and proportion | JPG, PNG, PDF, AI |
| Size Requirement | Controls pattern scale and visual balance | cm/inch note |
| Color Reference | Reduces shade misunderstanding | Pantone / swatch / marked artwork |
| Material Preference | Guides texture and cost direction | fabric note or reference photo |
| Face Detail Notes | Clarifies embroidery / print / appliqué priorities | marked image |
| Accessory Notes | Defines removable or fixed parts | list + reference photo |
| Usage Scenario | Helps choose structure and durability level | short brief |
| Packaging Request | Aligns sample with retail or gifting goal | photo or written note |
Another smart step is to tell the factory what you do not know yet. That may sound strange, but it actually helps. If are not sure whether the toy should use embroidery or print, or whether a shape should stand taller or feel softer, that uncertainty should be stated early. A good factory can then guide those decisions with practical sample logic instead of forcing to decide everything without support. This is one reason our process includes sample photo/video confirmation support and structured sample review notes, so feedback is easier to organize and the next revision is more focused.
Before sending your plush design, prepare these items if possible:
- Artwork or sketch
- Three-view drawing or multiple angles
- Target size
- Color references
- Fabric preference
- Logo / embroidery / face notes
- Accessory details
- Usage scenario
- Packaging expectation
- Any “must-keep” design point
Step-by-Step Plush Sample Process Overview
One of the biggest strengths of a well-built B2B landing page is that it works for both deep readers and fast scanners. Some visitors will read every module. Others will scroll until they find the one section that explains the whole process in a simple visual or step summary. This module is designed for that second behavior, while still keeping enough depth to support SEO, AI extraction, and real decision-making.
The key message is simple: custom plush sample development is not one blind jump from sketch to finished toy. It is a staged process, and each stage solves a different problem. When understand that clearly, they usually become more patient, give better feedback, and feel more confident about paying for sampling and approving the result.
Below is the cleanest way to summarize the full workflow.
Plush Sample Process Overview
| Step | Stage Name | What Happens | What Should Confirm |
|---|---|---|---|
| 1 | Design Submission | sends sketch, artwork, three-view, reference images, size, color notes, and key requirements | Whether all major design information has been shared |
| 2 | Design Review & Feasibility Check | Factory reviews the design and identifies structure, material, and development needs | Whether the direction and key priorities are aligned |
| 3 | 3D Visual Understanding / Confirmation | Flat design is translated into a more readable plush form direction | Whether the overall silhouette, proportion, and body feel are correct |
| 4 | Paper Pattern Development | The plush is broken into real construction pieces for sewing and shaping | Whether the design is moving into a buildable structure |
| 5 | First Model Sample | An early physical sample is made with available materials to confirm shape | Whether the plush shape, ratio, posture, and volume are right |
| 6 | Second Correct-Fabric Sample | The sample is rebuilt using the correct fabric to confirm structure in real material | Whether the approved shape still works in the actual fabric |
| 7 | Final Finished Sample | Embroidery, face details, accessories, labels, and final finishing are added | Whether the plush is visually complete and ready for approval |
| 8 | Review & Approval | checks shape, face, fabric, finish, and commercial readiness | Whether the sample is truly ready to become the production reference |
| 9 | Bulk Preparation Based on Approved Sample | Approved sample becomes the standard for later production alignment | Whether all key details are clear enough for repeatable production |
This table works well because it shows the process in plain language, but still preserves the deeper logic behind your page.
reading this summary should understand three very important ideas immediately.
1) Each Stage Has a Different Job
Many sample problems happen because assume every version should solve everything at once. But in a strong process, each step has its own purpose.
- Early stages reduce misunderstanding
- Middle stages confirm form and material behavior
- Final stage confirms expression, finish, and product readiness
When understand that, they stop asking the wrong questions at the wrong moment.
2) The Process Is Designed to Make Feedback Cleaner
This summary also helps understand why feedback should be staged.
For example:
- At the first model sample stage, feedback should focus on shape
- At the second correct-fabric sample stage, feedback should focus on material effect on structure
- At the final sample stage, feedback should focus on face, embroidery, and finishing
This makes the entire workflow easier to manage. It also explains why your process often leads to better revisions than a one-step sample method.
3) The Sample Is Not Only for Approval — It Is for Risk Reduction
This overview also helps reinforce an idea many miss at first: the sample process is not only there so the factory can “show something.” It is there to remove uncertainty before production.
By the time the final sample is approved, should already have confidence in:
- shape
- proportion
- real fabric behavior
- face and expression
- accessory layout
- finish quality
- whether the sample is strong enough to guide bulk production
That is what makes the sample process commercially useful.
Quick Version: The Full Logic in One Sentence
We first understand your design, then confirm the plush shape, then confirm the same shape in the correct fabric, and only after that do we complete the final details for approval.
That sentence is extremely valuable because it gives an easy way to remember the process and explain it internally.
Quick Version: The Full Logic in Three Decisions
Another useful summary is to show the workflow as three key approvals:
| Approval Type | Main Question | Sample Stage |
|---|---|---|
| Shape Approval | Does the toy look right in real 3D form? | First model sample |
| Material Approval | Does that shape still work in the actual fabric? | Second correct-fabric sample |
| Final Visual Approval | Does the toy now look complete and ready to sign off? | Final finished sample |
For a short visual block or infographic, we can also show the workflow like this
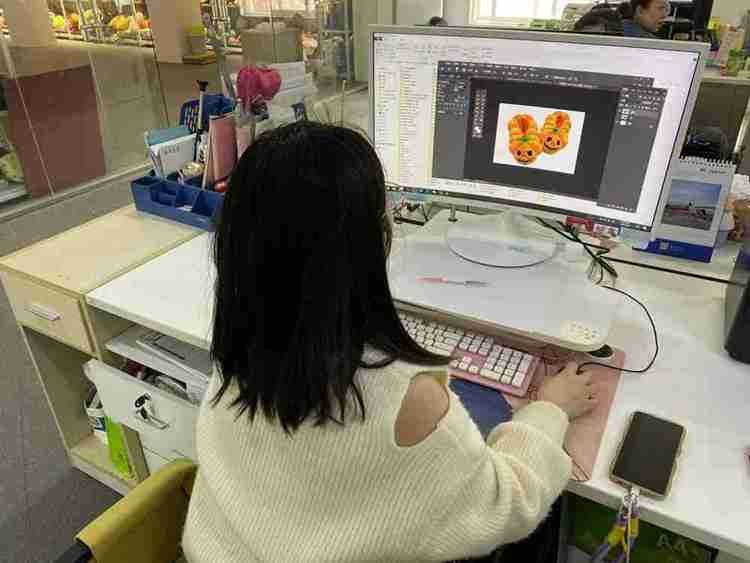
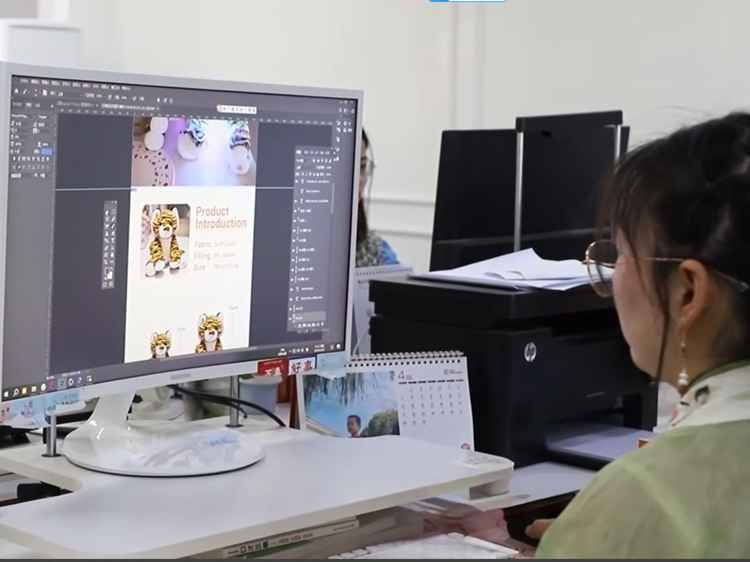
Step 1 — Design Review & Quotation
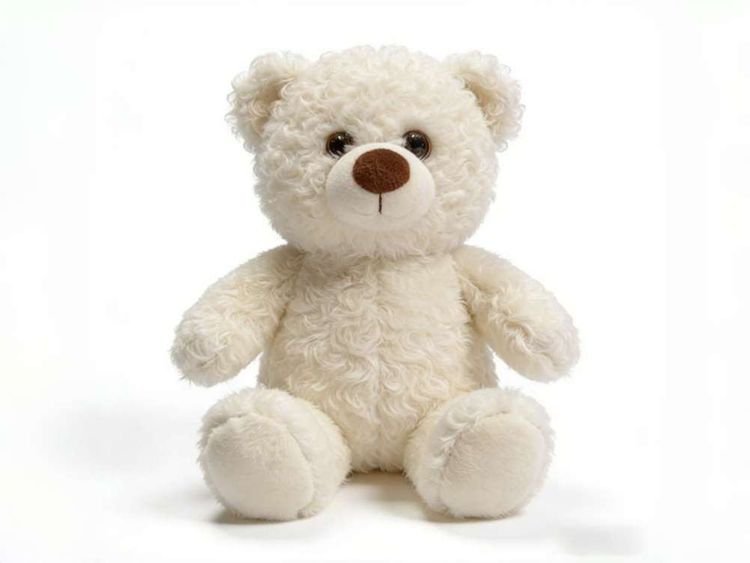
The first step is for you to share your concept with us. This can be a hand-drawn sketch, digital artwork, or even a simple reference photo. The goal is to give our design team a clear idea of your vision, including proportions, colors, and key details. Don’t worry if it’s not perfect; even rough sketches help us understand the overall style and feel you want. The more detail you provide, the better we can translate it into a three-dimensional plush concept. Think of this as the starting point for turning your idea into a tangible product.
Step 2 — We review the design and confirm feasibility
Once we receive your artwork, our design and production team evaluates it carefully. We check whether the shapes, sizes, and details are achievable with plush materials and sewing techniques. If anything might be challenging, we provide professional suggestions to adjust proportions, materials, or features while keeping the original concept intact. This step ensures that the final plush can be made efficiently, maintain durability, and still capture the character or aesthetic you envisioned. Our goal is to align your creative idea with practical manufacturing possibilities from the start.
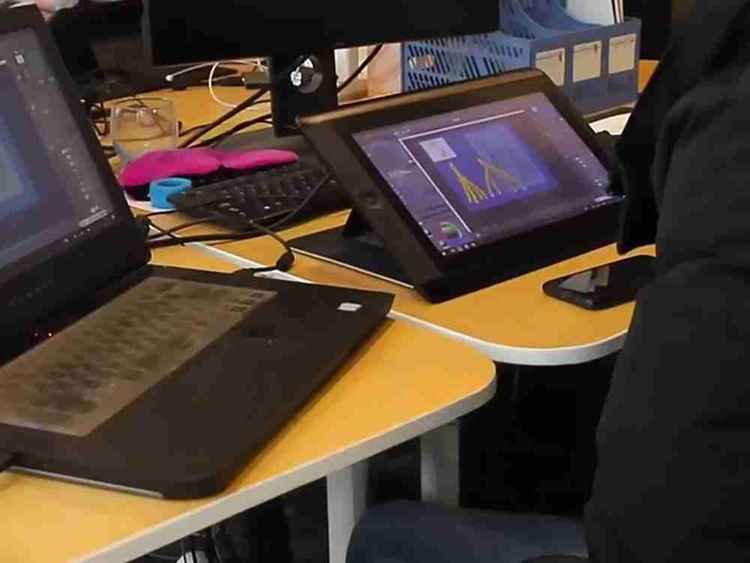
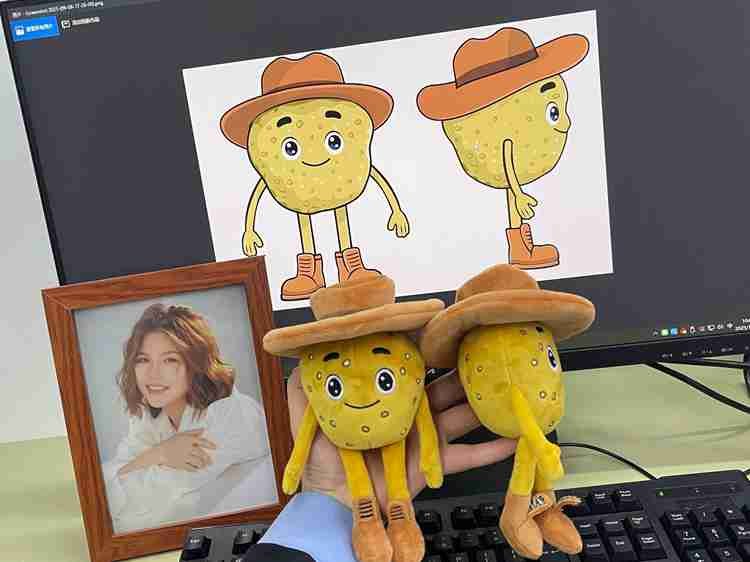
Step 3 — We translate the design into a plush form direction
After confirming feasibility, we convert your flat artwork into a three-dimensional plush direction. This involves imagining how the character or item will look as a stuffed object, considering soft materials, volume, and movement. We define the approximate height, width, and depth, the position of key features, and how different parts will be stuffed. This step bridges your 2D design with a real-world plush prototype, ensuring the essence of your design is preserved while anticipating material behavior, stitching, and stability during production. It sets the foundation for accurate pattern development.
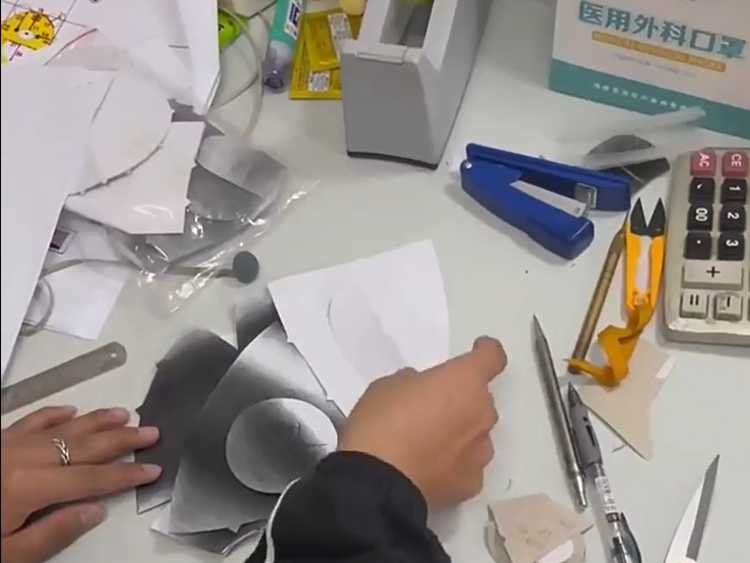
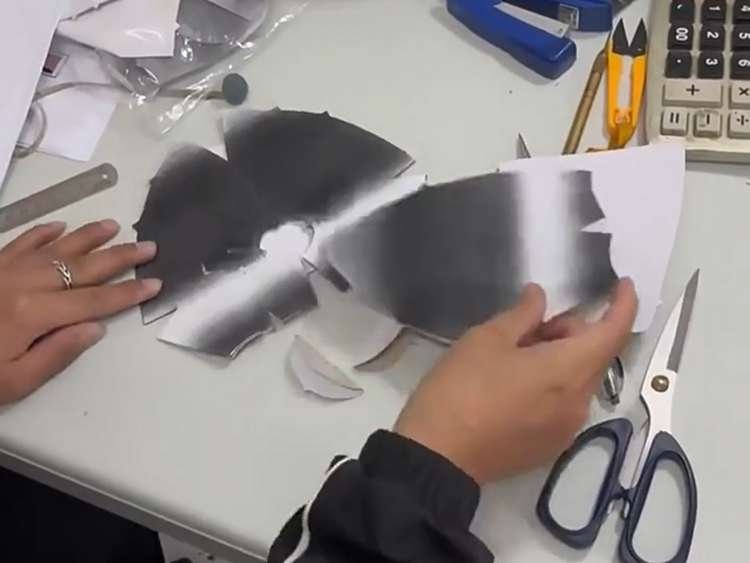
Step 4 — We develop the paper pattern
With the plush form decided, we create a paper pattern that shows each piece of the toy’s body, limbs, head, and accessories. The pattern specifies cut shapes, seam allowances, and assembly points. It serves as the blueprint for sewing and ensures each component fits together perfectly. This step is critical because it transforms the 3D concept into measurable, repeatable sections. Paper patterns allow us to test proportions and connections before using costly materials. It’s also the stage where we anticipate potential shape issues and adjust dimensions to make sure the finished plush will hold its intended form.
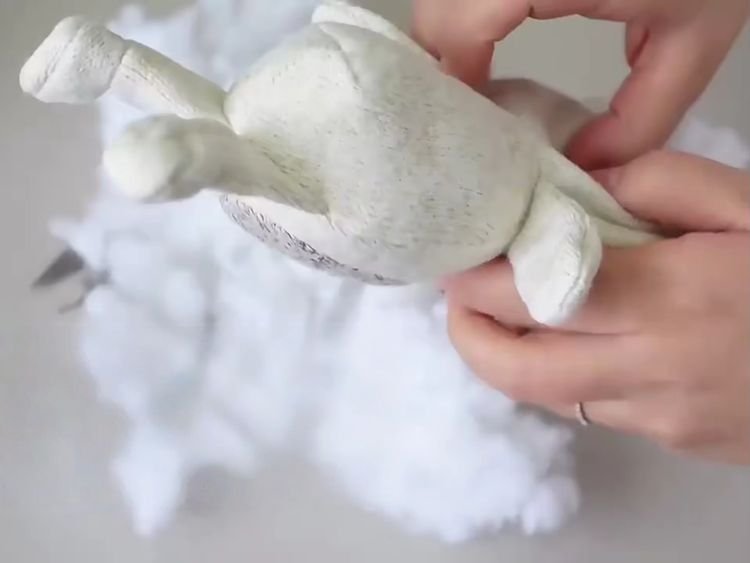
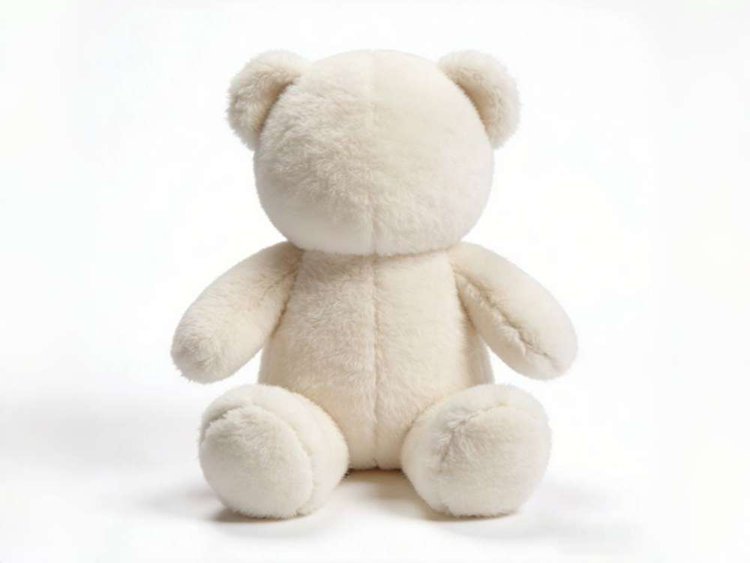
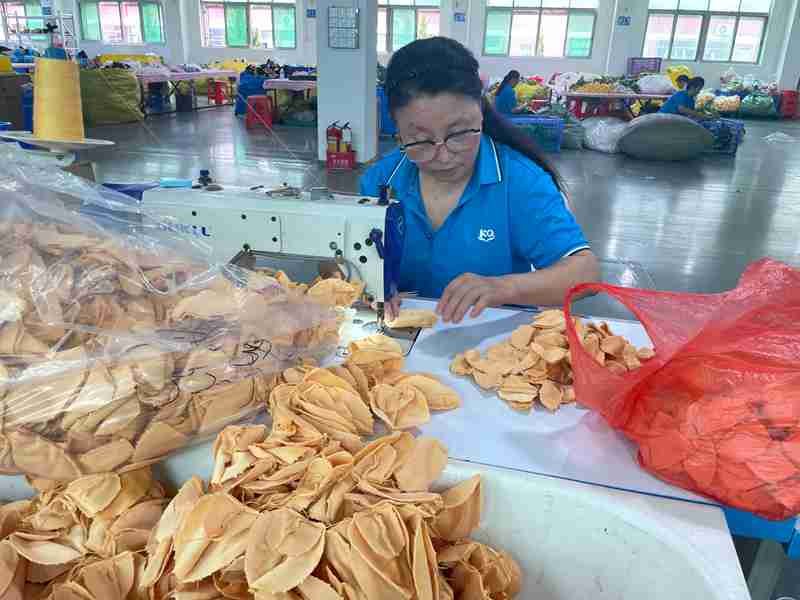
Step 5 — We make the first model sample to check shape
Using the paper pattern, we produce the first model sample, often using inexpensive test fabric. This prototype focuses on evaluating the overall shape, structure, and proportions. At this stage, embroidery, details, or final materials are usually omitted to focus solely on how the plush holds its form. We check for balance, symmetry, and stability, ensuring the character or design looks as expected from every angle. This step helps identify early issues before committing to final fabrics, saving time and material while guaranteeing the final plush will resemble your original vision.
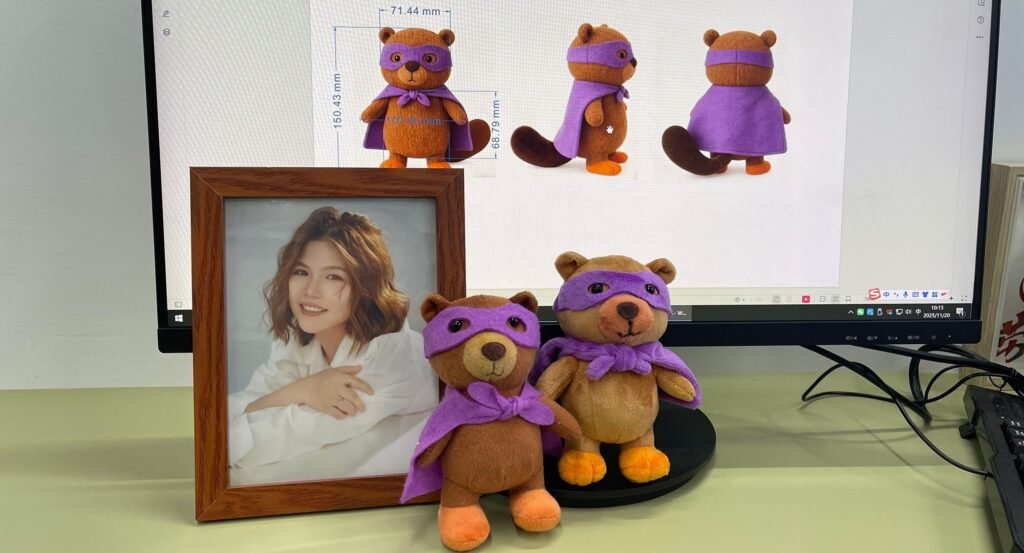
Step 6 — We rebuild with the correct fabric to verify structure
Once the shape is confirmed, we create a second prototype using the intended plush material. This step tests how the actual fabric behaves when sewn and stuffed, ensuring the toy maintains its form and proportions. We verify that seams, stuffing, and plush textures interact correctly, and that the overall weight and feel match expectations. This stage may also include initial hardware placement, like zipper or keychain locations, to confirm functionality. By building with the real fabric, we minimize surprises in bulk production and ensure the final plush is stable, durable, and visually accurate.
Step 7 — We add embroidery and final details
With the structure verified, we add all surface details such as embroidered eyes, noses, logos, patterns, or additional textures. Accessories, trims, or small sewn elements are also included at this stage. The focus is on achieving the exact appearance you envisioned while maintaining durability. We check that threads, fabric combinations, and color placement are precise and consistent. This step ensures that the plush is not only structurally correct but also visually polished and expressive, capturing the character’s personality or brand style before moving to the final approval stage.
Step 8 — You review and approve the final plush sample
Now the plush is ready for your review. You can examine the shape, material, embroidery, colors, and small details. At this point, minor adjustments can still be made if necessary, but the sample represents the final product closely. Your approval confirms that the toy meets your quality and design expectations. This step is crucial for ensuring both parties agree before committing to bulk production. Clear feedback here prevents miscommunication, ensures production accuracy, and serves as a reference for the factory to replicate the plush consistently across all units.
Step 9 — The approved sample guides bulk production
Once you approve the final sample, it becomes the standard for bulk production. All materials, stitching techniques, embroidery placement, and packaging instructions follow this approved sample to ensure consistency. It serves as a reference for the production team to reproduce the plush accurately, preserving shape, appearance, and quality. With the approved sample as a guide, bulk orders can be fulfilled efficiently, and buyers can be confident that each unit matches the original vision. This step closes the loop from concept to repeatable, high-quality production.
How We Turn a Flat Design into a 3D Plush Concept
For plush projects, one of the biggest risk points is not fabric, embroidery, or even color. It is form translation. A 2D character drawing can be expressive, but plush is built from sewn panels, filled volume, curved seams, and material behavior. That means a factory must interpret how a flat concept becomes a soft object that can be held, viewed from different angles, and judged as a real product. If that translation is handled too quickly, may receive a first sample that is technically well sewn but visually not what they expected. The issue is often not “bad workmanship.” The issue is that the three-dimensional reading of the design was never fully aligned.
This is why an early 3D plush concept step is so useful. At this stage, the purpose is not to finalize every production detail. The purpose is to confirm the plush toy’s overall silhouette, head-to-body ratio, side depth, limb thickness, body posture, facial placement zones, accessory scale, and visual balance before the pattern is locked too far forward. For many projects, this is the point where realizes whether the plush should feel more round, more compact, more upright, more floppy, more chibi, or more proportional. These decisions sound simple, but they have a major effect on how the toy will finally look in real life.
A strong 3D confirmation step is especially valuable when the design includes one or more of the following conditions:
- Only a front-view sketch is available
- The design style is highly stylized
- The plush has unusual body proportions
- There are large head shapes, short limbs, wings, tails, hats, backpacks, or layered outfits
- The product is based on IP artwork that must stay recognizable
- is still deciding between “cute,” “accurate,” or “more commercial” shape language
At Heyzizi, this stage helps us convert customer-provided material into a clearer plush development direction. The customer may send a rough sketch, three-view character art, reference toy images, a design mood board, or a mix of all of these. Based on that input, the development team reviews what the drawing is saying visually and what the plush will need structurally. This includes looking at questions such as: Should the head be more spherical or more oval? Does the body need a seated base or hanging leg feel? Will the arms sit outward or drop naturally? Should the muzzle project more, or stay flatter to preserve a cleaner cartoon look? Can the accessory keep its size without making the toy top-heavy?
These are exactly the kinds of questions that often care about, but do not always know how to describe in technical sewing language. A good 3D stage bridges that gap. It creates a more readable middle step between art and sample. It is not just about making the design “look nice.” It is about confirming the product’s volume logic before sampling time and money are spent on a shape that may need major rework.
Below is a simple comparison that helps explain why this stage matters:
| Design Stage | What It Shows Well | What It Still Cannot Fully Prove |
|---|---|---|
| 2D Artwork | Character style, facial expression, color zones, main details | True depth, stuffing feel, seam effect, soft volume |
| 3D Plush Concept | Silhouette, body proportion, head depth, accessory scale, visual balance | Final handfeel, exact fabric behavior, finished embroidery effect |
| Physical Sample | Real touch, sewing result, stuffing, final finish, review in hand | Requires more time and cost to revise major shape issues |
This table makes one thing clear: a 3D concept is not there to replace the sample. It is there to make the sample smarter. It reduces the chance that the first physical version becomes a costly “shape discovery exercise.” Instead, it helps the first model sample focus on validation, not blind exploration.
For , this creates several practical benefits. It gives them a cleaner way to comment on shape. It helps internal teams review faster. It is easier to show to brand managers, licensors, product teams, and sales teams before physical work advances. It also creates a record of what was visually agreed on, which can later help when discussing revisions. For factories, it reduces unnecessary trial-and-error during the sample stage. For both sides, it creates a better shared language around plush structure.
This stage is also useful from a commercial point of view. Many plush projects are not judged only by design accuracy. They are judged by how well they will sell. A toy that is too thin may feel weak at retail. A head that is too large may look cute but make packaging harder. An accessory that is too oversized may distort the body. A face that sits too low may lose shelf appeal. When review a 3D plush concept early, they are not only checking design faithfulness. They are also checking whether the toy feels right as a market-ready product.
The main idea of this module is simple: before sewing begins, shape deserves its own review step. That is one of the cleanest ways to reduce misunderstanding in custom plush development. When the plush form is discussed clearly before pattern and sampling move forward, the entire project usually becomes easier to manage.
Key Review Points at This Stage
When reviewing a 3D plush concept, should focus on:
- Overall silhouette
- Head-to-body proportion
- Side depth
- Posture and pose feel
- Accessory size and placement
- Character recognizability
- Whether the plush feels too stiff, too flat, or too bulky visually
Paper Pattern Development for Custom Plush Toys
From 3D Confirmation to Paper Pattern: How a Plush Design Becomes Buildable
A good-looking concept is only the beginning. The paper pattern is where a plush idea becomes something that can actually be sewn, stuffed, adjusted, and repeated.
Many of us focus naturally on visible things: the face, the body shape, the color, the cuteness, the outfit, the accessory details. Those are all valid. But underneath all of that is a less obvious system that determines whether the plush toy will actually come together correctly. That system is the paper pattern. In plush manufacturing, the pattern is not just a technical formality. It is the structural language of the toy.
A pattern decides how many pieces the plush will need, where the seams will sit, how volume will be created, how much shape can be achieved through stitching, and how the design will behave once turned, filled, and closed. Two plush toys may look very similar in flat artwork, but if their pattern strategy is different, the final result can feel completely different. One may have a fuller head and softer transition lines. Another may look cleaner from the front but flatter from the side. One may hold its sitting posture better. Another may look more relaxed but less stable on shelf. These outcomes are not random. They are often the direct result of pattern breakdown choices.
This is why the paper pattern stage deserves much more attention than it usually gets on supplier websites. It is also one of the best ways to show that your factory understands not only how to sew plush, but how to engineer plush shape. At this stage, the development team studies the design and decides how to convert it into workable components. A round head may require multiple curved panels or a side gusset strategy. A muzzle may need a separate insert or a cleaner contour transition. A chubby body may need wider side volume. Short limbs may need different attachment logic than long hanging arms. A standing toy may need balance consideration that a sitting toy does not. A plush with clothing may need the body pattern adjusted so the outfit sits correctly without bunching.
This is also the stage where factories must balance three things that often pull against each other:
- Visual accuracy
- Sewing practicality
- Repeatable production logic
A design can sometimes be made more accurate by adding many panels and tiny construction breaks. But too many small pieces may increase sewing difficulty, raise inconsistency risk, and slow sampling. On the other hand, simplifying too aggressively may make the toy lose character, volume, or recognizability. Good pattern development is not about making the pattern as complex as possible. It is about making it as effective as necessary.
At Heyzizi, this stage supports the move from approved concept direction into actual sample structure. It fits naturally with our broader workflow of design-to-manufacturing support, pattern development, material planning, and prototype execution, helping turn artwork into a sample path that is both realistic and reviewable.
Here is a simple way to understand what the paper pattern is doing behind the scenes:
| Pattern Task | What It Controls | Why Should Care |
|---|---|---|
| Panel Breakdown | How the toy is divided into sewing parts | Affects shape accuracy and seam visibility |
| Seam Placement | Where sewing lines sit on the plush | Changes appearance, symmetry, and finish |
| Volume Planning | Head depth, body fullness, limb thickness | Controls whether the toy feels flat or well formed |
| Turnability | Whether parts can be sewn and turned cleanly | Affects sample cleanliness and risk of distortion |
| Stuffing Logic | Space for fill, balance, softness, support | Influences posture, feel, and shape hold |
| Accessory Integration | How ears, tails, wings, clothes, and extras attach | Improves durability and appearance |
| Repeatability | Whether the same structure can be sampled and later produced consistently | Reduces scale-up risk from sample to bulk |
For , one of the most useful things to understand is that paper pattern development is where many future problems are prevented before they happen. A weak pattern can lead to issues such as:
- Face area distortion after stuffing
- Head and body ratio drifting during sewing
- Arms or legs attaching at awkward angles
- Accessories pulling the body out of balance
- Seams becoming too obvious on key visual surfaces
- Difficulty keeping symmetry from sample to sample
- Too much dependence on hand correction instead of built-in structure
A stronger pattern reduces these risks by building logic into the toy earlier. This matters even more for projects that include licensed characters, retail plush collections, collector items, multi-SKU series, repeat programs, or brands planning reorders, because those are not only checking whether one sample looks good. They are also checking whether the product can stay stable across future production.
Another point that rarely hear explained clearly is this: a pattern is not only about shape, but also about how feedback can be executed efficiently. If a customer says, “We want the belly fuller, the head slightly less tall, and the arm angle a little lower,” those changes must be translated into pattern adjustments. A factory with weak pattern discipline may fix the look temporarily by hand manipulation during one sample round, but that does not always create a stable base for the next version. A factory with stronger pattern control is more likely to adjust the actual structure, which leads to more reliable progress.
This is one reason the paper pattern stage is so valuable in a serious plush sample process. It gives the sample a structural backbone. It also makes the project less dependent on luck, individual hand feel, or one-time visual patching.
For practical decision-makers, the main message is simple: the quality of the sample starts long before the sample is sewn. Pattern development is one of the strongest indicators of whether a plush supplier truly understands custom product development.
-Focused Review Questions for This Stage
When discussing paper pattern development with a plush factory, should think about:
- Is the design being simplified too much or over-complicated?
- Will the seam placement affect appearance?
- Can the toy keep the right shape after stuffing?
- Will the accessory layout stay stable?
- Is the structure suitable for later bulk production?
- Can future revisions be made through pattern adjustment, not only handwork?
The First Model Sample: Why We Start with Available Materials to Confirm Shape
A lot of customers have experienced the same frustrating situation before: they pay for a custom plush sample, wait for the first version, open the package, and immediately feel that something is wrong. But the problem is hard to describe in one sentence. Maybe the head shape is close, but the body feels too thin. Maybe the ears are fine, but the toy does not look cute from the side. Maybe the legs are too short, the belly is too flat, or the sitting angle feels awkward. At that moment, surface details like correct fabric, color match, logo embroidery, or decorative stitching do not solve the real issue. The real issue is that the base form still needs work.
That is exactly why the first model sample exists. Its purpose is not to become the final approval sample. Its purpose is to become a controlled checkpoint. This first version is usually made using currently available materials rather than waiting for every exact final fabric to arrive. That helps the factory and check the most fundamental questions first:
- Does the toy look right in real volume?
- Is the head-to-body ratio correct?
- Does the side view feel too flat or too thick?
- Are the arms, legs, ears, tail, or accessory positions visually balanced?
- Does the body posture feel cute, stable, soft, upright, or relaxed in the intended way?
- Are there structural issues that should be corrected before final fabric makes the sample more expensive to rework?
This stage is valuable because it protects the project from mixed feedback. Without it, often comment on too many variables at the same time. A single first sample may trigger discussion about shape, material, color, embroidery, seam visibility, stuffing, accessory placement, and handfeel all in one round. That makes revision notes less precise. It also makes the next version harder to improve efficiently. But when the first model sample is treated mainly as a shape-confirmation prototype, the discussion becomes much cleaner. and factory can focus on structure first.
At Heyzizi, this logic aligns with the way we support pattern prototype development, revision rounds, and sample review records during plush development. The value is not only technical. It is also commercial. save time because major shape corrections happen before the project goes deeper into more exact and more decorative sampling work. They also gain clarity because they can separate comments into the right order: first form, then fabric, then detail finish.
The word “model” here is very important. This first sample is a model sample, not a marketing sample. That means should judge it differently. They should not expect it to represent the final plush surface in a perfect way. Instead, they should review whether the plush has the right foundation. If that foundation is wrong, making the sample in the final material too early often increases waste. Correct plush fabric may have a stronger pile, softer handfeel, stretch behavior, or visual texture that makes shape analysis less straightforward. Decorative details can also distract from major proportion problems. In other words, a project sometimes needs a simpler physical version first so the real structural issues are easier to see.
This stage is especially useful in the following situations:
| Project Situation | Why a First Model Sample Helps |
|---|---|
| Only artwork exists, no previous plush reference | Helps translate concept into real volume early |
| The character has exaggerated proportions | Confirms what looks cute in actual 3D form |
| The plush includes accessories or outfits | Checks whether extra parts distort the main body |
| has had failed samples before | Creates a more controlled restart point |
| The final fabric is special or custom dyed | Avoids wasting exact materials before shape is approved |
| The project may become a repeat program | Builds a stronger structural base before later scaling |
Another advantage is cost logic. You already explained a very -friendly point for: the sample fee is charged once, and it already includes both the first model sample and the second corrected fabric sample. That is a strong trust signal. It shows that this stage is not being used to create extra billing layers. It is being used to improve accuracy and reduce later risk. On many supplier pages, sample development is described too vaguely. We can be stronger by stating clearly that the early model stage exists to help avoid paying for avoidable confusion.
The first model sample also improves how feedback is written. When receive this version, their review should focus on questions like these:
- Is the silhouette correct from front, side, and back?
- Does the toy still look like the intended character?
- Does it feel too stiff, too long, too narrow, too round, or too small in certain areas?
- Are the main proportions commercially attractive, not only artistically accurate?
- Should the next version be fuller, softer, shorter, taller, wider, or more compact?
Those are the comments that create useful structural revisions. Once confirms those, the project can move forward with much more confidence.
This module matters because it shows something many factories leave unexplained: a smart sample process does not rush to look finished too early. It solves the most expensive uncertainty first. For plush projects, that uncertainty is usually shape. And when shape is reviewed early, the later sample stages become faster, cleaner, and more reliable.
Review Checklist for the First Model Sample
When reviewing the first model sample, should focus on:
- Overall silhouette
- Head and body ratio
- Side depth
- Posture and sitting / standing feel
- Accessory influence on balance
- Whether the plush still feels true to the original design
- What structural changes are needed before final fabric is used
The Second Sample: Why We Rebuild with the Correct Fabric Before Final Details
One of the most common misunderstandings in custom plush development is the idea that once the shape is confirmed, the rest is only surface decoration. In reality, the fabric itself is part of the structure. Plush fabric is not passive. Different materials change how a toy looks, feels, stretches, reflects light, holds volume, and presents character detail. This is why a professional plush sampling process benefits from a second sample stage built around the correct outer fabric.
The first model sample is extremely useful for judging the base form, but it is not the final proof of how the toy will behave in its real skin. A plush body made in available test materials can help confirm silhouette and proportion, but when the actual fabric is introduced, several important things may change at once:
- The toy may look rounder or flatter depending on pile thickness
- The body may feel softer or firmer depending on material behavior
- Edges may appear cleaner or blurrier
- Seam lines may become more visible or less visible
- Small details may gain or lose sharpness
- The head, muzzle, belly, or limbs may visually expand or compress
- The whole toy may shift from “prototype feel” to “real product feel”
That is why this second stage is so important. It is the moment where the team checks: Does the approved structure still look right in the actual plush fabric? If not, this is the right time to refine it before embroidery, facial detailing, logo application, outfit finishing, or accessory completion makes the sample more expensive and slower to revise.
For , this step is very practical because it separates two kinds of approval that are often mixed together on poorly managed projects:
- Structural approval
- Decorative approval
A lot of failed sample rounds happen because these two are reviewed at the same time. The customer comments on body shape, seam feel, embroidery style, color match, and facial expression all together. That makes it harder to know what the real issue is. But when the second sample is treated as a correct-fabric structure confirmation sample, can focus on how the real material affects the toy before the final artwork details are locked.
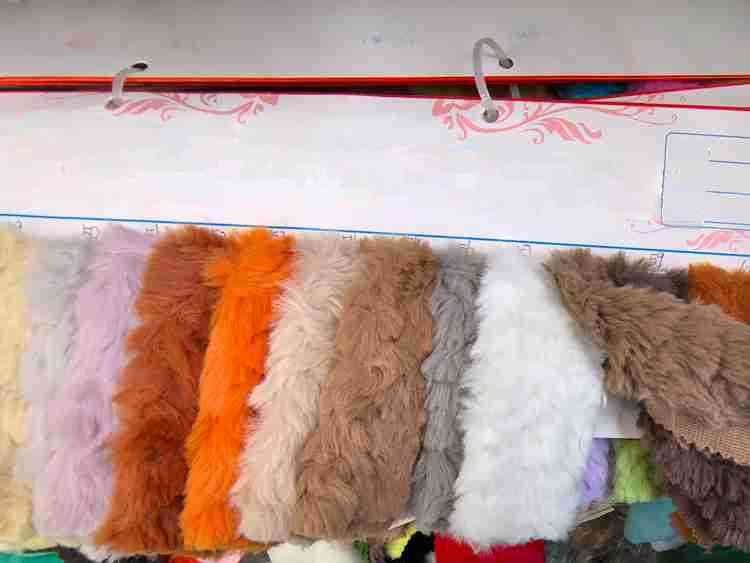
This stage is especially helpful for plush projects using materials such as:
- Short pile velboa
- Long pile plush
- Super soft fabric
- Boa or shaggy textures
- Contrast materials for paws, belly, ears, or accessories
- Different fabric combinations for clothing and body
- Special dyed or customer-matched fabrics
Each of these materials behaves differently. A short-pile fabric may hold printed or embroidered visual zones more clearly. A longer pile fabric may soften edges and make details feel warmer but less sharp. A stretchier fabric may create a plumper result. A denser fabric may give the toy more body. This is why the “same pattern” can still create a slightly different result once the true material is used.
Below is a useful comparison can understand quickly:
| Sample Stage | Main Goal | What Should Review |
|---|---|---|
| First Model Sample | Confirm shape and proportion with available materials | Silhouette, body ratio, posture, volume direction |
| Second Correct-Fabric Sample | Confirm approved shape in real outer material | Surface behavior, softness, seam appearance, real-body feel |
| Final Finished Sample | Confirm decoration and complete appearance | Embroidery, face, labels, accessories, finishing quality |
The Final Sample: Embroidery, Face Details, and Approval-Ready Finish
A plush toy is not truly ready approval just because the body shape is correct. In the real world, customers, licensors, brand teams, retail , and product managers usually react first to the face, detail quality, and finish level. A toy may have the right silhouette, but if the embroidery spacing is off, if the eyes feel too small, if the mouth sits too low, if the outfit seams look bulky, or if the accessory attachment feels visually weak, the product still may not pass. That is why the final sample stage deserves its own explanation instead of being treated as a minor last step.
In professional plush development, the final sample is where the approved structure becomes the approved character presentation. Earlier stages solve the body. This stage solves the identity. It is where the toy gains the expression, visual sharpness, and surface polish that will actually present internally or compare against their brand expectations. Industry ordering pages commonly distinguish between an earlier prototype used to confirm structure and a later final sample made with correct fabric, embroidery, print, and accessories, which supports the logic of keeping decorative completion after form approval.
For , this sequence is extremely practical. If embroidery is done too early, it can hide proportion problems or create wasted revision work. But once the shape and material are already settled, embroidery becomes meaningful. At that point, can finally review the things that define how the plush will feel in the market:
- Face expression
- Eye size and position
- Mouth placement and stitch style
- Nose treatment
- Blush, cheek, eyebrow, or facial accent details
- Logo embroidery or printing
- Outfit finishing
- Label, tag, patch, or accessory integration
- Overall neatness and shelf appeal
This is also the stage where small visual choices have a surprisingly large commercial effect. Two samples with the same body pattern can perform very differently in perception once the face is finished. A slightly higher eye placement may make the toy look younger and cuter. A thicker mouth embroidery may read more clearly online. A cleaner nose shape may improve likeness for an IP character. A slightly adjusted accessory stitch line may make the toy feel more premium. These are not random aesthetic preferences. They are often the details that separate a sample that is “acceptable” from one that feels ready to launch.
At Heyzizi, this stage is stronger when it follows the earlier workflow properly. Your prior development stages — artwork review, 3D confirmation, pattern development, first model sample, and second correct-fabric sample — create the foundation. The final sample then adds the visible details on top of a body that has already been tested. That is a more controlled path than trying to solve structure and decoration at the same time. It also matches the broader way your company supports prototype creation, revision handling, and sample photo/video confirmation during development.
Below is a simple table can understand quickly:
| Final Sample Area | What Gets Confirmed | Why It Matters |
|---|---|---|
| Embroidery | Eyes, mouth, nose, facial accents, logos | Defines expression and brand readability |
| Print / Appliqué (if used) | Graphic zones, patches, decorative pieces | Affects character accuracy and finish |
| Accessory Completion | Hats, scarves, bags, wings, trims, tags | Changes overall presentation and value feel |
| Outfit Finishing | Fit, edge cleanliness, closure logic | Improves realism and retail impression |
| Label / Hangtag Details | Brand identity and product presentation | Helps internal approval and sales readiness |
| Overall Finish | Symmetry, neatness, polish, final look | Determines whether the sample feels approval-ready |
This stage is also where should stop reviewing the toy only as a technical prototype and start reviewing it as a market-facing product. The questions become slightly different:
- Does the face expression match the original design intent?
- Does the embroidery look clean on the actual plush surface?
- Do the details read clearly in both hand-held viewing and photos?
- Does the sample feel premium enough for the target channel?
- Would this sample look convincing in a pitch deck, sales presentation, product meeting, or licensing review?
Those questions matter because many plush projects today are judged in both physical and digital formats. A final sample may be viewed in hand, in approval photos, on video calls, or inside internal slide decks before bulk production is approved. A face detail that looks acceptable at close range may disappear in a sales presentation. A subtle embroidery line may not read clearly in e-commerce thumbnails. A tag placement that is fine in person may look messy in product photography. This is why final sample review should include not only the toy itself, but also how the toy presents.
Sample Review and Revision Logic
How to Review a Plush Sample Correctly: Clear Feedback That Leads to Better
A good sample process is not only about how the factory makes the toy. It is also about how reviews it, comments on it, and pushes the next version forward efficiently.
A plush sample does not improve only because a factory works hard on it. It improves because each round of feedback helps the next version move in a more precise direction. That sounds obvious, but in real projects, sample review is often handled poorly. may open a sample, feel that several things are not ideal, and then send comments in an unstructured way such as: “The face looks strange, the body is a bit off, the fabric is not right, the arms feel weird, and please also make it cuter.” While that reaction is understandable, it is not always easy for the development team to translate into efficient action.
The real goal of sample review is not to describe disappointment. It is to create actionable revision guidance. That means the comments should help answer three questions:
- What exactly is wrong?
- Which issue matters most?
- At which stage should it be fixed?
This is especially important in your plush sample workflow, because the process is intentionally divided into different checkpoints. The first model sample is mainly for shape and proportion. The second correct-fabric sample is mainly for structure in real material. The final finished sample is mainly for embroidery, expression, and completed visual presentation. If review each version according to its real purpose, the project becomes easier to manage. If they comment on everything at once in every stage, the process becomes slower and less clear.
A very practical way to review plush samples is to separate comments into categories. This helps both and the factory stay aligned:
| Feedback Category | What It Covers | Best Stage to Comment |
|---|---|---|
| Shape / Silhouette | Head size, body width, limb length, overall outline | First model sample |
| Posture / Volume | Sitting angle, standing feel, fullness, side depth | First model sample / second sample |
| Material Behavior | Softness, pile effect, seam visibility, surface look | Second correct-fabric sample |
| Face / Embroidery | Eye placement, mouth size, nose style, expression | Final finished sample |
| Accessory / Outfit | Balance, attachment logic, fit, neatness | Second sample / final sample |
| Presentation Details | Label, tag, logo, polish, approval feel | Final finished sample |
This kind of structure makes comments far more usable. For example, instead of saying “The toy feels strange,” a stronger comment would be: “The head looks correct from the front, but from the side it feels too flat. Please increase side depth slightly and make the belly fuller so the sitting silhouette feels more balanced.” That gives the factory something clear to adjust. Or instead of saying “The face is not cute enough,” could say: “Please move the eyes slightly higher and shorten the mouth width so the expression looks younger and more compact.” That kind of feedback moves the project forward much faster.
Another very useful principle is to distinguish between must-change points and nice-to-improve points. Not every comment has the same weight. Some issues affect brand identity or product approval directly. Others are small refinements that would be good if possible, but are not deal-breakers. When do not separate these, factories may spend too much time polishing minor things while missing a major decision point. A simple priority format works well:
- A-Level: Must change
- B-Level: Recommended adjustment
- C-Level: Optional improvement
This sounds simple, but it is extremely effective for reducing revision confusion.
should also avoid giving conflicting goals in the same round unless they explain the trade-off clearly. For instance, comments like “make it softer, but keep the body standing firmly” or “make the head larger, but keep the product size unchanged” may both be possible, but they require technical balancing. A good review note should explain which goal matters more if both cannot be maximized at once. This is where a factory with stronger sample management can help guide the conversation, but still benefit greatly from stating priorities early.
For internal teams, another best practice is to collect comments into one aligned feedback file before sending them to the factory. Many sample delays happen because the sales team, designer, brand manager, and founder all send separate opinions at different times. Then the factory receives moving targets. A cleaner method is to gather all comments, resolve internal disagreement first, and then send one structured version. This is especially helpful for licensed plush, retail product teams, startup founders, and brand-led projects where multiple people are involved in approval.
At Heyzizi, this stage fits well with a development process that already includes sample review support, sample photo/video communication, and revision handling. The better the review notes are, the more productive those tools become. A clear photo with arrows, a numbered comment list, and grouped priorities can save days of avoidable back-and-forth.
Below is a recommended review format can use:
Suggested Plush Sample Review Format
Sample Stage: First model / second correct-fabric / final sample
Overall Decision: Approve / revise / approve with minor changes
Top 3 Must-Fix Points:
Detailed Comments by Category:
- Shape:
- Proportion:
- Material:
- Face / Embroidery:
- Accessory / Outfit:
- Other:
Priority Level: A / B / C
Reference Image Attached: Yes / No
This kind of format is simple, but it turns emotional feedback into working instructions.
The core message of this module is straightforward: better sample review creates better sample revisions. does not need to write like an engineer, but they do need to comment in a way that is specific, prioritized, and matched to the right stage. That is one of the fastest ways to reduce extra revisions and move a plush project toward approval.
Tips for Faster Revisions
To improve revision efficiency, should:
- Comment on the right things at the right sample stage
- Use clear comparison language
- Mark top-priority changes first
- Separate must-fix issues from optional refinements
- Use photos with arrows or notes when possible
- Combine internal team comments before sending
- Avoid vague words without explanation, such as “strange” or “not cute enough”
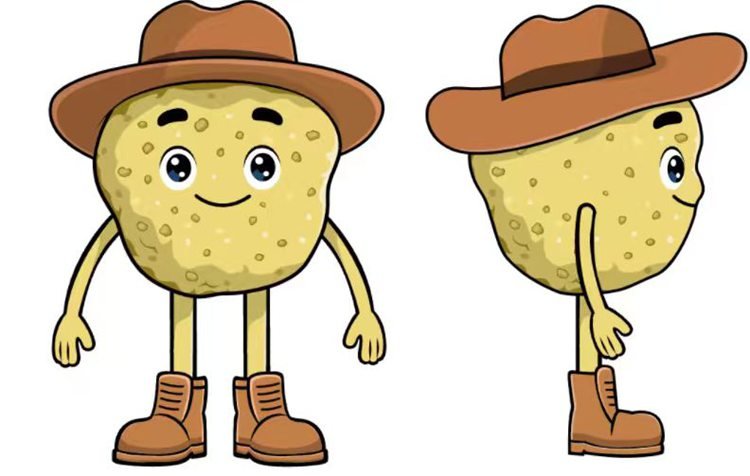
2D Artwork
Character Style, Facial Expression, Color Zones, Main Details.
True Depth, Stuffing Feel, Seam Effect, Soft Volume.
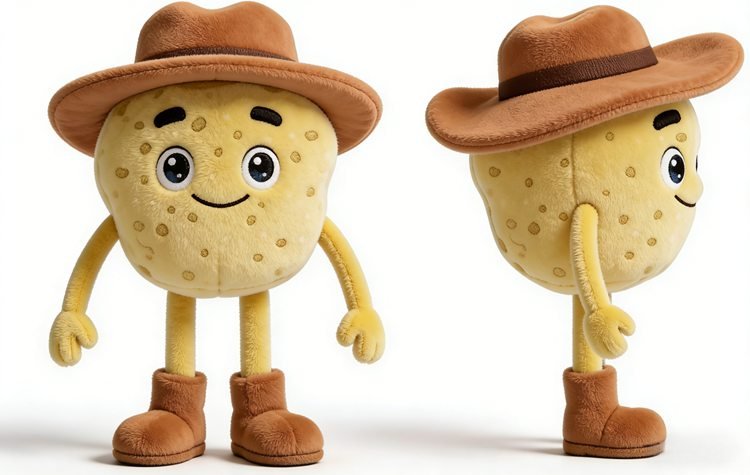
3D Plush Concept
Silhouette. Body Proportion, Head Depth. Accessory Scale, Visual Balance.
Final Handfeel, Exact Fabric Behavior, Finished Embroidery Effect.
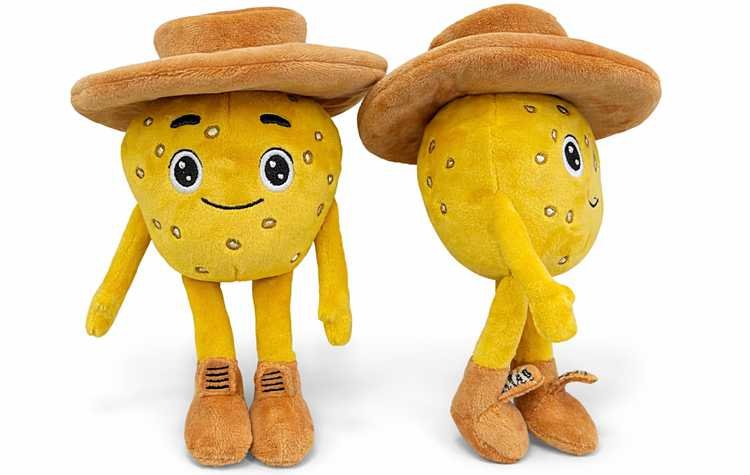
Physical Sample
Real Touch, Sewing Result, Stuffing. Final Finish, Review In Hand.
Requires More Time And Cost To Revise Major Shape Issues.
Sample Lead Time and Shipping Time: What Should Expect at Each Stage
A lot of supplier websites talk about “fast sampling,” but very few explain what that timing actually includes. That is a missed opportunity, because are not just looking for a low number of days. They want predictability. They want to know whether a date is realistic, what might change it, and what they themselves can do to help the process move faster.
In a structured plush sample workflow like yours, time should be understood in layers. A plush sample is not one single action that starts and ends in a straight line. It moves through review points. The customer sends artwork or a sketch. The factory studies the design. A 3D concept may be reviewed. Paper patterns are developed. A first model sample may be created to confirm shape. A second correct-fabric sample may follow to confirm structure in real material. Then the final detailed sample is completed with embroidery and finishing. Some projects move through these stages quickly because the design is clean and decisions are made fast. Others take longer because the design is more complex or approvals take more time.
That is why the best way to explain sample timing is not just to publish one number, but to show what affects that number.
Typical Plush Sample Time Range
| Sample Item | Typical Time Range | What Influences It Most |
|---|---|---|
| Sample Making | 5–14 days | Style complexity, size, accessories, embroidery, approval speed |
| Sample Shipping | 3–9 days | Destination country, courier service, customs route, season |
| Total Waiting Window | Usually 8–23 days | Combined factory time + transit time |
This table gives a more practical picture. It also helps prevent a common misunderstanding: some hear “sample takes 7 days” and assume that means the sample will be in their hands in 7 days. In reality, a clearer expectation is that the factory production portion and the logistics portion are separate.
Several factors affect whether a plush sample sits closer to the 5-day end or the 14-day end of the making range.
1. Design complexity
A simple sitting plush with embroidered eyes and no extra outfit is much easier to develop than a character with layered clothing, attached accessories, appliqué zones, mixed fabrics, and custom packaging requirements. The more structural decisions the toy requires, the more time is usually needed.
2. Number of confirmation points
A project with strong initial artwork and quick approval on the 3D concept or first model stage often moves faster. A project with incomplete artwork or many undecided details may need more internal review time before the next sample step can begin.
3. Material readiness
If the correct material is already available or easy to source, the process is smoother. If the project needs unusual fabrics, color matching, or special trims, material preparation may require extra coordination before the second or final sample stage.
4. Embroidery and detail workload
Face embroidery, logos, decorative stitching, patches, clothing edges, and accessories all affect workload. A very clean prototype body may still need extra time once the detailed finishing stage begins.
5. feedback speed
This point is often underestimated. Some projects lose more time during review than during physical sample making. If sends consolidated comments quickly, the next stage can start sooner. If internal approvals are delayed, the calendar stretches even when the factory is ready.
6. Shipping destination and courier route
Transit time depends heavily on where the sample is going. Some countries and routes move very quickly, while others require more time due to customs handling, local delivery structure, or logistics volume during peak periods.
Below is a simple decision table that often find helpful:
| Situation | Timeline Risk Level | Why |
|---|---|---|
| Simple plush, clear artwork, fast feedback | Low | Fewer technical unknowns and faster approvals |
| Character plush with outfit and accessories | Medium | More components to align and finish |
| Licensed or brand-sensitive plush with many approvers | Medium to High | Internal review often adds time |
| Custom fabric / special trim / exact matching needed | Medium to High | Material prep may affect timing |
| Peak season or urgent holiday launch | High | Sampling and logistics pressure can both increase |
This kind of transparency helps plan better. It also makes your page stronger from an SEO and AI-answer perspective, because many search questions like:
- How long does a custom plush sample take?
- How many days does plush toy sampling need?
- What is the sample lead time for custom stuffed animals?
- How long does it take to ship a plush sample from China?
- Why does plush prototype development take more than one week?
Those are very commercial, high-intent search phrases, and this module directly answers them in a structured way.
Another point worth stating clearly is that speed without order often creates more delay later. Some factories promise very fast sample times by skipping proper review stages. That may sound attractive at first, but if the first sample arrives with major shape problems or unclear structural decisions, the total project time often becomes longer. A more controlled process may look slower on paper, but it usually reduces wasted rounds.
At Heyzizi, the most honest and useful message is this: we aim to move samples efficiently, but we also stage the process so can confirm the right things at the right time. That balance is what creates a better approval path. Not every sample needs the full 14 days, and not every shipment needs the full 9 days, but should plan with realistic windows instead of best-case assumptions only.
For who want to keep projects moving, several actions help:
- Send complete artwork and specs early
- Clarify which details are fixed and which are flexible
- Respond to sample review requests quickly
- Consolidate internal team comments before replying
- Tell the factory early if the sample supports a launch date, pitch, or meeting
- Confirm the shipping country and receiver details clearly
The central message of this module is simple: a good sample timeline is not just fast — it is visible, structured, and realistic. When understand what the 5–14 day making window and 3–9 day shipping window actually represent, they can plan their own approvals and launches much more confidently.
Planning Checklist for Sample Timing
Before starting a plush sample, should confirm:
- Whether the design is simple or complex
- Whether all artwork files are ready
- Whether internal approvers are aligned
- Whether the project needs special materials
- Whether the target country may affect shipping speed
- Whether the sample is tied to a sales, launch, or licensing deadline
Why Our Sample Fee Is Charged Once and What It Covers
One Sample Fee, Multiple Development Steps: What Are Actually Paying For
A clear sample fee policy reduces hesitation. do not want vague charges, repeated billing, or uncertainty about what is included before the final sample is approved.
In custom plush development, rarely object to paying for real work. They understand that sampling takes time, skill, labor, pattern development, material handling, sewing, revision thinking, and project management. The real issue is usually not the existence of a sample fee. The real issue is whether the fee structure feels transparent, fair, and development-oriented.
That is why a clear “charged once” sample policy is such a strong page message. It tells something very practical: the factory is not treating every internal development checkpoint as a new commercial trap. Instead, the factory is treating sampling as one guided process with several necessary validation stages built inside it.
This matters because your sample process is intentionally structured. It does not jump from drawing straight to one final plush and then leave to accept or reject the whole result at once. It moves through logic:
- Design intake and review
- 3D concept understanding / confirmation
- Paper pattern development
- First model sample to confirm form
- Second correct-fabric sample to confirm structure in real material
- Final detailed sample with embroidery and finishing
If had to think of each of these steps as a separate uncertain charge, when the policy is explained clearly, the opposite happens. understand that the fee is supporting a better approval path.
This is especially important for customers who have had bad supplier experiences before. Many have already encountered at least one of these problems elsewhere:
- The initial sample fee sounded low, but revisions triggered repeated extra charges
- The factory never explained what was included
- A prototype was quoted separately from a corrected version without clear logic
- only discovered the real total cost after the process had already started
- The fee structure discouraged proper development, so the project rushed too early into a final-looking sample.
What the One-Time Sample Fee Is Really Covering
| Included Development Area | What It Means for | Why It Matters |
|---|---|---|
| Early design interpretation | The project is reviewed before sampling begins | Reduces misunderstanding from the start |
| Pattern development work | The plush is structurally prepared, not guessed | Improves build quality and revision logic |
| First model sample | Shape and proportion are checked before final fabric | Helps solve the biggest risk early |
| Second correct-fabric sample | The approved structure is rechecked in the real material | Prevents avoidable mistakes before final detail work |
| Sample progression support | The project moves through stages instead of one blind jump | Gives a cleaner approval process |
How Sample Development Reduces Bulk Production Risk
A sample is not only for approval. It is also the earliest tool for controlling what may go wrong when the order moves into mass production.
Many people think of a plush sample mainly as something they approve before placing a bulk order. That is true, but it is only part of the story. In a professional plush manufacturing workflow, the sample is also a risk-control tool. It helps identify structural, material, visual, and execution problems before those problems become expensive across hundreds or thousands of units. This is one reason many plush manufacturers describe prototype approval as the key step before mass production, and why industry quality guidance emphasizes comparing bulk units against an approved sample or “golden sample” during inspection. For Heyzizi, this is exactly why the sample process is staged instead of rushed. Each checkpoint — design review, 3D confirmation, paper pattern development, first model sample, second correct-fabric sample, and final finished sample — helps remove a different kind of production risk before the project scales.
When a plush project moves from one sample to bulk production, the biggest danger is not always obvious failure. Often, the real problem is drift. The approved sample may look good, but bulk units can begin to vary in subtle but important ways: head fullness changes, face placement shifts, fabric feel looks slightly different, stuffing firmness becomes less consistent, accessory positions move, outfit fit changes, or the overall expression loses the character that made the sample attractive in the first place. Industry guidance for plush production repeatedly points to this exact issue: after sample approval, factories still need quality controls that compare production output against the approved reference, because the approved sample is the baseline for fabric, stuffing, stitching, accessory placement, and packaging consistency.
That is why should not view sampling as a formality. A good sample process does much more than help say “yes” or “no.” It helps the factory define what “correct” looks like before many units are cut, sewn, stuffed, and packed. The better the sample process, the easier it becomes to protect the bulk order from avoidable variation.
How Each Sample Stage Reduces a Different Production Risk
| Sample Stage | Main Risk It Reduces | Why It Matters for Bulk Production |
|---|---|---|
| Design Review | Misreading the artwork or missing key specs | Prevents the whole project from starting on the wrong assumption |
| 3D Concept Confirmation | Wrong body language, wrong proportion, weak character recognizability | Avoids repeating the wrong form across the entire order |
| Paper Pattern Development | Poor seam logic, unstable structure, inconsistent shape control | Builds a more repeatable construction base |
| First Model Sample | Major silhouette errors | Catches the most expensive shape problems early |
| Second Correct-Fabric Sample | Material behavior changing the approved form | Prevents bulk surprises caused by real fabric performance |
| Final Finished Sample | Face, embroidery, label, accessory, and overall finish mismatch | Creates a clearer “golden reference” for later inspection |
What Should Check Before Approving a Plush Sample
A sample should not be approved only because it looks “good enough.” It should be approved because the right things have been checked in the right order.
A plush sample can be attractive and still not be ready for approval. This happens more often than many expect. The toy may photograph well, the face may look cute, and the overall impression may feel positive, but underneath that first impression there may still be unresolved issues. Perhaps the body proportion is still slightly unstable. Perhaps the fabric choice weakens the original character feel. Perhaps the accessory is visually acceptable but not fixed in the most stable way. Perhaps the embroidery looks fine in a close-up photo but feels less clear in normal viewing distance. Perhaps the sample is nice as a one-off handmade piece, but not yet strong enough to act as a repeatable production standard.
That is exactly why a sample approval check list matters. It helps separate “I like it” from “this is ready to approve.”
A practical approval check should be divided into several review areas.
Size and Dimensions
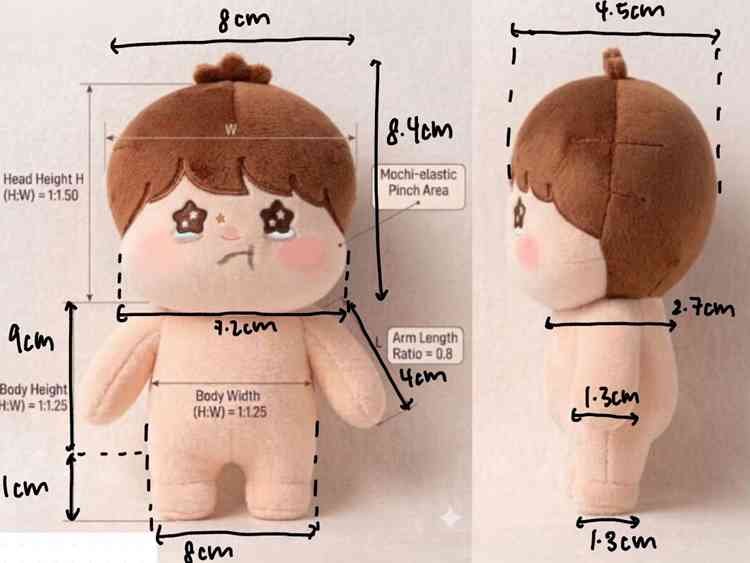
A plush may look visually accurate in photos or on the desk, but the real-world measurements determine usability, packaging, and shelf presence. Confirm that the toy meets the intended scale and functional size for the target channel.
We should check:
- Does the overall height, width, and depth match the design specification?
- Are key features (head, body, limbs, accessories) proportional according to the approved sketch or 3D direction?
- Does the toy fit into its intended packaging, polybag, or display box?
- Will it meet weight or volume expectations for shipping and handling?
- Are variations between front, side, and back views consistent with design intent?
This step is critical, Confirming dimensions ensures functional consistency and prevents costly adjustments later in production.

Shape and Silhouette
Even at the final stage, should still go back and confirm the basic body logic. A finished sample may distract with details, but the structure still matters.
We should check:
- Does the toy still match the intended character silhouette?
- Does the head-to-body ratio feel right from front, side, and back?
- Does the plush look balanced when standing, sitting, or hanging, depending on the design?
- Are the limbs, ears, tail, wings, or body extensions proportionate?
- Does the toy hold the intended visual personality — cute, compact, soft, premium, playful, collectible, or brand-specific?
This matters because a plush sample is often approved when is emotionally focused on the face.

Fabric and Surface Behavior
The next check is whether the approved fabric is doing the right job for the product.
should ask:
- Does the fabric texture fit the intended market position?
- Does the pile length help or hurt the detail clarity?
- Does the toy feel too flat, too fluffy, too thin, too stiff, or too loose?
- Do seam lines appear acceptable in the chosen material?
- Do color areas read correctly under normal lighting, not only under close inspection?
A plush made for a baby-friendly line, a gift program, a collector product, or a retail shelf may all need slightly different fabric behavior. Approval should reflect the actual target use, not just a generic preference.
Face, Expression, and Character Accuracy
This is one of the most sensitive approval areas because it often determines whether the sample feels “right” immediately.
should check:
- Are the eyes placed correctly?
- Is the mouth the right width, height, and emotional tone?
- Does the nose read cleanly?
- Do cheeks, eyebrows, blush, or accent stitches help the expression or clutter it?
- Does the face feel true to the original artwork, but also strong enough as a plush interpretation?
This is especially important for IP plush, mascot plush, branded character plush, plush keychains, and retail-focused collectibles, where facial recognition is directly tied to approval and sales appeal.

Embroidery and Detail Execution
A plush sample should not be approved only on design intent. It should also be approved on execution quality.
should check:
- Is the embroidery clean, even, and readable?
- Are small details consistent and well positioned?
- Do decorative stitches look deliberate rather than messy?
- Are printed or appliqué areas, if used, aligned and visually stable?
- Does the detail work still look clear on the actual plush surface, not just in flat artwork?
This is where moves from judging the concept to judging the actual product-making quality.
Accessories, Outfits, Add Parts
Accessories often look like secondary elements, but they can change the whole approval decision.
should confirm:
- Are accessories correctly sized relative to the body?
- Do hats, scarves, bags, bows, wings, or clothes sit naturally?
- Are removable-looking parts actually meant to be fixed, and is that clear?
- Does the extra detail improve value perception or create clutter?
- Would the sample still look strong if seen quickly on a shelf or in a product photo?
Accessories can sometimes impress at first glance while also introducing imbalance, bulk, or visual confusion.

Commercial Readiness
This is the area many forget to assess directly. A sample may be technically acceptable, but still not commercially strong enough.
should ask:
- Would this plush look convincing in a sales meeting, presentation, product launch review, or licensing deck?
- Does it feel premium enough for the target channel?
- Does it still look good in normal photos, not only in person?
- Would customers immediately understand its appeal?
- Does it feel like a product the brand would be proud to release?
This section matters because approval is not only about correctness. It is also about readiness.
Repeatability for Production
A very beautiful one-off sample is not enough if it cannot function as a reliable production reference.
should think about:
- Does this sample look stable enough to become the production reference?
- Are the key details clear enough that a QC team could inspect against them later?
- Would another unit made from the same standard likely look similar?
- Are there any areas that seem overly dependent on hand adjustment rather than build logic?
This is one of the most overlooked approval questions, and one of the most important.
Common Plush Sampling Mistakes Make and How to Avoid Them
Many sample problems are not caused by bad intention. They are caused by unclear inputs, mixed feedback, rushed approvals, or expectations that were never fully aligned at the start.
A custom plush sample can go off track even when both and the factory are trying hard to make it work. In many cases, the biggest problems do not come from one dramatic mistake. They come from a series of small misunderstandings: the artwork is incomplete, is imagining a side view that was never drawn, the factory is asked to make the face “cuter” without specific direction, the sample is approved too early, or multiple people send conflicting comments at different times. These problems are common in plush development because plush is not a flat product. It involves shape, softness, fabric behavior, embroidery, accessories, and commercial presentation all at once. That is why a strong sample process should not only explain what the factory does. It should also help avoid the most common mistakes that create delays, extra revisions, hidden frustration, and poor approval results. This module is designed to make the page more useful, more honest, and more -centered by showing not only what can go right, but also what often goes wrong.
One of the strongest ways to build trust on a plush sample page is to speak openly about mistakes commonly make during sampling. This does not make look inexperienced. It makes the page feel real. Because in practice, even experienced sourcing teams can run into the same avoidable problems again and again if the process is not structured clearly.
Below are some of the most common plush sampling mistakes, along with the smarter way to handle each one.
1) Sending Only a Front View and Expecting Full 3D Accuracy
This is one of the most common starting problems. A front-view drawing can show the basic look of a character, but it cannot fully define head depth, nose projection, belly thickness, tail angle, back details, arm drop, or side balance. When the factory receives only one angle, it must interpret the missing dimensions. That interpretation may not match what imagined.
How to avoid it:
Provide front, side, and back views whenever possible. If a full three-view is not available, send reference notes or similar plush examples to explain intended depth and posture. Even a rough side-view sketch can reduce major misunderstanding.
2) Trying to Approve Shape, Fabric, and Face All at the Same Time
Many unintentionally slow down their own project by reviewing every element together in every round. They may comment on head shape, fabric choice, embroidery size, label placement, and packaging all in one message, even when the current sample stage is only meant to confirm structure.
How to avoid it:
Review the sample according to the stage it is in.
- First model sample: focus on shape and proportion
- Second correct-fabric sample: focus on how real material affects the structure
- Final sample: focus on embroidery, face, finish, and presentation
This makes feedback more precise and revisions more efficient.
3) Using Vague Feedback That Sounds Emotional but Is Hard to Execute
Comments like “not cute enough,” “a bit strange,” “still not right,” or “can you make it better?” may be honest reactions, but they are difficult for a development team to act on. Vague comments often lead to vague revisions.
How to avoid it:
Turn emotional reactions into physical instructions.
Instead of “the face is weird,” say:
“Please move the eyes slightly higher and reduce the mouth width so the face feels younger and more compact.”
Instead of “the body feels off,” say:
“Please make the belly fuller and reduce the torso height slightly so the silhouette looks more balanced.”
The clearer the comment, the better the next version.
4) Approving Too Early Because the Sample Is “Close Enough”
Some approve a plush sample because they feel tired of revisions, under deadline pressure, or emotionally attached to the progress. But once the sample becomes the reference for production, “close enough” may create much bigger problems later.
How to avoid it:
Before approval, ask three questions:
- Is this sample really correct, not just acceptable?
- Would I still approve this if I saw 500 units made to this standard?
- Can this sample function as a future production reference?
If the answer is unclear, approval is probably premature.
5) Not Separating Must-Fix Problems from Optional Improvements
When send a long list of comments without priority, the factory may not know which changes matter most. This can create misalignment. A small surface detail may get polished first while a more important structure issue receives less attention.
How to avoid it:
Use a simple priority system:
| Priority Level | Meaning | Use For |
|---|---|---|
| A | Must change | Approval blocker |
| B | Recommended adjustment | Strongly preferred improvement |
| C | Optional refinement | Nice to improve if practical |
This small step often saves a lot of time.
6) Letting Too Many People Give Separate Feedback Directly
This is very common in brand, retail, licensing, and startup teams. One person comments on WhatsApp, another sends email notes, another marks up the photo, and a founder sends a voice message later. The factory receives multiple directions that may conflict.
How to avoid it:
Collect all internal opinions first. Then send one consolidated feedback file with aligned comments. A structured document with numbered notes and marked images is much easier to act on than scattered messages.
7) Ignoring the Commercial Side of the Sample
A plush toy may be technically accurate, but still not feel commercially strong. For example, it may match the artwork but feel weak on shelf, unclear in photos, or less premium than the target market requires.
How to avoid it:
Review the sample not only as a design translation, but also as a product. Ask:
- Will this look good in a product photo?
- Does it feel right for retail, gifting, licensing, or e-commerce?
- Would a customer understand its appeal quickly?
- Does it feel brand-right, not only technically correct?
8) Forgetting That Fabric Changes Shape
Some think that once the toy shape is confirmed, switching to the real fabric is just a visual upgrade. But real plush fabric can change roundness, seam visibility, softness, and body feel.
How to avoid it:
Treat the second correct-fabric sample as a critical review step, not as a repeated version of the first sample. The question at this stage is not “didn’t we already check this?” The real question is: does the approved shape still work in the actual material?
9) Expecting the First Sample to Be the Final Sales Sample
This is an expectations mistake. The first model sample is often meant to validate form, not to act like a finished showroom piece. When judge an early structural sample as if it should already look retail-ready, they may misread the purpose of the stage.
How to avoid it:
Judge each sample by its intended role. Early versions are for learning and confirmation. Final versions are for finish and approval.
10) Failing to Lock the “Must-Keep” Design Elements Early
Sometimes care deeply about certain features but do not state that clearly at the start. Later, when the sample comes back with a slightly different expression, proportion, or accessory treatment, they feel that the character identity has shifted too much.
How to avoid it:
At the beginning of the project, clearly list the must-keep points, such as:
- face expression
- color blocking
- head shape
- key accessory
- logo placement
- specific proportion rule
This helps the factory know what should never drift during development.
Common Sampling Mistakes Summary Table
| Common Mistake | What It Causes | Smarter Approach |
|---|---|---|
| Only one design angle provided | 3D misunderstanding | Send multi-angle views |
| Commenting on everything at every stage | Mixed revision logic | Match comments to the sample stage |
| Using vague feedback | Slow, unclear revisions | Give specific physical changes |
| Approving too early | Production risk later | Check approval readiness carefully |
| No priority system | Wrong issues get attention first | Rank A / B / C comments |
| Multiple people comment separately | Conflicting instructions | Send one aligned feedback file |
| Ignoring commercial feel | Product may be accurate but weak | Review for market-readiness too |
| Underestimating fabric effect | Shape changes later | Recheck structure in real fabric |
| Expecting early samples to look final | Wrong judgment standard | Judge each sample by stage purpose |
| Not defining must-keep elements | Identity drift | Lock key design priorities early |
Start your project with confidence!
Make a Sample of Your Plush Toys First?
Before mass production, a sample allows you to verify structure, materials, workmanship, and overall quality.
Our sampling process helps identify details early, reduce risks, and ensure your plush toys meet technical and quality expectations before moving forward.
Cooperating Brands Trusted
Trusted by brands for consistent plush manufacturing.
We work with brands across gift, retail, publishing, and promotional industries to develop plush toys with consistent quality and controlled production standards. From custom character plush to large-scale projects, our factory supports long-term cooperation built on trust, process transparency, and reliable delivery.


Selected Plush Toy Projects
Real-world examples from our OEM plush manufacturing work
Below is a small selection of plush toys we have developed and produced for our clients across different industries. Each project reflects our approach to material selection, pattern development, quality control, and production consistency. These examples demonstrate how we support brands with reliable plush manufacturing, from sample development to mass production.
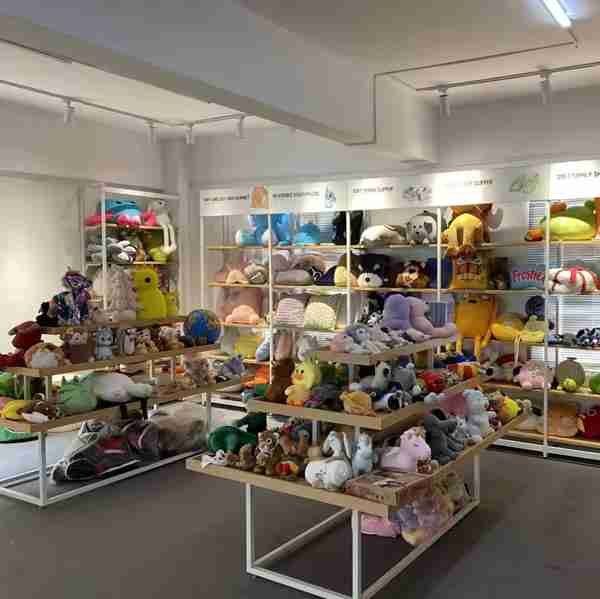
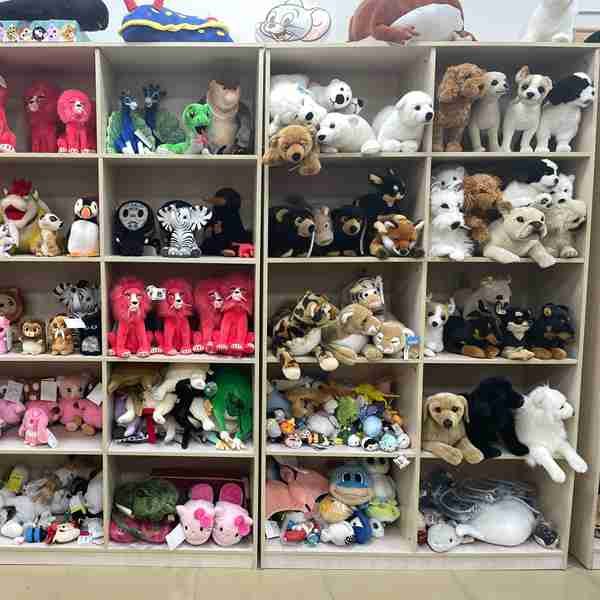
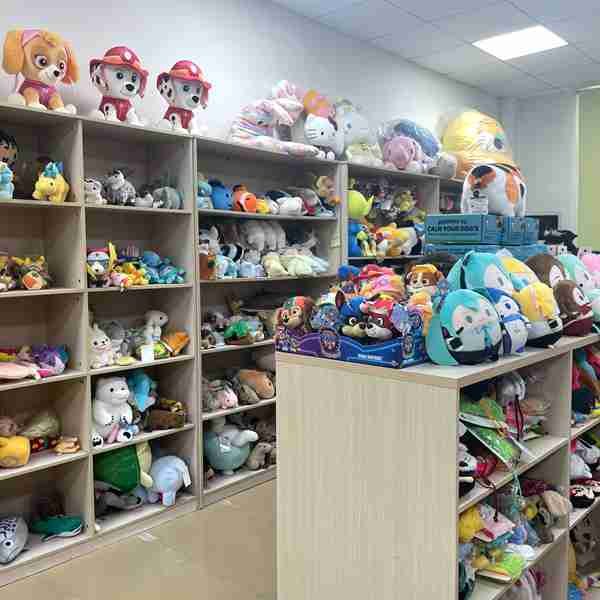

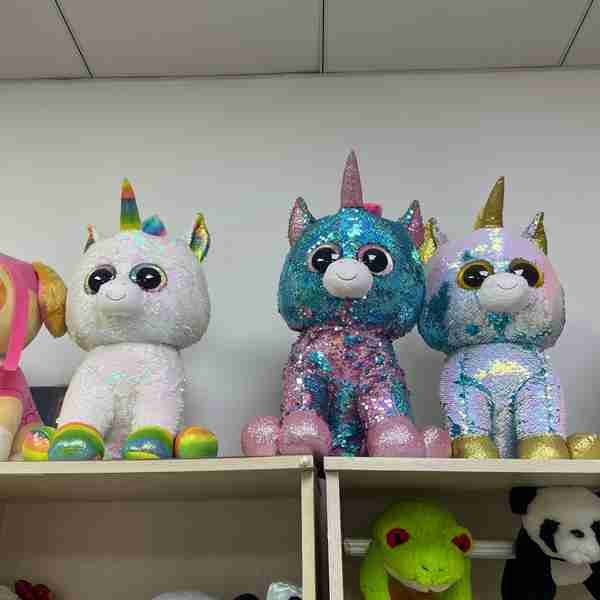
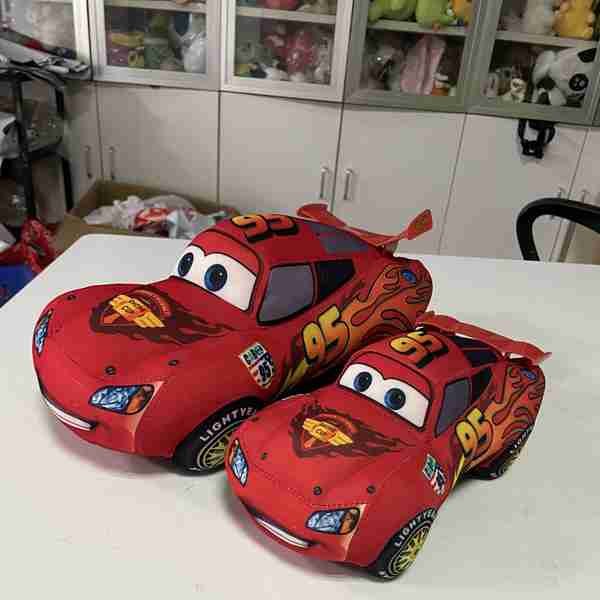
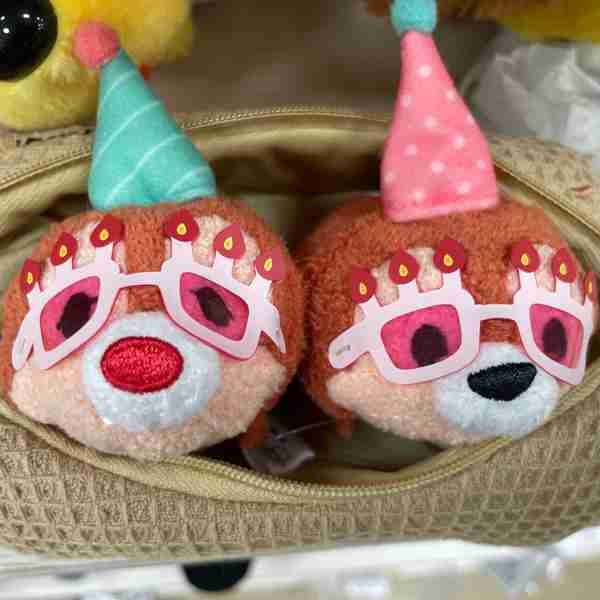
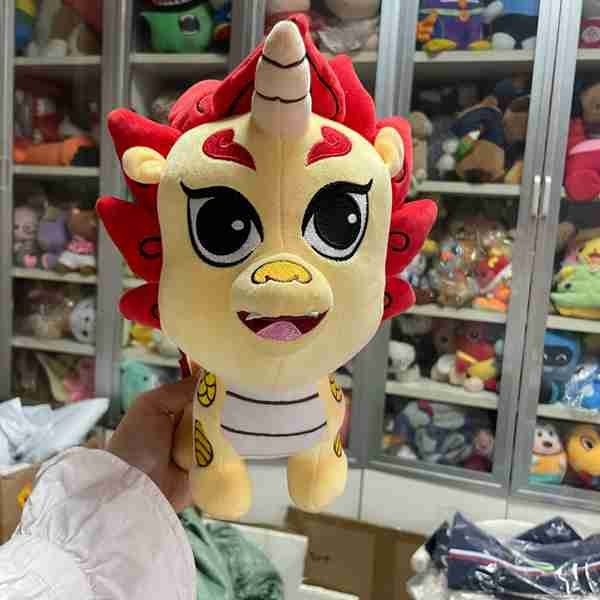
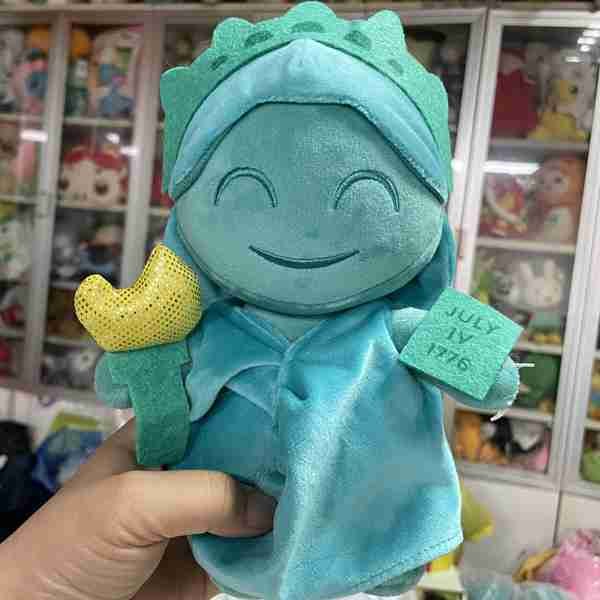
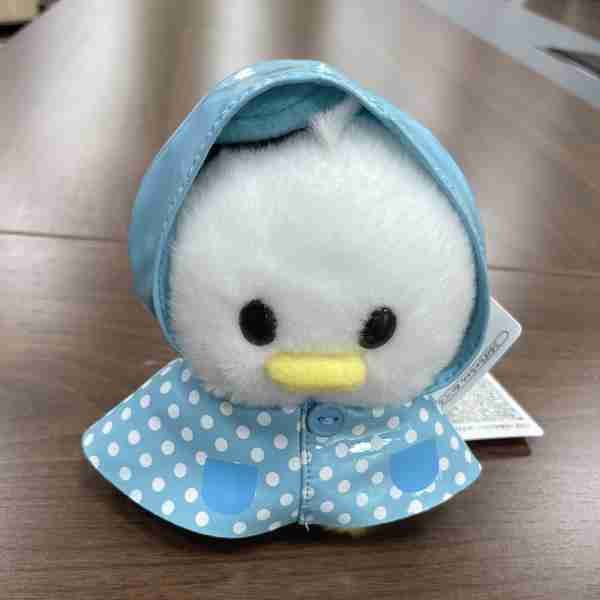
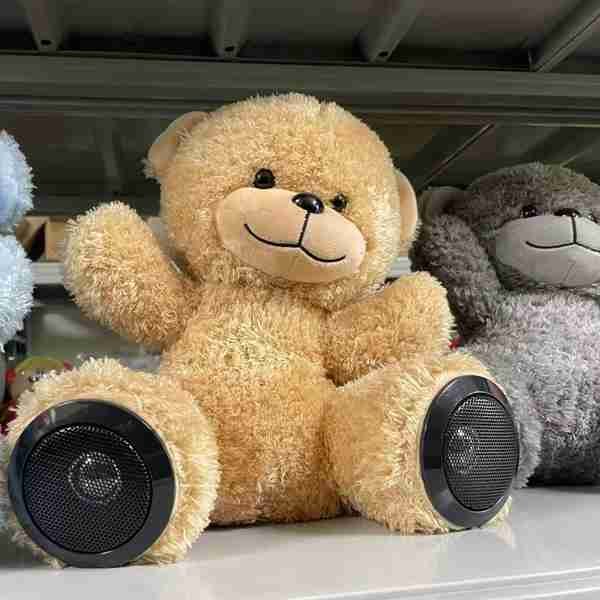
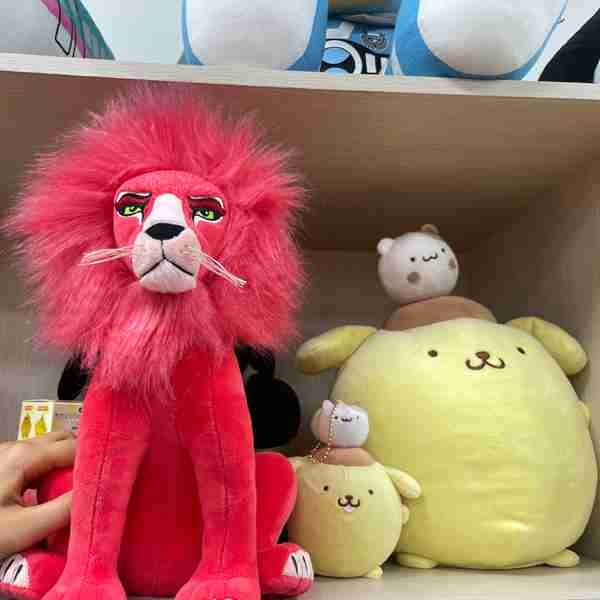


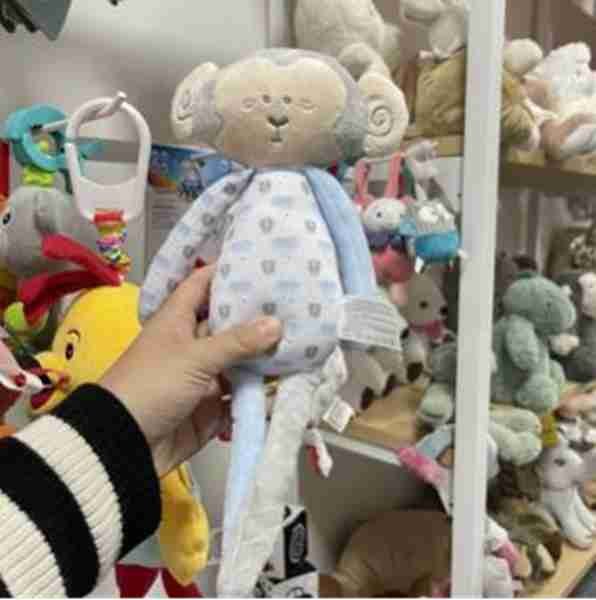
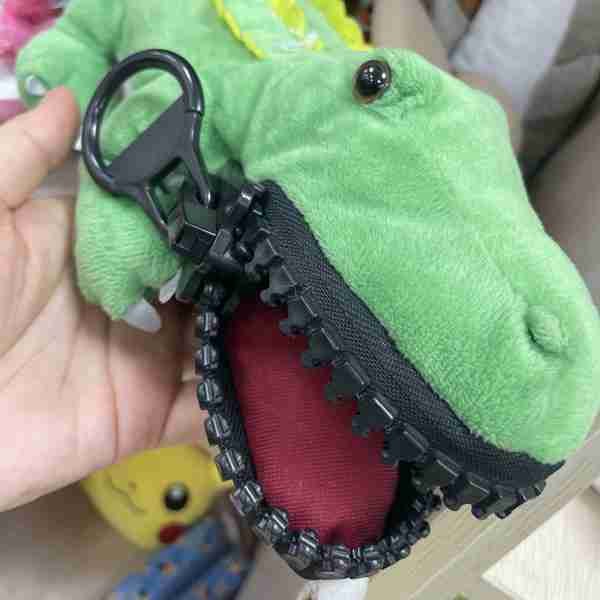
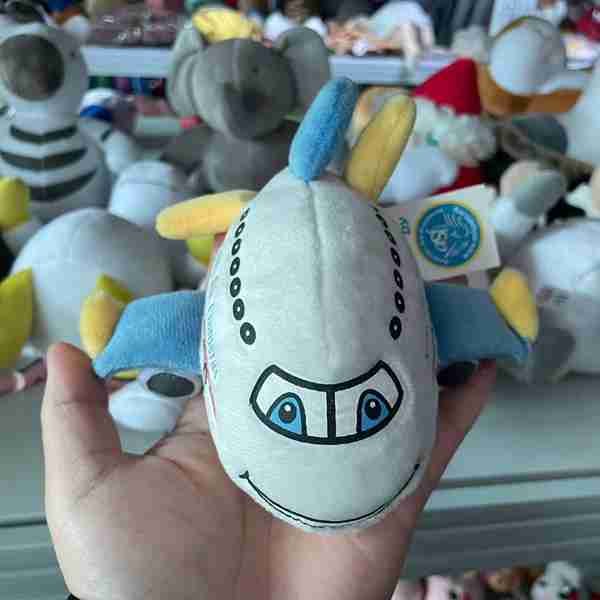
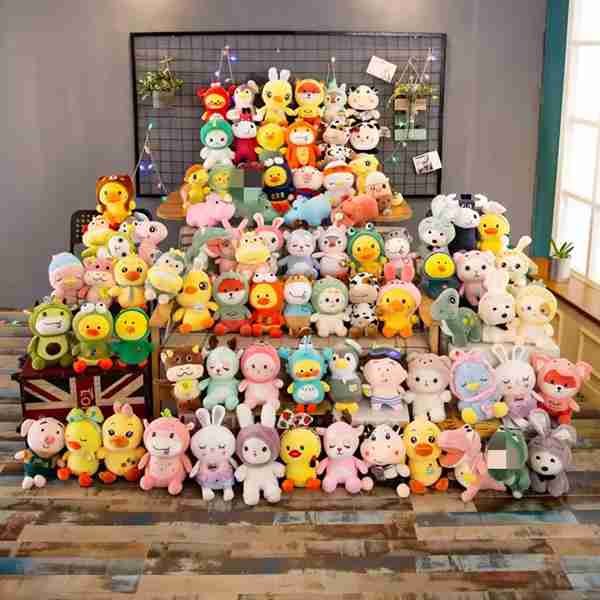
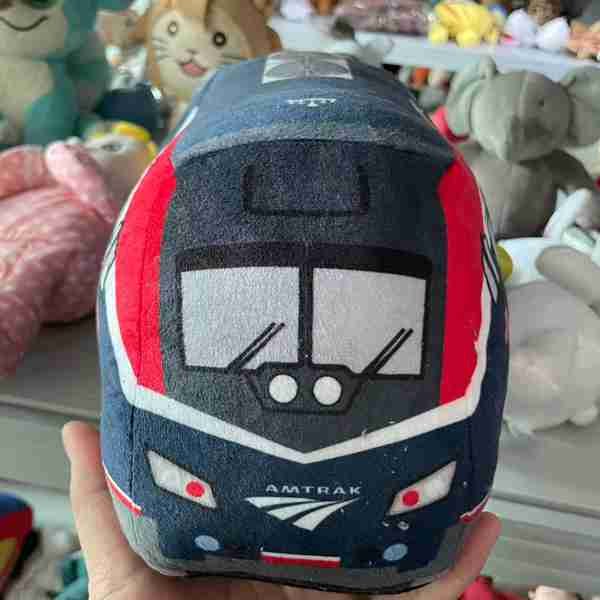
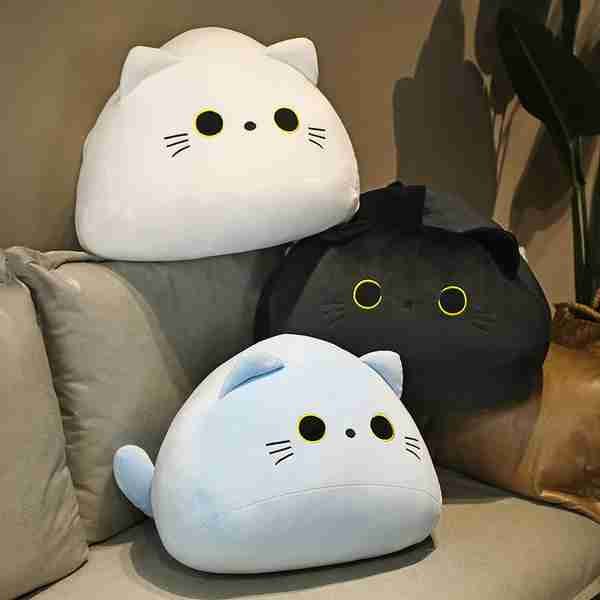
Why Choose Heyzizi for More Structured Plush Sample Development
A good plush supplier does not only make samples. A better one helps reduce confusion, improve approvals, and move toward bulk production with fewer surprises.
Many factories can make a plush sample. Far fewer can guide through a sample process in a way that feels clear, structured, commercially practical, and scalable into production. That difference matters. In real B2B sourcing, are not only choosing a sewing vendor. They are choosing how much uncertainty they want to carry through the project. At Heyzizi, the goal is not to impress with vague claims about being “professional.” The goal is to build a sample development path that makes the next decision easier at every step: what to send, what to confirm, what to revise, what to approve, and how to move from one approved sample into stable mass production. That approach is supported by your in-house organization, including an international sales team, product development team, product design team, and in-house pattern and sampling room, plus a production system built for repeatability rather than one-off sample making. This module explains why that matters to and why a more structured sample system can feel safer than a cheaper but less controlled path.
Why May Feel More Comfortable Starting with Heyzizi
| Concern | What Heyzizi Offers | Why It Helps |
|---|---|---|
| “Will they understand my design properly?” | In-house sales, development, design, and sampling roles | Fewer interpretation gaps |
| “Will the sample process feel organized?” | A staged workflow from shape to real fabric to finished sample | Easier approvals and clearer revisions |
| “Is this only a pretty sample, or can it support production?” | In-house pattern/sampling room + production-focused structure | Better sample-to-bulk transition |
| “Can they actually handle bigger programs later?” | 600+ staff, 18,000㎡ scale, multi-step manufacturing setup | Better long-term scalability |
| “Will quality be protected later?” | 80 QC inspectors and defined quality checkpoints | Stronger consistency confidence |
| “Am I too small for a factory like this?” | MOQ from 50 pieces | More accessible for smaller launches |
You Are Not Working with a Pure Middleman Model

One of the most meaningful differences care about is whether the supplier truly controls development or is simply forwarding requirements between parties. Heyzizi positions itself as a Guangdong-based B2B plush product development and manufacturing supplier operating with in-house teams and a scalable manufacturing setup, not as a simple order-forwarding trader. That matters because sample development becomes much easier to control when the people managing communication, design translation, pattern work, and manufacturability are connected to the actual making process.
For , this means fewer interpretation gaps between “what was requested” and “what was physically made.” It also means the sample process is more likely to follow a consistent internal logic instead of being fragmented across loosely connected parties.
The Team Structure Matches the Real Needs of Plush Sampling
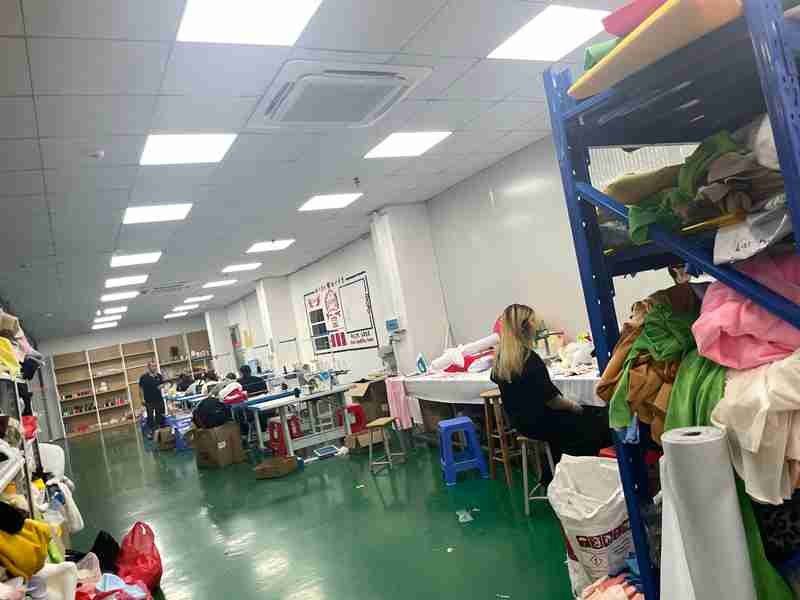
Many suppliers say they have “experienced workers,” but that does not tell how the project is actually managed. Heyzizi has a clearer internal structure: an international sales team for communication and RFQ handling, a product development team for manufacturability and process planning, a product design team for visual refinement and production file support, and an in-house pattern and sampling room to build prototypes that can later support bulk production stability.
That structure is especially relevant because your sample process is not a one-step action. It includes concept interpretation, shape confirmation, pattern development, material judgment, revision support, and approval management. gain confidence when they see that these needs are matched by dedicated roles rather than handled vaguely under one broad “factory” label.
The Sample Path Is Designed to Reduce Confusion, Not Just Produce an Object

A lot of suppliers talk as if the only question is whether they can physically sew the toy. But often struggle more with decision confusion than with physical sewing itself. They need to know what to send, what each sample stage is for, why the sample is changing, when the right time to approve is, and how to avoid paying for avoidable misunderstanding.
That is why your staged process is such a strong differentiator:
- Customer artwork and requirement intake
- 3D understanding / visual confirmation
- Paper pattern development
- First model sample to confirm shape
- Second correct-fabric sample to confirm structure in real material
- Final sample with embroidery, expression, and finish
The Factory Is Built for Repeatability, Not Just for “Making One Nice Sample”
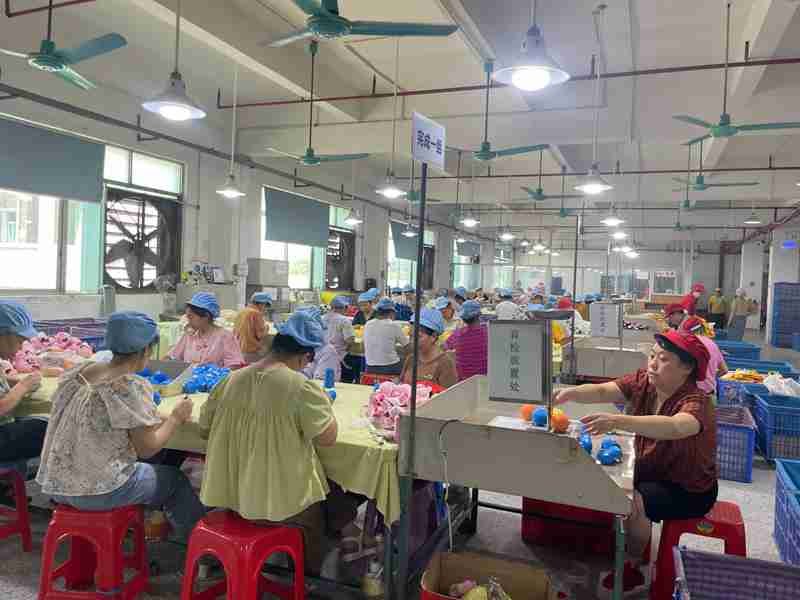
One of the most powerful trust points is that Heyzizi does not present the sample as a one-off craft object. Your in-house pattern and sampling room is described as helping build stable foundations for bulk production, not just isolated prototypes. That is exactly the right message for B2B .
may like a sample visually, but the deeper question is whether that sample can become a reliable production reference. That is why your broader manufacturing scale also matters here: 600+ employees, about 18,000㎡ of factory space, and equipment across cutting, sewing, embroidery, printing-related steps, inspection, packing, and warehousing support the idea that the approved sample can move into a more controlled production environment later.
This is especially persuasive for planning:
- repeat orders
- multi-SKU collections
- licensed programs
- retail launches
- plush lines with future extensions
- gift or promotional programs that may scale beyond the first run
Quality Control Is Presented as Part of the Sample-to-Bulk Logic
Another place where this page can sound more thoughtful than competitor pages is in how it talks about quality. Instead of just saying “we do QC,” Heyzizi can point to a more concrete capability base: 80 QC inspectors and testing focused on dimensions, stitching strength, accessory safety, surface appearance, and durability-related checkpoints, with the goal of reducing rework and keeping production aligned with approved samples.
That matters here because reading a sample page are often silently asking:
“If I spend time getting this sample right, will the factory actually protect that standard later?”
Your company information gives a stronger answer than generic sales language can.
A surprisingly strong trust point is that Heyzizi combines factory scale with a relatively accessible MOQ of 50 pieces.
This is powerful because many startups and emerging brands assume that only very large can get serious development support. Your page can directly counter that assumption.
Product Range Flexibility Helps Think Beyond One Plush Toy
Heyzizi also has a meaningful advantage in product flexibility. The company positions its capability as combining plush fabrics with zippers, webbings, buckles, fillings, linings, hangtags, labels, and other accessories to create not only classic plush toys but also more functional and channel-specific plush products. That supports a stronger sample page because it tells that your development logic is not narrow. You are thinking in terms of how plush products work across:
- keychains
- plush bags
- pillows
- gift items
- storage items
- mascot merchandise
- retail collections
- event products
- line extensions
This matters because many do not want only one isolated sample. They want a development partner who can help turn one approved sample into a broader range later.
FAQs for Custom Plush Sample Development
Can you make a custom plush sample if I only have a sketch or rough idea?
Yes — a rough sketch, reference image, or simple character concept is usually enough to start the custom plush sample process, as long as the key idea is clear. Many assume they must prepare a perfect technical file before contacting a plush factory, but that is not how most real projects begin. In practice, many custom plush developments start from a hand sketch, front-view drawing, inspiration board, reference toy image, or simple character artwork. What matters most is whether the factory can understand the product’s main direction: shape, size, style, expression, colors, accessories, and intended use.
At Heyzizi, the early sample stages are designed to help move from idea → clearer visual direction → buildable plush structure. That is exactly why we separate the process into design review, 3D concept understanding, paper pattern development, first model sample, second correct-fabric sample, and final finished sample. If a customer only has a rough drawing, we usually recommend also sending any available support information, such as target size, similar plush references, desired fabric feel, key facial details, and which design elements must stay unchanged.
The more complete the input, the faster and more accurately the sample can move. But should not wait until everything is “perfect” before starting. A good plush development process is meant to help shape the idea, not just receive finished files. For many brands, startups, creators, and mascot , this is one of the most useful parts of working with an experienced plush sample team.
What files or information should I send first for a plush sample quotation and evaluation?
The best starting package is a mix of visual design files and basic product notes, because a plush factory needs both appearance information and production direction to evaluate the project properly. If wants a more accurate plush sample assessment, it is better to send not only the artwork, but also a short spec summary. In most cases, the most useful materials include: front / side / back views, target size, color references, key accessories, fabric preference if known, facial detail notes, logo artwork if needed, and a short note about the intended market or use.
This matters because a plush toy is a 3D sewn product, not a flat printed product. A front view may explain the character style, but it may not fully explain head depth, side profile, body thickness, tail direction, or how clothing should sit on the plush body. Even simple added notes can greatly reduce misunderstanding. If does not have all of this, that is still workable. But the more clearly the “must-keep” points are identified, the better the development path becomes.
A good rule is this: send enough information so the factory can answer three questions — what should this plush look like, what parts matter most, and what kind of product is it meant to become? That helps with both quotation logic and sample planning. It also reduces avoidable revisions later.
Why do you make a first model sample before using the final fabric?
Because the first model sample is meant to confirm the plush toy’s shape, proportion, and structure before the real outer material is added, which reduces expensive mistakes later. This is one of the most practical steps in professional plush development, but it is also one of the least explained. Many expect the very first sample to already use final fabric and final details. However, if the toy’s head shape, body ratio, side depth, limb position, sitting posture, or accessory balance is not yet right, adding the exact fabric too early often creates more confusion, not less.
The first model sample allows both and factory to focus on the most critical early question: does the plush form actually work in real 3D? That helps separate shape issues from surface issues. Once the shape is approved, the next stage becomes much easier and more accurate.
This step is especially useful for projects with stylized proportions, accessories, clothing, IP characters, or no previous plush reference. It is also -friendly because it makes the review process cleaner. Instead of commenting on everything at once, can first confirm silhouette and volume, then move on to material behavior and final details. In short, the first model sample is not an extra complication. It is a way to make the whole project more controlled.
Does the sample fee include both the first model sample and the second correct-fabric sample?
Yes — in our standard sample development logic, the sample fee is charged once, and it already covers the first model sample and the second correct-fabric sample within the normal structured development path. This is an important point for because one of the biggest concerns in custom plush development is not just the cost itself, but whether the charging method is clear. Many have had previous experiences where a factory quoted one sample fee at the start, then added new charges at each step without explaining the reason clearly.
Our approach is different. We treat sampling as a guided development process, not as unrelated paid events. The first model sample checks whether the plush shape is right. The second correct-fabric sample checks whether that approved shape still works when the actual material is used. These two stages answer different questions, but both are necessary for reducing risk before the final sample is completed.
This structure helps in two ways. First, it improves transparency. Second, it makes the process feel more trustworthy and easier to approve internally. It also shows that the purpose of the sample fee is to support a more accurate result, not to create repeated billing for every checkpoint.
How long does a custom plush sample usually take from development to delivery?
In most cases, custom plush sample making takes about 5–14 days, and sample shipping usually takes about 3–9 days, depending on the design complexity and destination country. This is the most practical timeline range for to use when planning a new plush development project. The reason there is a range, not one fixed number, is simple: not all plush samples require the same amount of structural work, material coordination, embroidery effort, or internal approval.
A simple plush style with a clear sketch, embroidered face, and few accessories usually moves faster. A more complex project with layered clothing, multiple accessories, special fabrics, licensed character requirements, or several internal approvers usually takes longer. Shipping time is also separate from sample making time. A factory may complete the sample quickly, but international transit still depends on the destination, courier route, customs handling, and season.
For , the key is not only to ask “how fast can it be done?” but also “what affects the speed?” The best way to keep sample timing efficient is to provide clearer design files, confirm priorities early, consolidate internal comments, and review each sample stage promptly. A structured process often saves more total time than a rushed process that creates extra revisions later
Can I approve a plush sample by photo or video before receiving the physical sample?
Yes — photo and video review can be very useful during plush sampling, especially for international , but final approval should still depend on the project type and what exactly is being confirmed. In real B2B development, photo and video support often helps move faster between stages. For example, may review a first model sample by photo to comment on silhouette, side depth, posture, or accessory balance before waiting for physical delivery. That can save valuable time.
However, not every decision is equally safe to make through images alone. Photos are helpful for checking shape direction, embroidery placement, visible details, and general presentation, but they cannot fully replace in-hand judgment for softness, stuffing feel, seam texture, material thickness, tactile quality, or small surface differences. Video can improve understanding, but it still has limits.
A practical approach is to use photo or video review for faster intermediate confirmation, while treating physical sample receipt as more important when needs to judge premium feel, texture, softness, final handfeel, or production-reference quality. This is especially relevant for retail plush, gift plush, collector plush, and brand-sensitive projects.
What happens if the first plush sample is not right?
If the first plush sample is not right, that is usually not a failure — it is part of the normal development process, and the next step depends on what kind of problem was found. This is one of the most important mindset shifts for . A first sample, especially a model sample, is not always expected to be the final approval version. Its main purpose is to reveal whether the plush shape, proportion, and structure are moving in the correct direction.
The key question is not simply “is the first sample perfect?” but rather “what exactly is still wrong, and at which stage should it be corrected?” If the problem is mainly about silhouette, head shape, body ratio, or posture, then the feedback should guide structural revision. If the issue appears after moving into real fabric, then the second correct-fabric stage may be where the adjustment happens. If the body is already correct but the face or embroidery still feels off, that belongs to the final sample refinement stage.
This staged logic helps avoid panic and helps factories avoid blind revisions. A strong sample workflow does not assume the first version must already solve everything. Instead, it gives each version a clear job and makes each revision more meaningful.
Why is the second correct-fabric sample necessary if the shape was already approved?
Because a plush toy’s approved shape can still change once the real fabric is used, and the second correct-fabric sample is the stage that checks exactly that risk. This is one of the most misunderstood parts of plush development. Many think that once the body shape is approved, switching to the real outer material is only a visual improvement. In fact, plush fabric directly affects roundness, softness, seam visibility, surface thickness, volume feel, and detail clarity.
For example, a shape that looks balanced in an early model sample may appear more bulky, more flat, softer, or less defined after the actual fabric is applied. A longer pile may soften edges. A denser fabric may create more body. A different handfeel may change how premium or playful the toy feels. That is why the second sample is not just a repeated version. It answers a new question: does the approved shape still work in the correct material?
For , this step reduces risk before embroidery, face details, and final finishing are added. It is much easier to make structural refinements at this point than after the sample already looks fully completed. In other words, the second correct-fabric sample protects the project from a very common problem: approving the right shape in the wrong material context.
How many sample revisions are usually normal for a custom plush project?
Most custom plush projects do not become final in one single round, and one to a few focused revision steps is normal depending on the design complexity and how complete the starting information is. sometimes worry that if the first sample is not approved immediately, the project is already going badly. In reality, custom plush is a development process, not an instant output. The real question is not how many revisions happen, but whether each revision is becoming more precise and more useful.
A simpler plush with clear artwork, basic embroidery, and few accessories may move through the process very quickly. A more complex plush with special proportions, layered clothing, multiple materials, accessories, licensed-character accuracy needs, or several internal approvers will usually require more discussion and refinement. What matters most is that revision comments are structured by stage: shape first, then real-fabric behavior, then final face and finishing.
A healthy revision process feels more controlled over time, not more chaotic. If each new version helps narrow the gap between concept and approval, then the process is working correctly. For , the goal should not be “zero revision.” The smarter goal is clear revision logic, because that is what leads to a more accurate final plush sample and a safer production reference later.
Can you develop plush samples for complex styles with clothes, accessories, or multiple materials?
Yes — complex plush styles with clothing, accessories, mixed materials, or stronger character requirements can absolutely be developed, but they benefit even more from a staged sample process. In fact, the more complex the plush is, the less suitable it is for a one-step “just make the final sample” approach. When a design includes separate outfits, bags, hats, scarves, wings, tails, layered parts, contrast fabrics, appliqué areas, or special trims, more technical decisions need to be confirmed along the way.
That is exactly why the process should be separated into shape confirmation, correct-fabric confirmation, and final detail completion. If a complex plush goes straight into a fully decorated first sample, may end up reviewing too many variables at once: body ratio, outfit fit, accessory position, fabric thickness, embroidery clarity, and overall presentation. That usually makes feedback less clear.
A more structured path helps both and factory reduce risk. The body can be corrected before the outfit is finalized. The correct material can be tested before final embroidery is applied. Accessories can be judged not only for appearance, but also for balance and proportion. For complex plush projects, this kind of process is often not slower in the end — it is simply more controlled.
Can the approved sample really be used as the reference for bulk production later?
Yes — a properly approved plush sample should become the key reference for later bulk production, quality alignment, and consistency control. This is one of the most important reasons should take sample approval seriously. The sample is not only for visual confirmation. Once approved, it should help define what the factory is aiming to repeat in production: shape, proportion, material feel, facial placement, embroidery look, accessory position, and overall finish level.
A good approved sample supports later work in several ways. It gives the production team a clearer target. It gives the QC team a visual and structural reference to inspect against. It gives a standard for discussing consistency. And it reduces the risk of “sample-to-production gap,” where the approved sample looks good but the bulk order begins to drift.
That is why should not approve a sample only because it feels “close enough.” A stronger question is: if future production units follow this exact standard, would I still be satisfied? If the answer is yes, the sample is doing its job properly. In serious B2B plush development, sample approval is not the end of the process. It is the beginning of production control.
What is the best way to make the plush sample process smoother and faster?
The best way to make plush sampling smoother is not to rush blindly, but to improve clarity at the points that affect revisions the most: design input, feedback structure, decision priority, and response speed. often assume that “faster sampling” means pressing the factory harder. But in many projects, the biggest delays come from unclear artwork, mixed feedback, missing priorities, or slow internal review.
A smoother plush sample process usually comes from a few simple but high-impact habits:
- send clearer multi-angle references
- state the must-keep design elements early
- separate comments by sample stage
- rank feedback by priority
- consolidate internal team comments before replying
- review photos or samples promptly
- tell the factory early if there is a launch or meeting deadline
These actions improve more than speed. They improve sample quality, because the factory spends less time guessing and more time refining the right things. In other words, the fastest useful process is usually the clearest one. That is why structured plush sampling often performs better than a rushed but poorly managed workflow.
Custom plush sample FAQs
Planning a custom plush sample usually raises practical questions about files, revisions, timing, approval, and what happens before bulk production. Below are some of the questions ask most often when starting a new plush sample project.
