IP / Character Plush Development: How to Translate 2D to 3D, Control Face Accuracy, and Approve the
You can spot the brands that win with character plush in about five seconds—because their plush looks “on-model” the moment you see it. The face reads correctly from across a room. The proportions feel intentional. The expression matches the IP, not “close enough.” And most importantly, it stays that way when the order scales from a prototype to thousands of units. That consistency isn’t luck. It’s a workflow.
Here’s the uncomfortable truth most first-time IP plush programs learn the hard way: a character drawing is not a manufacturing instruction. Plush is soft sculpture. Fabric stretches, pile changes expression, seams pull volume in unexpected directions, and embroidery can shift a millimeter and suddenly your character looks like a cousin instead of the character. Add licensing approvals, tight launch calendars, and retail requirements, and a plush project can either become a smooth repeatable system—or a slow loop of revisions and surprise costs.
To translate 2D character artwork into accurate 3D plush, you need clear input files, smart seam planning, and a locked “Golden Standard” sample that defines measurements, face placement, materials, and tolerances. Face accuracy is controlled through fabric selection, embroidery/printing methods, placement guides, and QC checkpoints that reference the golden sample. For licensed IP, a risk checklist and approval workflow reduce delays and protect brand consistency from sample to bulk.
In this guide, we’ll walk through the exact decisions teams make—what to send, which method fits your face art, how long sampling really takes, and why the “golden standard” is the difference between a one-off plush and a scalable product line. (Heyzizi is a China-based plush manufacturer with 20+ years of development and production experience, supporting custom, private label, and OEM/ODM programs with low MOQ, fast sampling, free design support, and practical QC discipline.)
What is IP/character plush development, and why does “2D to 3D translation” fail so often?
IP plush development fails when teams treat art like a build spec. Plush needs 3D volume rules: seam placement, fabric behavior, pile direction, and tolerances. Face accuracy is usually lost through unclear references, missing turnaround views, and unrealistic micro-details. The fix is to define “on-model” in measurable terms (dimensions + photo angles), simplify details that don’t translate, and align all stakeholders on what “approved” means before sampling.
IP/character plush development is a structured process of turning a character’s identity—shape, expression, and recognizable features—into a manufacturable soft product that can be repeated in bulk. It’s not just “making a toy.” It’s building a repeatable system that protects the character’s look across sampling, production, packaging, shipping, and reorders.
So why does “2D to 3D translation” fail so often?
1) People confuse “recognizable” with “manufacturable.”
A character can be recognizable on a screen while still being extremely hard to reproduce in plush. Thin lines, sharp corners, tiny gradients, and complex facial shading do not naturally map to fabric, stuffing, and stitches. Plush is built from panels; panels create seams; seams create tension; tension changes expression.
2) Most programs don’t define face accuracy in measurable terms.
Teams say “make the face accurate,” but don’t define what accuracy means. Is it the eye spacing in millimeters? The head width-to-height ratio? The smile curve? The cheek volume? Without measurable anchors, every review becomes a subjective opinion loop, and each sample round changes goals midstream.
A simple rule helps: define face accuracy using three layers:
- Silhouette accuracy: does the outline read as the character at a glance?
- Proportion accuracy: are key ratios consistent (head/body, eye spacing, mouth position)?
- Expression accuracy: do the eyes and mouth create the same emotional tone?
3) Missing inputs create “guesswork seams.”
If the factory only has one front-view illustration, pattern makers must invent side volume, back head shape, and seam paths. That invention is where characters drift. A plush head can’t be designed responsibly without understanding how the character looks from multiple angles and what features are “must keep” vs “flexible.”
4) Not all character artwork should be made into plush without redesign.
Here’s the honest answer to “Can any character artwork be made into plush?”
Almost any character can become a plush-like product, but not every character can become a plush without design translation. Some art styles need changes to survive plush physics:
- Extremely thin limbs may need internal structure or thicker shapes.
- Complex facial shading may need simplified color blocks.
- Tiny facial features may need scale adjustments so embroidery/printing stays crisp.
This is not “ruining the character.” It’s protecting recognizability in a 3D medium.
5) Stakeholder approval paths are unclear.
In licensed IP, you may have multiple decision-makers: brand team, licensor, distributor, retailer. When “who approves what” is unclear, samples bounce between people with different goals. The solution is a defined approval chain and clear “must-fix vs nice-to-have” priorities.
Practical Why IP plush fails (and how to prevent it)
| Failure point | What it looks like | Prevention method |
|---|---|---|
| Unclear references | “Face feels off” feedback | Turnaround sheet + expression set |
| Micro-details | Details disappear or distort | Simplify into manufacturable shapes |
| Fabric mismatch | Face looks blurry | Choose fabric pile that supports expression |
| No measurable targets | Endless revisions | Lock ratios + key measurements |
| Licensing confusion | Approval delays | Set approval owner + timeline |
If your goal is a plush that stays “on-model” in bulk, the first step is not sewing—it’s defining what “on-model” means in a way a production team can repeat.
Which files and references does a plush manufacturer need to quote and prototype accurately?
To quote and prototype accurately, a factory needs a character tech pack: target size, tolerances, fabric type, face method (embroidery/print), color references, accessories, labeling/packaging needs, and approval contacts. The “real truth” reference must be declared—2D art, 3D model, or physical sample—so the team isn’t guessing. For licensed IP, confirm usage rights, approval steps, territories, and audit rules before paying for sampling.
If you want fewer surprises, treat your first message to a factory like a structured brief, not a casual inquiry. Quoting plush is not only “how many units.” It’s a calculation based on complexity, materials, processes, and risk controls.
What should be in a character tech pack?
A good tech pack can be simple, but it must be complete. At minimum, include:
- Target size (height/width/depth) and whether size is measured stuffed or relaxed
- Tolerance expectations (± mm range for key points like head width, eye spacing)
- 2D artwork package (front/side/back, plus expressions if relevant)
- Color references (Pantone/TCX if available, or clear physical swatches)
- Fabric direction (pile direction notes for fur and face zones)
- Face method preference: embroidery vs printing vs mixed
- Accessories (clothes, plastic parts, keychains, hangtags)
- Labeling and packaging (UPC/EAN placement, hangtag style, polybag, retail box)
- Compliance and market (US/EU/UK target, age grade if known)
- Timeline: desired sample date and launch window
- Approval contacts: who signs off internally and (if licensed) who represents the licensor
Which reference is the “real truth”?
This matters more than people expect. You must declare what has authority when there’s a conflict:
- If the 2D art is the truth, the plush must match the art even if it’s hard to manufacture.
- If a 3D model is the truth, proportions should match the model even if the 2D art differs.
- If a physical sample is the truth, the sample becomes the visual master and overrides small art inconsistencies.
Programs get stuck when each reviewer uses a different “truth.” Pick one.
How to avoid price surprises
Here’s where surprises usually come from:
- Face method changes (switching from print to embroidery changes setup and labor)
- Embroidery density increases (more stitches, more time)
- Accessories added late (clothes, keychains, special tags)
- Fabric MOQ constraints (special fur colors may require minimum yardage)
- Retail packaging added after sampling (boxes, trays raise volume and assembly steps)
- Testing/compliance requirements introduced late
A practical approach is to request pricing as three tiers:
- Baseline (simple packaging, standard materials)
- Brand-ready (recommended face method + stable material choices)
- Retail-ready (hangtags, barcodes, boxes if needed)
Licensed IP program risk checklist (confirm before paying for sampling)
This is the “money-saving” section that prevents painful rework later.
Risk Checklist for Licensed IP Plush Programs
- Do you have the right to manufacture this character in this product category?
- What territories are allowed (US/EU/UK/Global)?
- What approval steps are required (art, sample, pre-production, packaging)?
- Who is the approver (name/role), and what is their typical response time?
- Are there audit rules (factory audits, material declarations, production records)?
- Are there restricted materials, logo placements, or mandatory legal text?
- What happens if approvals take longer—do you have a revised launch plan?
If you can answer those questions before sampling, your timeline and cost become much more predictable.
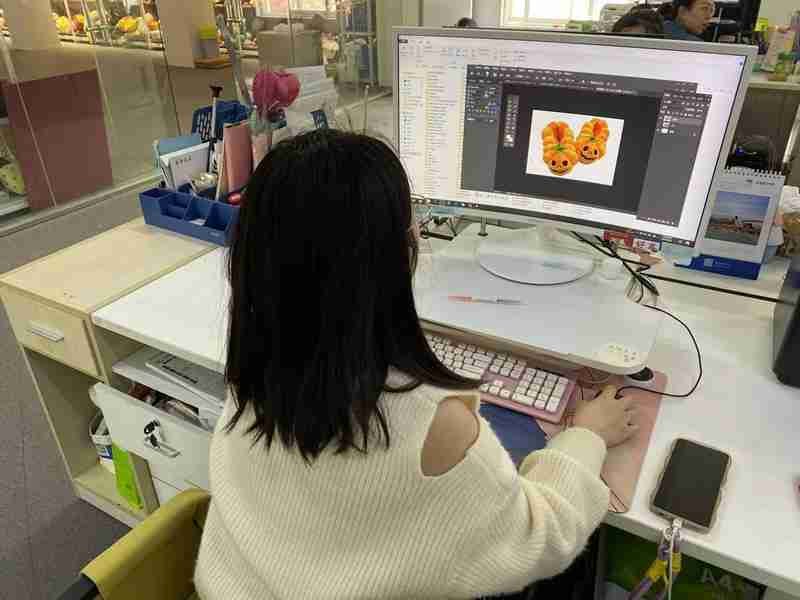
How do you translate 2D art into a manufacturable 3D plush (pattern, seams, and structure)?
2D-to-3D plush translation is solved through pattern engineering: converting a character’s volumes into fabric panels with seams placed to protect the face and maintain shape. The best seam plan supports the character’s silhouette, hides distortion in low-visibility zones, and uses gussets/darts/multi-panels for complex heads. Most “face drift” comes from seam tension near eyes and mouth—so seam placement and stuffing strategy matter as much as artwork.
This is where plush becomes “soft engineering.” Pattern making is the bridge between your artwork and a product that can be sewn repeatedly with predictable results.
How pattern making converts 3D surfaces into 2D fabric pieces
Plush heads and bodies are 3D volumes. Fabric panels are 2D. The pattern maker’s job is to decide:
- Where seams go
- How many panels are used
- How tension distributes when the plush is stuffed
- Which areas must stay smooth (face zone) and which can hold seams (back of head)
More panels generally allow more accurate shapes—but also increase labor and risk. Fewer panels reduce cost but can flatten features.
Which seam placements protect the face and reduce distortion?
If you want high face accuracy, you must protect the eye zone and mouth zone from seam tension. Common best practices include:
- Avoid running high-tension seams directly through the center of embroidered eyes.
- Use panel shapes that support cheek volume without pulling the mouth upward.
- Place seams in areas where fur can hide transitions (back of head, under chin) when suitable.
Even with perfect embroidery, a seam that pulls at the wrong angle can make eyes appear “angry,” “sad,” or misaligned. That’s why factories that handle IP well talk about face geometry, not just decoration.
Complex shapes: gussets vs darts vs multi-panel heads
- Gussets help build rounded volumes and maintain silhouette
- Darts can create shaping in specific areas but may show on short pile fabrics
- Multi-panel heads offer precision for stylized characters (cheeks, muzzle, jawline)
The “best” method depends on your character style and your acceptable unit cost. A premium licensed plush might justify more panels. A souvenir program with seasonal volume might choose a simplified structure to support fast replenishment.
When you must simplify (and how to simplify without losing the character)
Some details rarely survive plush without cost explosion:
- Micro-gradients and tiny shading
- Ultra-thin outlines
- Sharp corners smaller than seam allowance reality
- Small facial marks that disappear into pile
A smart simplification doesn’t delete identity. It translates identity:
- Replace gradients with 2–3 clean color blocks
- Slightly enlarge critical face marks so they read after sewing
- Move tiny markings to embroidery/print zones with stable placement jigs
“Art detail” vs “Plush translation”
| Art feature | Plush risk | Better plush translation |
|---|---|---|
| Micro shading | Lost in pile | 2–3 color blocks |
| Thin lines | Stitch breaks | Slightly thicker lines |
| Sharp corners | Distortion | Rounded geometry |
| Tiny face marks | Disappear | Scale up + lock placement |
If you’re building IP plush, the goal isn’t to reproduce every pixel. It’s to reproduce what people recognize first: silhouette, proportions, and expression.
Embroidery vs printing for character faces: which is best for accuracy, cost, and durability?
Embroidery is best for bold lines, clean color blocks, and premium durability, but it can feel stiffer and may lose micro-detail. Printing is best for gradients and tiny features with softer handfeel, but it depends on fabric surface stability and can fade if poorly executed. For “on-model” faces, many brands use mixed techniques and control bulk consistency by locking stitch/print files, placement guides, and QC photo standards.
This decision is where many brands accidentally spend money in the wrong place. The goal isn’t “embroidery is premium” or “printing is cheaper.” The goal is face accuracy that survives bulk production.
What embroidery does well
Embroidery is strong when your face art relies on:
- Clear outlines
- Solid color blocks
- Simple shapes that must look crisp
- Durability under handling
Embroidery also gives a textured, tactile look associate with “quality.” But it has limits:
- Very small details can become messy
- High stitch density can stiffen the face panel
- If placement shifts slightly, expression changes dramatically
What printing does well
Printing is excellent when your character face uses:
- Gradients
- Tiny marks
- Soft shading
- Micro features that embroidery can’t resolve cleanly
Printing can also keep the face feeling softer—important for certain brand positioning. Risks include:
- Printing on unstable pile can blur edges
- Inconsistent color if the process is not tightly controlled
- Wear/fade issues if not chosen correctly for the intended use
Mixed techniques: when embroidery + printing together wins
Many “best-in-class” IP plush faces are mixed:
- Print for gradients and fine shading
- Embroidery for outline, highlights, and key edges
- Appliqué for certain shapes when you need crisp fabric boundaries
Mixed faces can be more “on-model” than either method alone—if managed correctly.
How to prevent “face drift” between sample and bulk
This is discipline matters. Drift typically happens because:
- The embroidery file is re-generated or edited without control
- Placement is done by eye instead of a positioning guide
- A different operator “interprets” alignment during production
To prevent drift:
- Lock the stitch file or print artwork file and treat it as controlled documentation
- Create a placement map with measurable distances (e.g., eye center to seam reference points)
- Require QC photos from fixed angles (front/side, consistent lighting)
- Define acceptable tolerances (eye spacing ± mm)
Embroidery vs Printing vs Mixed
| Method | Best for | Main risk | Cost driver |
|---|---|---|---|
| Embroidery | Bold lines, durability | Stiffness, micro-detail loss | Stitch count + placement steps |
| Printing | Gradients, tiny features | Blur on pile, color variation | Print setup + surface control |
| Mixed | Highest “on-model” potential | More steps to manage | Multi-process labor + QC |
If you tell Heyzizi your face art style (line-based vs gradient-based), your fabric plan (short pile vs long pile), and your target market, we can recommend a face method that protects accuracy, not just cost.
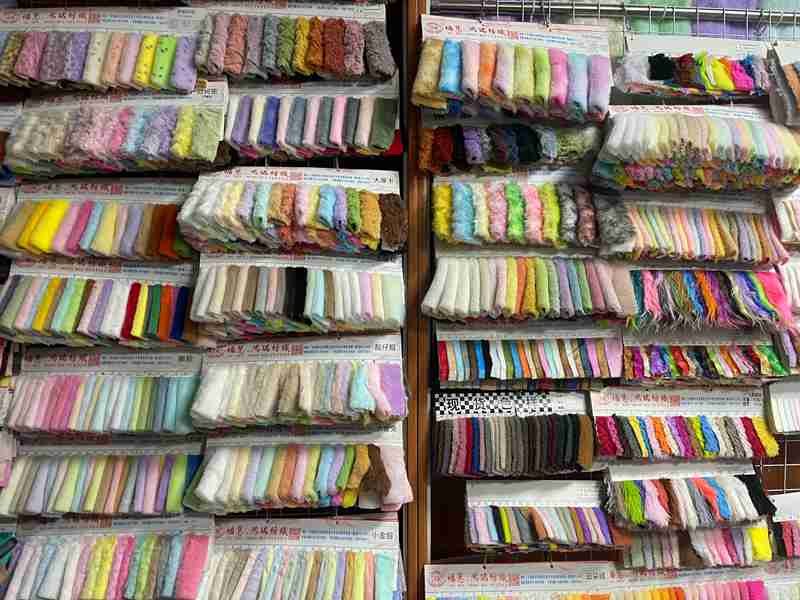
What materials and fur types change face accuracy the most and why do they behave differently?
Fabric choice can make or break face accuracy. Short pile plush supports crisp eyes and mouth details, while long pile fur hides seams but can blur expression. Stretch direction and stuffing density influence how a face panel holds shape. To reduce pilling and roughness, align fabric quality with expected handling, choose stable pile structures, and set brushing/packing rules. For souvenir programs, prioritize fabrics that stay clean-looking after travel handling.
Face accuracy isn’t only about embroidery or printing. It’s about what the face is placed on.
Short pile vs long pile: the trade-off
- Short pile: better detail visibility, cleaner printed edges, sharper embroidery, easier to keep expression consistent.
- Long pile: hides seams and can feel premium, but it can swallow small features and blur outlines—especially in photos, which matters for eCommerce.
If your character’s identity depends on precise eyes and mouth, short pile in the face zone is often the safest. If the character’s identity depends on a fluffy silhouette, long pile can work—but you may need to enlarge face features or use contrasting techniques to keep the expression readable.
Fabric stretch direction and “face pull”
Every fabric has a stretch behavior. If the face panel stretches more in one direction, stuffing tension can pull eyes upward, widen the mouth, or distort spacing. That’s why serious factories note grain direction and keep it consistent between sample and bulk.
Handfeel targets without losing shape
Many brands want a soft, squeezable plush that still holds character shape. That balance is built by:
- Choosing a fabric that feels soft but has stable backing
- Setting stuffing density targets (too soft can collapse face geometry)
- Controlling seam allowances and reinforcement where needed (especially for heads)
What causes pilling and roughness
Pilling often comes from low-grade fiber blends, high friction handling, and poor brushing/finishing. Roughness can come from fabric finishing issues or pile damage during packing. Prevention is usually simpler than expect:
- Choose fabric with stable pile and proven performance for the intended use
- Avoid overly aggressive compression packing for long pile styles
- Use brushing/finishing steps to align pile direction before packing
- Define packing rules so faces aren’t pressed against hard accessories
Souvenir programs: what changes?
If you’re building a city IP plush souvenir program, the product is handled differently. It’s touched in stores, squeezed by tourists, and carried in bags. That means fabrics must:
- Keep a clean look after handling
- Resist visible flattening
- Maintain color consistency under varied lighting for retail display
A souvenir plush often benefits from:
- Shorter pile in face zones for consistent expression
- Durable fabrics in high-contact areas (hands, feet)
- Gift-ready packaging that prevents shape loss during travel
Fabric selection for face accuracy
| Fabric zone | Best choice for accuracy | Why |
|---|---|---|
| Face panel | Short pile / minky-type | Keeps eyes/mouth readable |
| Body | Short or medium pile | Holds silhouette without blurring |
| Fur-style characters | Long pile (selectively) | Fluffy identity, but needs larger features |
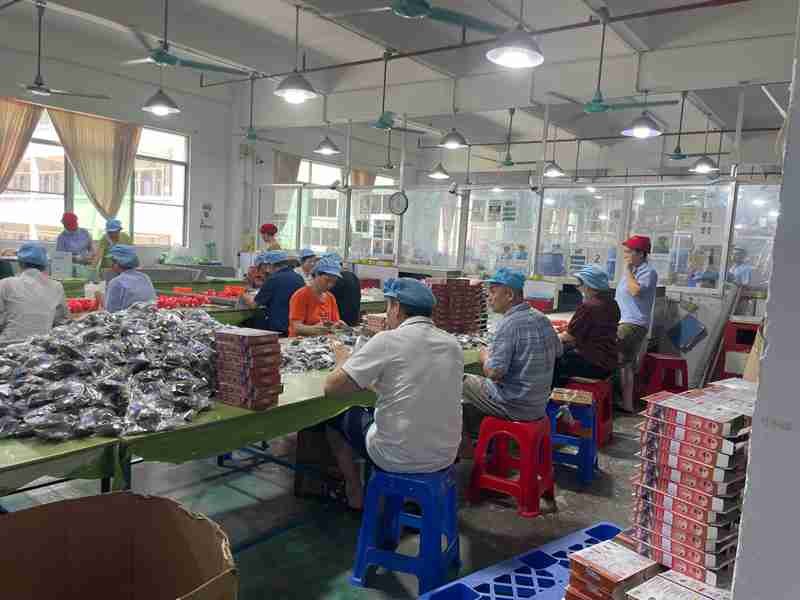
How long does the sampling process take for IP plush, and how many sample rounds are normal?
IP plush sampling typically includes briefing, pattern, prototype, revisions, and a pre-production (PP) sample. Most programs need 2–4 rounds to lock face accuracy and proportions, especially with licensing approvals. Sampling speed depends on how complete your references are, how fast approvals come back, and whether materials are standard or special-order. The quickest path is a clear review schedule, measurable feedback, and a defined “must-fix vs nice-to-have” list.
If you’ve never built an IP plush program before, sampling can feel like it “should be quick.” The reality is: sampling is fast when decisions are stable, and slow when approvals are fuzzy. You can think of sampling as a loop that ends only when everyone agrees the plush is on-model and repeatable.
How long does each step take (practical view)
A typical IP plush sampling flow looks like this:
- Brief & confirmation You send the tech pack, references, and face method decisions. The factory confirms what is clear, what is missing, and what needs translation. What helps speed: turnaround views, size targets, and a clear “truth reference.”
- Pattern engineering + prototype build Pattern makers plan panels, seams, stuffing, and face zones. The sample room produces the first prototype. What slows it down: complex head geometry, special fabrics, and uncertain face method.
- Review + revision list You review against measurable anchors: eye spacing, head proportions, mouth curve, silhouette. What slows it down: feedback that is purely emotional (“feels off”) without measurable direction.
- Revised sample The factory updates pattern, embroidery/print files, and build steps. What slows it down: changing face method midstream (embroidery → print or vice versa).
- Pre-production sample (PP sample) This is where you confirm the exact spec that will be used for bulk: materials, face placement, labels, packaging, and QC standards.
How many rounds are normal?
For IP plush, 2–4 rounds is common. A simple character with clear inputs may lock quickly. A complex character with multiple expressions, hair/fur, or layered accessories often takes more rounds—especially if there’s a licensor involved.
What are the most common revision reasons?
- Head shape not matching the art (too round, too flat, wrong cheek volume)
- Eye placement shifting expression (angry vs cute is often a 1–2 mm change)
- Proportions drifting (head/body ratio changes the “age” of the character)
- Color matching issues (pile reflects light differently than screen colors)
- Fabric choice blurring face features or hiding details
- Stuffing density making the plush collapse or look stiff
Who should approve what?
This is the biggest workflow risk. If you’re licensed, approvals can include: brand team, licensor, distributor, or retailer. If each group reviews in a different order, you get contradictory feedback.
A better approach is to map approvals:
- Brand approves proportion + expression
- Licensor approves on-model compliance
- Retail/Channel approves packaging and labeling requirements
Approval workflow for licensed IP (avoid stuck approvals)
Set the rules early:
- Fixed review windows (e.g., 48–72 hours)
- One consolidated feedback list per round
- A cap on revision loops (or a clear “revision scope”)
- Priority categories: must-fix vs nice-to-have
- “Golden standard” decision criteria: what exactly qualifies as final approval
Sampling is not just making a nice plush. It’s building a repeatable blueprint so bulk won’t drift.
What is the “Golden Standard” (golden sample/master sample), and how does it protect bulk consistency?
The Golden Standard is the final approved sample that becomes the production truth. It’s different from a “nice prototype” because it has signed approvals, locked materials, documented measurements, and defined tolerances. During bulk, QC must reference the golden sample for face placement, embroidery/print files, stuffing feel, and finishing. For series collections, a golden standard system keeps multiple characters consistent in eyes, proportions, and handfeel.
In IP plush, the golden standard is where you stop “creating” and start “repeating.” If you skip this step or keep it vague, you will almost always experience “sample good, bulk different.”
What makes a golden sample different from a nice prototype?
A prototype can be beautiful and still not be a production standard. The golden sample is:
- Approved by the right people (brand + licensor if required)
- Documented (measurements, photos, files, materials)
- Locked (no casual changes without re-approval)
- Used for QC (the benchmark during in-line and final inspection)
How to document the golden standard
A practical golden standard package usually includes:
- Measurement points + tolerances Not “overall height only.” You want measurement points that control expression: head width, eye spacing, mouth position, ear height, muzzle depth.
- Face photos from fixed angles Front, 45-degree, side. Use consistent lighting and distance so comparisons are fair.
- Embroidery/printing file control The exact stitch file, stitch count range, thread colors, and placement map. For printing: artwork file, color standard, print area boundaries.
- Material list Fabric codes, pile length, backing type, stuffing type, accessory specs.
- Finishing rules Brushing direction, trimming, steam shaping, and packing method—because finishing changes expression.
What QC checks should reference the golden sample?
A strong workflow uses the golden sample in three stages:
- First article check (first units off the line)
- In-line QC (random checks during production)
- Final inspection (appearance + labeling + packing)
Critical checks should include:
- Face placement alignment
- Symmetry (eyes, ears)
- Stuffing feel consistency
- Color consistency under defined lighting
- Packaging compliance (hangtags, labels, barcode)
Golden standard for a series: keeping a whole character family consistent
When you build one character vs a series collection, consistency becomes the brand signal. Notice when a series looks like it comes from one universe—same face style, same stitching quality, same handfeel.
To keep a series consistent, define:
- Standard eye style rules (outline thickness, highlight size)
- Embroidery density range
- Stuffing “handfeel grade” (soft vs firm)
- Color rules across SKUs (acceptable shade variation)
- Shared packaging and labeling templates
Golden Standard pack (minimum set)
| Item | Why it matters |
|---|---|
| Signed approval record | Stops “moving targets” |
| Measurement map | Controls face accuracy in bulk |
| Face photo angles | Visual benchmark for QC |
| Stitch/print files | Prevents drift from re-files |
| Material codes | Locks repeatability |
| Packing SOP | Protects appearance after shipment |
A golden standard is basically your “insurance policy” for bulk consistency.
How do you protect your IP when working with a plush factory?
Protecting IP is a system: share only what’s needed at each stage, use NDA + ownership clauses, and control source files through watermarking and version tracking. For licensed programs, keep an audit-ready “compliance pack” with approved assets, sign-off logs, and production records. The goal is practical risk reduction: fewer leaks, fewer misuses, and smoother approvals—without slowing development.
IP protection is a sensitive topic, and it should be. The best approach is not paranoia—it’s process. You want a workflow that lets the factory build efficiently while reducing the risk of asset misuse.
What you should share first vs later
A smart staged approach looks like this:
Stage 1 (low-risk briefing pack):
- Low-resolution renders or watermarked art
- Key views (front/side/back) without full source layers
- Color references and size targets
- A summary of “must keep” features This is enough for feasibility evaluation and early quoting.
Stage 2 (development pack):
- Higher-resolution files needed for embroidery/print setup
- Clear expression sheets
- Technical decisions: fabrics, face method, accessories Share these when you’re committed to sampling.
Stage 3 (production pack):
- Final approved files, dielines for packaging, label copy
- Barcode mappings
- Golden standard documentation This stage should be tightly controlled and versioned.
Which legal protections matter most
You’ll typically use:
- NDA (non-disclosure agreement)
- IP ownership clauses (who owns patterns, samples, files)
- Non-use / non-compete language for your specific character or designs (where applicable)
For licensed IP, also confirm:
- Who is allowed to manufacture (authorized factory list)
- Any required compliance steps or audits
- Any restricted materials or logo rules
How to reduce “factory reuse” risk in a practical way
The goal is to reduce accidental reuse and intentional misuse.
Useful controls:
- Watermarking artwork and files
- Controlled access (send files only to necessary contacts)
- Version tracking (file naming rules, dated approvals)
- Clear “do not reuse” clauses and documentation
- Avoid sending editable source files until needed
Licensed IP compliance pack
A “compliance pack” is simply organized proof that the product is made according to approved assets and processes. It can include:
- Approved artwork files (dated)
- Approval emails / sign-off logs
- Golden sample photos and measurement maps
- Production records (batch info, QC records)
- Packaging approvals and label copy approvals
This also helps you internally. If a retailer questions authenticity or a licensor asks for evidence, you can produce records quickly.
The best IP protection strategy is the same as the best quality strategy: define what’s approved, lock it, and control changes.
What pricing factors matter most for character plush (and how do you compare manufacturers fairly)?
Character plush pricing is driven by fabric choice, face method (embroidery vs printing vs mixed), accessories, panel complexity, QC level, and packaging. Low MOQ costs more because the same setup steps are spread across fewer units. To compare manufacturers fairly, compare like-for-like: the same specs, the same packaging level, and the same approval/QC deliverables. For brand building, series collections often scale faster than single characters—if SKUs and reorders are planned smartly.
Pricing confusion usually comes from comparing quotes that are not the same product. One quote includes retail-ready packaging, another assumes bulk polybags. One includes strict face QC, another assumes “reasonable variation.” You need a comparison framework.
What drives unit price?
Major drivers include:
- Fabric type (short pile vs long pile; custom-dyed colors may require MOQ)
- Face method: embroidery/printing/mixed (stitch count and setup time matter)
- Accessories (clothes, keychains, plastic parts, tags)
- Pattern complexity (more panels = more labor)
- QC level (tight face tolerances require more checks)
- Packaging (bulk vs gift-ready vs retail-ready)
- Compliance expectations (if your channel requires specific labeling or tests)
A useful way to think: the “character” itself is a cost multiplier. Cute complexity is real cost.
Low MOQ vs bulk: why small runs cost more
Sometimes expect low MOQ to mean low price. In reality, small runs often cost more per unit because:
- Pattern development, face setup, and sample labor are fixed steps
- Material purchasing has less scale (fabric and accessories cost more)
- Production lines are less efficient at very low quantities
- QC and packaging steps still happen regardless of quantity
So yes, Heyzizi can support low MOQ, but it’s important to plan how you’ll scale to better pricing with reorders.
One character vs series collection: which builds brand faster?
This depends on your business model, but here’s the practical view:
- One character builds focus and recognition quickly if marketing is strong, and it reduces SKU complexity.
- A series collection can build faster when your audience likes collecting, gifting, and variants—because series drives repeat purchases and higher basket size.
However, series only works if you plan:
- Shared materials and shared face rules to control cost
- A consistent golden standard system
- SKU strategy: not too many variants too early
- Reorder plan: which characters will replenish first?
Best city IP plush souvenir program: what changes?
City souvenir programs have a different pricing and replenishment logic:
- Seasonal demand spikes (tourist seasons)
- More gift-ready packaging expectations
- Barcode/SKU compliance for retail
- Fast restock requirements
That means you often choose:
- Durable fabrics that look clean after handling
- Simplified structure for faster repeat production
- A packaging system that protects shape during travel
Fair quote comparison checklist
| Compare item | Why it changes price |
|---|---|
| Fabric type + color method | Custom colors can add MOQ cost |
| Face method + stitch count | Major labor driver |
| Accessories list | Adds labor + QC |
| Packaging level | Impacts materials + assembly + freight |
| QC deliverables | Tighter control costs more, saves rework |
| Timeline | Rush schedules affect cost |
What is the history of character plush manufacturing, and what’s “best practice” today for brands?
Character plush evolved from simple prototypes to today’s controlled systems: prototype → master sample → documented golden standard → repeatable bulk with QC checkpoints. Modern best practice centers on measurable face accuracy, locked files, audit-friendly records for licensed IP, retail-ready labeling, and structured communication. Brands that win treat plush development like product engineering: clear inputs, controlled approvals, and a defined pre-production checklist before mass production.
Plush used to be simpler. Many older plush programs relied on a skilled sample maker and a “looks good” approval. That approach breaks down in modern because:
- eCommerce magnifies small face mistakes
- licensors require tighter compliance
- expect reorders to match the first production
- retail and 3PL systems demand clean labeling and documentation
History of standards (why “golden sample” became mandatory)
As programs scaled globally, brands needed repeatability across:
- factories
- production batches
- seasonal reorders
- new SKU expansions
That’s why the workflow matured into:
prototype → master sample → golden standard → controlled bulk → reorder consistency
What modern brands expect now
Today’s “professional program” expectations include:
- Face accuracy that is stable and measurable
- Repeatability across bulk and reorders
- Retail-ready packaging and labeling compliance
- Documented QC checks and sign-off logs
- For licensed IP: audit-ready compliance evidence
Communication rhythm
The best projects feel calm. That calm comes from predictable updates:
- weekly status + photos
- a clear revision list per round
- clear responsibilities: who approves, who decides, who escalates
- clear “freeze points”: when art, face method, and materials are locked
Best-practice checklist: what to lock before mass production
Use this as your “go/no-go” gate:
Pre-Production Lock Checklist
- Approved and signed golden standard sample
- Locked materials and backup options (if fabric supply changes)
- Locked stitch/print files + placement maps
- Measurement map + tolerances agreed
- Packaging level confirmed (bulk vs retail-ready)
- Barcode/SKU mapping confirmed (if required)
- QC plan confirmed (first article + in-line + final)
- Shipping mode and carton specs aligned with packaging
- For licensed IP: approval logs and compliance pack ready
When you run an IP plush program this way, you stop reacting and start controlling outcomes.
Conclusion — Ready to Build an “On-Model” IP Plush Program?
If you’re developing a character plush, the real goal isn’t just “a sample that looks good.” It’s a system that produces a plush that looks on-model every time—across bulk, across reorders, and across a whole series. That means clear inputs, smart 2D-to-3D translation, the right face method, and a documented Golden Standard that QC can actually enforce. It also means practical IP protection and an approval workflow that doesn’t get stuck.
If you want Heyzizi to review your character artwork and recommend a manufacturable 2D→3D route (structure, face method, fabric plan, sampling steps, and a golden standard checklist), email us your artwork pack and target size. We’ll respond with a realistic development plan and options that match your budget and timeline.
Contact: info@heyzizi.com
IP / Character Plush Development — FAQs

Can any character artwork be made into a plush toy?
Yes—almost any character can be made into plush, but not always as a perfect 1:1 copy of the drawing. Plush is “soft sculpture,” and some art styles don’t translate cleanly without a small redesign. The biggest issues are ultra-thin limbs, sharp corners, micro facial marks, and complex gradients. Those details may look great on-screen, but they can disappear into pile, get distorted by seams, or become expensive because they require extra panels, appliqué, or high-density embroidery. A good factory will tell you early what must change to keep the character recognizable while staying manufacturable.
A practical way to decide is to identify your “character identity anchors”: silhouette, head/body ratio, eye style, mouth curve, signature marks. Then allow flexibility on items that don’t affect recognition (tiny shading, micro lines, very sharp corners). If you share your art plus your target size and market (gift, retail, promo), Heyzizi can recommend a 2D→3D translation route and explain what needs simplification and what should stay locked for face accuracy.
Email: info@heyzizi.com
Procurement checklist
- Is face readability still clear at the final plush size?
- Are micro details better as printing instead of embroidery?
- Does the design require extra panels (cost/lead time impact)?
- Are there risky parts (thin limbs, spikes) that need safer geometry?
What files does a plush manufacturer need to make an accurate quote (not a guess)?
To quote accurately, a factory needs more than “a picture.” The fastest path is a simple character tech pack—it doesn’t have to be fancy, but it must be complete. At minimum, you should provide: target size (and how it’s measured), required materials or handfeel targets, face method preference (embroidery vs printing), accessory list (clothes, keychain, plastic parts), packaging level (bulk bag vs retail-ready), and your target market (US/EU/UK) if compliance labeling matters. You’ll also want to share 2D references that reduce guesswork: front/side/back views, color callouts, and any “must-match” expression sheet.
Why does this matter? Because price changes usually come from late additions: adding a keychain after quoting, switching printing to embroidery, upgrading to gift boxes, or requesting special dyed fabric colors (which can trigger fabric MOQ). If you want clean budgeting, ask for pricing in tiers: baseline, brand-ready, and retail-ready. That lets you see what’s driving cost without endless back-and-forth. If you send your artwork and requirements, Heyzizi can return a structured quote with cost drivers spelled out.
Email: info@heyzizi.com
Quick quote inputs that change price the most
| Input you provide | Why it affects price |
|---|---|
| Size | More fabric, more stuffing, larger cartons |
| Face method | Stitch count vs print setup changes labor |
| Accessories | Adds assembly steps + QC |
| Packaging level | Adds materials + packing time |
| Color method | Custom dye may require minimum yardage |
How do you define “face accuracy” so feedback doesn’t become endless opinions?
The best way to define face accuracy is to make it measurable. If feedback stays at “it feels off,” you’ll usually get extra sample rounds and inconsistent approvals. We recommend defining face accuracy using three layers: silhouette, proportions, and expression. Silhouette asks: does it read as the character from a distance? Proportions ask: are ratios stable (head/body, eye spacing, mouth position)? Expression asks: does the face deliver the same emotion as the IP (cute, cool, sleepy, mischievous)?
Then you turn those layers into real controls: key measurement points (eye-to-eye distance, head width, muzzle depth), a fixed photo angle set (front + 45° + side), and a tolerance range (for example, eye spacing ±1–2 mm depending on size). This helps both sides: you can give clean feedback, and the factory can execute changes predictably.
If you want your bulk to match your sample, face accuracy must also include process accuracy: locked embroidery files, placement maps, and QC photo standards. That’s how you prevent “sample perfect, bulk different.” Heyzizi can help you set a simple face accuracy checklist before sampling begins.
Email: info@heyzizi.com
Procurement checklist
- Do we have a measurement map for face landmarks?
- Are photo angles standardized for approvals?
- Is there a clear “must-fix vs nice-to-have” revision list?
Embroidery vs printing: which is best for character faces (and which is safer for bulk consistency)?
There’s no universal winner—embroidery vs printing depends on what your face art needs to communicate. Embroidery is strong for bold outlines, clean color blocks, and durability. Printing is strong for gradients, tiny details, and soft handfeel. The bulk-consistency risk comes when a face method is chosen for “premium vibes” instead of technical fit. For example, forcing embroidery for a gradient-heavy face can lead to stiff panels and lost details. Forcing printing onto unstable fur can blur edges.
In real IP programs, many brands choose mixed techniques: printing for shading + embroidery for outlines/highlights. That often looks most “on-model,” but it requires better file control and placement discipline. To keep consistency, you want: locked stitch/print files, placement guides with reference points, and QC checks against the golden standard sample.
If you share your artwork style (line-based vs gradient-based), your target size, and the fabric plan, Heyzizi can recommend the safest face method and explain cost and durability trade-offs clearly—so you don’t pay extra for the wrong technique.
Email: info@heyzizi.com
Quick comparison table
| Method | Best for | Common risk | Control tool |
|---|---|---|---|
| Embroidery | Bold lines, durability | Stiffness, micro-detail loss | Stitch file lock + placement map |
| Printing | Gradients, tiny details | Blur on pile, color variation | Surface choice + print boundary spec |
| Mixed | Highest on-model potential | More process steps | Golden standard + QC photos |
How many sample rounds are normal for licensed IP plush, and how long does it take?
Most licensed IP plush projects take 2–4 sample rounds. One round is often not enough because the first prototype reveals real-world constraints: fabric pile changes expression, seams pull volume, and small placement shifts change emotion. With licensed IP, the schedule also depends on how fast approvals return and how many stakeholders are involved (brand, licensor, distributor, retailer). The “hidden time” is usually not sewing—it’s waiting for decisions.
The fastest programs follow a simple discipline: fixed review windows (48–72 hours), one consolidated feedback list per round, and clear priorities (must-fix vs nice-to-have). Also, don’t underestimate materials: if you request special fur colors, custom dye can add time. If you add retail packaging late, you’ll need extra proofing and approvals.
If you want speed, treat sampling like a sprint with checkpoints: brief confirmation, prototype, revision, PP sample, then freeze. Heyzizi supports fast sampling and can propose a realistic timeline based on your design complexity and licensing approval path.
Email: info@heyzizi.com
Mini timeline table (typical workflow)
| Step | Typical outcome |
|---|---|
| Brief + feasibility | Risks and redesign suggestions |
| Prototype | First “3D reality” check |
| Revision sample(s) | Face accuracy + proportions locked |
| PP sample | Materials + files + packaging frozen |
| Bulk | QC references golden standard |
What is a “Golden Standard” sample and why is it non-negotiable for bulk production?
The Golden Standard (also called golden sample or master sample) is the final approved unit that becomes the production truth. It’s not just “the best-looking sample.” It’s a controlled reference with locked materials, locked embroidery/print files, documented measurements, and signed approvals. Without it, you’re basically asking the factory to “remember” what good looks like—and memory is not a manufacturing system.
The golden standard protects you in three ways:
- Bulk consistency: QC compares production units against the golden sample.
- Reorder stability: future orders don’t drift when staff or batch conditions change.
- Stakeholder alignment: licensors and internal teams have one reference, not multiple opinions.
A good golden standard package should include: measurement map (with tolerances), fixed-angle photos, stitch/print file versions, material codes, finishing rules (brushing/steaming), and packing method. If you plan a series collection, the golden standard also defines shared rules: eye style, embroidery density range, handfeel grade.
Heyzizi can build a golden standard documentation pack so your bulk and reorders stay on-model.
Email: info@heyzizi.com
How do you protect IP when sending artwork to a factory (NDA, file control, and practical steps)?
IP protection should be practical, not stressful. The safest approach is staged sharing + controlled files. First, share a low-risk briefing pack (watermarked art, key views, size targets, must-keep features). Once you decide to sample, share higher-resolution assets needed for embroidery/printing. Final source files and packaging dielines should be shared only when you’re ready for production and when agreements are in place.
Beyond NDA, what matters is operational control: watermarking, version tracking, limiting access to only the people building the product, and maintaining an approval log. For licensed IP, keep a “compliance pack” with approved artwork versions, sign-off records, golden standard references, and production/QC records. This helps in audits and also prevents internal confusion later.
If you’re worried about reuse risk, don’t guess—ask the factory about their internal file handling and approval process. Heyzizi can support NDA workflows and structured development so your artwork stays controlled while your project moves quickly.
Email: info@heyzizi.com
Procurement checklist
- Are files shared in stages (brief → dev → production)?
- Are approved versions date-stamped and tracked?
- Do we have a clear owner for final approvals?
One character vs a series collection: which builds a brand faster (and what does it change in production)?
A single character can build recognition quickly because it focuses marketing and keeps SKUs simple. A series collection can build faster when your audience likes collecting, gifting, and variants—because it increases repeat purchases and creates a “universe.” The production difference is that series requires tighter standardization: shared face rules, shared materials where possible, and a golden standard system that prevents characters from looking like they came from different factories.
From a procurement angle, series is powerful—but only if you plan it like a program. That means deciding which SKUs share materials, how you’ll manage MOQ across variants, and which characters will be replenished first. Series also changes packaging and labeling: your barcodes/SKUs must be mapped cleanly to avoid warehouse mistakes.
A smart launch path is often: 1 hero character → 2–3 supporting variants → full collection after reorders prove demand. If you tell Heyzizi your channel (DTC, retail, souvenir) and your target quantities, we can propose a SKU strategy that keeps cost and reorders manageable.
Email: info@heyzizi.com
Decision table
| Strategy | Best when | Risk if unmanaged |
|---|---|---|
| One character | Focused brand story | Growth slows if no variants |
| Series collection | Collectible demand + gifting | MOQ/SKU complexity, inconsistency |
What’s the biggest risk in licensed IP plush programs (and how do you avoid delays)?
The biggest risk is not sewing—it’s approvals and compliance. Licensed programs can stall when the approval chain is unclear, when the licensor’s standards aren’t documented, or when packaging/legal labeling is added late. Delays often come from repeated subjective feedback without measurable targets, or from missing assets (turnarounds, expression sheets, color standards).
To avoid delays, build a “licensed IP risk checklist” before sampling: confirm territories, allowed product categories, required approvals (art, sample, packaging), reviewer response times, and audit requirements. Then lock an approval rhythm: fixed review windows, one consolidated feedback list, and a clear “freeze point” where changes require re-approval.
A factory that is ready should also help you structure approvals: what the licensor must sign off, what the retailer must confirm, and what can be decided internally. Heyzizi can support licensed-style workflows with golden standard documentation and controlled files, so approvals feel predictable rather than chaotic.
Email: info@heyzizi.com
Best city IP plush souvenir program: what makes it work (design, packaging, replenishment)?
A strong city souvenir plush program is built for real travel behavior: tourists squeeze products in-store, pack them into luggage, and want them to look cute in photos immediately. That means the plush must be durable, recover shape quickly, and come in gift-ready packaging that protects it from crushing. You also need retail operations to be smooth: barcode placement that scans, consistent carton marks, and SKU mapping that doesn’t confuse staff.
Design-wise, souvenir plush often benefits from: clear silhouette, short pile face zones for readable expression, and simplified details that still feel “iconic.” Production-wise, replenishment matters more than perfection: you want a structure that repeats quickly and a golden standard that allows fast reorders without “face drift.” Pricing strategy should consider seasonal demand spikes—so you can restock before peak periods.
If you share your target city theme, sales channels, expected seasonality, and packaging preferences, Heyzizi can propose a program structure (hero SKU + variants), packaging protection options, and a replenishment-friendly production plan.
Email: info@heyzizi.com
What causes “sample looks perfect, bulk looks different,” and how do you prevent it?
This happens when the sample is treated like a one-time artwork instead of a controlled system. Common causes include: changing materials (fabric supplier or pile length), redoing embroidery files, inconsistent placement, different stuffing density, and missing QC benchmarks. Even small changes can shift expression. In IP plush, a 1–2 mm movement in eyes or mouth can change the character’s mood.
Prevention comes from the golden standard workflow: lock material codes, lock embroidery/print files, use placement maps with measurable reference points, and require QC photos from fixed angles. Also, define tolerances and run first-article checks before mass production ramps. For series collections, standardize shared rules like eye outline thickness and embroidery density range.
If you’re serious about bulk consistency, ask the factory what controls they use between sample and bulk. Heyzizi can provide a bulk-control package (golden standard documentation + QC checkpoints) so your production stays on-model and reorders remain stable.
Email: info@heyzizi.com
What should I put in my first email to Heyzizi to start an IP plush project fast?
Keep it simple, but structured. Your first email should answer: what the character is, which size you want, how you plan to sell it (gift, retail, DTC, souvenir), and when you want samples and launch. Attach your artwork (front/side/back if possible), call out must-keep features, and tell us whether your face art is line-based or gradient-based so we can recommend embroidery vs printing quickly. If it’s licensed IP, tell us who approves and whether there are territory or audit requirements.
Also include: expected order quantity range (even a rough range helps), preferred packaging level (bulk vs retail-ready), and any accessories (keychain, clothes, plastic parts). If you already have a target cost, share it—we can suggest material/process choices that fit reality rather than wasting time.
Send that to info@heyzizi.com and we’ll respond with a development route: feasibility notes, sampling steps, face method suggestion, and what we need next for accurate quoting and prototyping.
“Risk Checklist for Licensed IP Plush Programs”
| Item to confirm | Why it matters |
|---|---|
| Product category rights | Avoid unauthorized production risk |
| Territory limits | Affects where you can sell |
| Approval steps | Prevent timeline surprises |
| Reviewer response time | Controls sampling duration |
| Audit/compliance rules | Impacts documentation and factory requirements |
| Packaging/legal text | Avoid reprint and relabeling delays |
“2D Inputs that Speed Up 2D→3D Translation”
| Input | What it prevents |
|---|---|
| Turnaround sheet (front/side/back) | Guesswork volume and seam decisions |
| Expression set | Wrong “emotion” in face |
| Color callouts (Pantone/TCX) | Color mismatch disputes |
| Size grid | Proportion drift |
| Must-keep anchors list | Unnecessary redesign loops |