 Skip to content
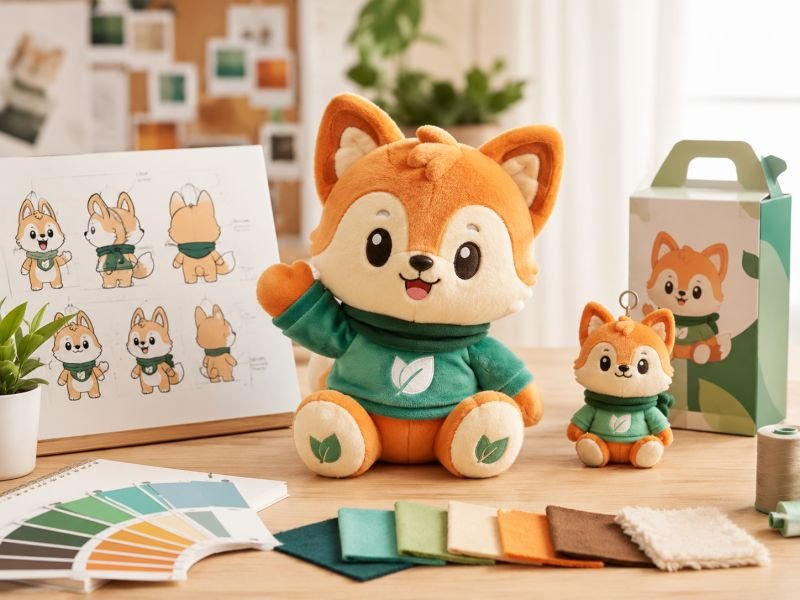
A mascot becomes much more valuable when people can hold it. On a poster, app icon, booth wall, package, or digital screen, the mascot can be seen for a few seconds. As a plush toy, it can stay on a desk, hang from a backpack, appear in event photos, sit inside a gift box, or become a small collectible that people keep long after the campaign ends. That is the real power of mascot plush. It turns a visual identity into a soft object with memory value.
A strong brand mascot plush starts with a clear campaign purpose, usable artwork, practical size, fabric color review, readable facial details, smart logo placement, sample approval, packing direction, and bulk planning. The design should keep the mascot recognizable while simplifying tiny details that do not work well in soft fabric. A good plush should look close to the character, feel pleasant in hand, pack safely, and stay consistent across the order.
The hard part is that mascot artwork and plush structure do not speak the same language. A drawing can have sharp lines, tiny graphics, exact flat colors, perfect symmetry, thin fingers, and small text. Plush fabric is curved, soft, textured, sewn, filled, shaped, packed, compressed, and shipped. Eyes can move slightly. Long pile can hide embroidery. A small logo can vanish after stuffing. A gift box can flatten the ears. The best mascot plush designs are not the ones that copy every line from the artwork. They are the ones that protect the parts people remember first.
Why Design Mascot Plush For Campaigns?
Mascot plush works for campaigns because it turns a visual character into a physical object people can keep, carry, display, photograph, collect, or gift. A mascot on a screen may be seen for a few seconds. A plush mascot can stay on a desk, in a child’s room, on a backpack, inside a welcome kit, or in a collector’s shelf for months. That longer life is why plush often creates stronger memory than many short-use promotional items.
The value is not only “cute.” A campaign mascot plush can support several goals at the same time: recognition, emotional connection, event interaction, fan engagement, gift value, retail display, internal team culture, and repeat campaign use. It can also connect offline and online activity. People may take photos with it, unbox it, give it to children, use it as a bag charm, or keep it as a small reminder of the event.
A strong mascot plush starts from a clear use scene. A plush made for a high-volume event handout should be light, easy to carton, easy to distribute, and simple enough to produce consistently. A plush made for member rewards or premium gifts needs better touch, fuller filling, cleaner finishing, and stronger presentation. A mascot plush for a fan event needs facial likeness and collectible value. A school or family-focused program needs safer material choices, secure seams, fewer hard parts, and label planning.
Mascot plush can also help a campaign feel more human. People may not remember every slogan, feature, or display panel, but they often remember a friendly face, a soft hand feel, or a gift they actually wanted to keep. This is where mascot plush becomes more than decoration. It becomes a small physical link between the campaign and daily life.
The best mascot plush designs usually meet four practical standards:
They can be recognized within three seconds.
They keep the mascot’s face, color, and signature detail clear.
They feel good enough to keep after the event.
They can be packed, shipped, and handed out without damaging shape or appearance.
Poor mascot plush usually fails in one of these areas. The character may look generic, the logo may be unreadable, the fabric may feel rough, the body may look flat, the box may crush the ears, or the plush may be too large for the planned handout. Good planning avoids these problems before sample work begins.
| Campaign Use | Suitable Plush Format | Main Design Focus | Practical Risk To Review |
|---|---|---|---|
| Trade show gift | 10–20 cm mascot plush or plush charm | Fast recognition, clear logo, easy handling | Carton sorting, handout speed, delivery date |
| Product launch | Sitting mascot plush, gift plush, or bag charm | Campaign color, story link, photo appeal | Packing, logo placement, launch timing |
| Gift-with-purchase | Mini plush, keychain, or boxed plush | Gift value, compact size, visible identity | Packing fit, retail label, carton volume |
| Fan event | Character-style mascot plush | Expression, outfit, signature feature | Likeness, sample approval, SKU control |
| Member reward | Medium plush with better fabric | Softness, fullness, keepsake value | Fabric level, gift packing, delivery schedule |
| School or family program | Soft mascot toy | Seam strength, simple parts, safer detail choices | Warning label, small parts, material review |
| Social media activity | Photogenic plush with clear front view | Face, pose, color, shareability | Camera effect, front display, prop strength |
| Retail promotion | Shelf-ready plush | Hangtag, barcode, carton rules, repeat quality | Label accuracy, packing consistency |
| Multi-style series | Mascot family or blind box plush | Shared structure, individual identity | SKU label, mixed carton, style records |
What Role Does Mascot Plush Play?
Mascot plush gives a campaign a physical memory. It can act as a giveaway, welcome gift, member reward, desk display, retail add-on, fan collectible, social photo prop, school gift, event souvenir, or themed merchandise. Its role should be decided before size, fabric, logo position, and packing are chosen.
When the role is unclear, the plush often becomes overdesigned or underbuilt. For example, a high-volume event gift does not need every outfit line from the mascot artwork. It needs a clear face, simple shape, secure stitching, practical packing, and easy distribution. A premium member gift needs a different plan: softer fabric, better filling, cleaner finishing, and more careful box fit.
A mascot plush can also extend the campaign beyond the event space. A keychain can stay on a backpack. A desk plush can stay near a computer. A boxed mascot can become a gift. A fan plush can become a collectible. A retail plush can continue the campaign through store shelves or online listings. Each role changes the product decisions.
Useful role-based planning questions include:
Will the plush be handed out quickly or presented as a gift?
Will people carry it, display it, collect it, or store it?
Does it need to fit a gift box, retail shelf, event bag, or shipping carton?
Should the logo be obvious, subtle, or mostly carried by the tag and package?
Will the plush be used once, or will it support future campaign waves?
Is the product for adults, children, families, fans, employees, or retail shoppers?
A mascot plush works best when it has a clear job. That job may be memory, engagement, gifting, collecting, or display. Once the job is clear, the design becomes much easier to control.
Which Campaign Type Fits Mascot Plush?
Mascot plush fits campaigns where emotional memory, physical gifting, collection, or photo sharing matters. It is especially useful for product launches, store openings, exhibitions, school events, tourism programs, sports events, seasonal promotions, charity programs, fan events, company anniversaries, loyalty rewards, and retail gift sets.
Different campaign types require different plush choices. A small mascot charm may be ideal for a beauty, beverage, youth, tourism, or event program because it is light and easy to carry. A 20–25 cm sitting plush may work better for member rewards, desk display, fan gifts, or retail presentation. A boxed mascot plush may fit holiday, anniversary, premium gift, or collector programs. A blind box mascot series can create repeat interest when several characters or outfits are involved.
Timeline should also shape the choice. If the event date is close, the safest design uses available fabric options, fewer accessories, simple packing, and fast feedback during sampling. If the launch has more preparation time, the plush can carry more detailed face work, refined fabric, special packaging, or multi-style development.
A practical match between campaign type and plush direction can look like this:
| Campaign Type | Better Plush Direction | Size Direction | Notes |
|---|---|---|---|
| Large event handout | Mini mascot or keychain | 8–18 cm | Keep details simple and packing efficient |
| Product launch kit | Small plush or boxed mascot | 12–25 cm | Match campaign color and launch story |
| Retail display | Medium sitting plush | 20–35 cm | Plan barcode, hangtag, and shelf presence |
| Fan merchandise | Character-accurate mascot plush | 15–35 cm | Protect face, outfit, and signature details |
| Gift-with-purchase | Compact charm or mini plush | 8–18 cm | Good for lightweight gift value |
| VIP or member gift | Soft plush with better finish | 20–35 cm | Improve fabric, filling, and presentation |
| Education program | Simple soft mascot | 15–25 cm | Review seams, small parts, and labels |
| Blind box series | Mini mascot collection | 8–15 cm | Requires SKU and packing control |
The wrong format can weaken even a good design. A large plush may be loved but hard to ship for a mass event. A mini plush may be practical but unable to show the mascot’s detailed face. A gift box may look premium but raise carton volume. The best format fits the campaign’s real use, not just the artwork.
Why Does Mascot Likeness Matter?
Mascot likeness matters because recognition is the core value of a mascot plush. If the plush loses the character’s face, body shape, color, or signature feature, it becomes a generic soft toy. The plush does not need to copy every line of artwork, but it must keep the details that make people say, “I know this character.”
Likeness is usually built from five visible parts: face, silhouette, color, signature detail, and mood. Face includes eye shape, mouth curve, nose, cheeks, and expression. Silhouette includes head shape, ears, body, tail, limbs, posture, or hat. Color connects the plush to the campaign identity. Signature detail may be a shirt, scarf, badge, crown, glasses, prop, belly mark, or special pattern. Mood is the feeling: friendly, playful, bold, calm, sporty, premium, funny, or educational.
A common design mistake is protecting too many small details while the face becomes weak. A mascot plush can still succeed if a hidden back detail is simplified. It will fail faster if the eyes look wrong, the body shape changes too much, or the main color feels off. Early design review should rank details by recognition value.
A simple recognition check can help:
Can the mascot be recognized from the front within three seconds?
Does the face still feel like the original character?
Can the silhouette be recognized even without the logo?
Does the main color feel close enough on plush fabric?
Is there one clear signature detail?
Will the logo placement support the character rather than cover it?
Does the plush still look good after packing?
Likeness also depends on size. A small charm cannot carry the same detail as a 30 cm plush. If the mascot has many facial features, clothing lines, or accessories, the size may need to increase, or the details must be simplified. A good plush design protects the character’s memory, not every tiny line.
How Can Plush Improve Brand Recall?
Plush improves brand recall because it stays in people’s surroundings after the campaign ends. A mascot plush can sit on a desk, travel on a bag, appear in a child’s room, stay in a car, decorate a retail shelf, or become part of unboxing photos. This gives the mascot repeated visibility without another media placement.
Recall grows when the plush is worth keeping. People keep items that feel pleasant, look finished, and carry emotional value. A plush with soft fabric, clear expression, stable shape, and clean finishing is more likely to stay visible. A flat, rough, poorly shaped plush is more likely to be forgotten or discarded.
There are several ways to make mascot plush easier to remember:
Use one strong facial expression instead of too many small decorations.
Keep the main color clear and close to the campaign identity.
Place the logo where it feels natural, such as a shirt, scarf, belly patch, side label, hangtag, or box.
Add one campaign-specific feature, such as a small badge, themed outfit, or mini accessory.
Choose a size that fits the user’s daily life.
Make the front view photo-ready.
Use packaging that protects shape and adds presentation value when needed.
A plush mascot should not feel like a logo printed on a toy. It should feel like the campaign character became real. That difference affects how people treat it. A well-made plush is kept, photographed, shared, and remembered. A weak one is simply another giveaway.
The strongest recall often comes from restraint. A clear face, soft fabric, one memorable feature, and a natural logo position can be more effective than a crowded design with too many tiny details. When the plush is simple enough to understand and good enough to keep, it can keep working long after the campaign moment has passed.
How To Turn Mascot Art Into Plush?
Turning mascot art into plush is not a direct copy-and-paste process. A flat mascot file has clean lines, perfect colors, sharp edges, and fixed proportions. A plush mascot has fabric pile, seams, stuffing, curves, thickness, hand shaping, packing pressure, and small natural variation. The goal is to keep the mascot recognizable while adapting the design into a soft product that can be made, packed, shipped, and used in real campaign scenes.
The strongest mascot plush designs usually begin with a simple question: what must people recognize first? For most mascots, the answer is the face, head shape, body color, signature accessory, outfit, or logo position. These details should be protected. Other details may need to be simplified because they become too small, too fragile, too costly, or too unclear in plush form.
A mascot drawing often contains details that work beautifully on a screen but not in fabric. Thin mouth lines may disappear under long pile. Tiny text may become unreadable after embroidery. Sharp hair spikes may soften after filling. A perfect Pantone color may look slightly different on plush fabric due to pile direction and lighting. A small logo may need to move from the body to a shirt, scarf, woven label, hangtag, or box.
Good plush translation is not about reducing creativity. It is about choosing the right physical language for the mascot. The design has to work with fabric, thread, filling, sewing, label placement, packing, and bulk consistency. When this is planned early, the sample stage becomes smoother and the final plush has a better chance of staying close to the intended look.
A practical mascot-to-plush review usually includes:
Design purpose: giveaway, gift set, retail item, fan collectible, school program, or event prop.
Product format: sitting plush, plush keychain, bag charm, boxed plush, pillow, backpack, or multi-style set.
Target size: small charm, hand-held plush, desk plush, gift plush, or display item.
Main recognition details: face, silhouette, main color, outfit, logo, accessory, or pose.
Material direction: short pile, long pile, ultra-soft fabric, textured fabric, or stronger fabric.
Craft method: embroidery, printing, appliqué, woven label, patch, or fabric color block.
Packing route: polybag, hangtag, gift box, retail box, blind box, display box, or carton plan.
Use region and age direction: especially when labels, warnings, or third-party testing support may be needed.
| Mascot Art Feature | What Changes In Plush | Better Plush Direction |
|---|---|---|
| Thin mouth lines | May sink into fabric pile | Use clearer embroidery with proper thickness |
| Small eyes | Can shift expression easily | Enlarge slightly or adjust spacing |
| Tiny logo | May not read after stuffing | Move to shirt, scarf, hangtag, or woven label |
| Sharp edges | Become softer after filling | Accept rounded soft-form styling |
| Many color blocks | Add cutting and sewing steps | Keep main colors and simplify hidden areas |
| Gradients | Hard to match with fabric | Use solid fabric color or controlled print |
| Small fingers | Difficult to sew cleanly | Use mitten shape or stitch lines |
| Long ears | May bend in packing | Add structure or review box space |
| Large head | May affect posture | Widen body or adjust filling support |
| Detailed outfit | Raises pattern and sewing work | Keep signature clothing features |
| Exact digital color | Fabric may shift under light | Review fabric swatches before approval |
| Separate tiny prop | Adds attachment and safety review | Turn into embroidery or larger soft part |
The earlier these choices are made, the easier it is to control cost, timing, and final appearance. If every line of the original art is kept until late sample review, revisions can become slower because pattern pieces, embroidery files, fabric cutting, packing size, and labels may all be affected.
What Artwork Should Be Prepared?
The most useful mascot plush artwork includes front view, side view, back view, key detail views, color references, logo files, target size, product format, and packing direction. These files help turn the mascot into a real plush shape with fewer assumptions.
Front view is the most important for face and overall recognition. It shows eye shape, mouth curve, nose, cheeks, logo placement, outfit, and main color layout. Side view shows body thickness, head depth, ear angle, nose length, belly curve, tail position, sitting posture, and whether the mascot should look flat, rounded, chubby, or upright. Back view matters for tails, clothing, hoods, capes, rear prints, back logos, wings, or special color blocks.
Detail views are useful when the mascot has special features. For example, a close-up of the eyes helps embroidery planning. A logo file helps decide whether embroidery, printing, woven label, or hangtag placement is more suitable. A clothing detail view helps decide which lines should be sewn, printed, simplified, or changed into fabric color blocks.
A clear file package can include:
Front, side, and back views.
High-resolution mascot artwork.
Vector logo file when available.
Pantone or other color references.
Close-up face details.
Outfit and accessory notes.
Target plush size.
Expected quantity per design.
Preferred fabric feel.
Packing idea.
Target sales region.
Event or delivery deadline.
If only one front image is available, the project can still begin, but more interpretation is needed. The side thickness, back structure, ear shape, tail position, and sitting balance may need to be developed during sampling. For campaign projects with fixed dates, better artwork files usually save time because fewer details need to be guessed.
A simple example: if a mascot has a long tail but no side or back view, the first sample may place the tail too high, too low, too thin, or too short. If the tail is shown clearly before sample work, the pattern can be planned more accurately from the start.
Can You Match Pantone Colors In Fabric?
Pantone references are helpful for fabric review, but plush fabric cannot always match printed color exactly. Fabric has pile height, pile direction, fiber texture, dye batch, shadow, and lighting effect. The same color may appear deeper from one angle and lighter from another. This is normal for soft fabric, especially on longer-pile materials.
For mascot plush, color matters because it often carries recognition. A red mascot body, blue shirt, yellow scarf, green ears, or purple hat may be part of the campaign identity. If the color shifts too far, the plush may feel disconnected from the original character. That is why color should be reviewed through fabric swatches, material references, and sample photos rather than judged only from a screen.
There are usually two color paths:
Available fabric color: faster, more practical, often better for schedule and cost control.
Custom-dyed fabric: closer color direction in some cases, but may require longer material preparation, higher material quantity, and extra review.
Color review should include more than body fabric. Embroidery thread, printed areas, clothing fabric, woven labels, hangtags, gift boxes, and retail boxes should feel visually coordinated. A mascot may have the correct body color but still look wrong if the scarf, logo thread, or packaging color feels off.
A practical color check can include:
Compare fabric under daylight and indoor light.
Check pile direction from front, side, and top angles.
Place embroidery thread against the fabric.
Check whether long pile hides small color details.
Compare printed parts after fabric is sewn and filled.
Review packaging color next to the plush.
Keep material notes for repeat orders.
For repeat campaigns, color records are important. Fabric batches may vary, and some materials may change availability over time. Keeping fabric notes, approved sample photos, and material references helps reduce uncertainty in future orders, though each reorder should still be reviewed against current material batches.
Which Details Should Stay?
The details that should stay are the ones that make the mascot recognizable at first glance. Most mascot plush designs should protect the face, silhouette, main color, expression, logo position, and one or two signature features. These elements create recognition faster than small decorative details.
Face comes first. Eye shape, eye spacing, mouth curve, nose position, cheek shape, and eyebrow angle can completely change the mascot’s personality. A cheerful mascot can look tired if the eyes sit too low. A playful mascot can look serious if the mouth curve is too flat. A tiny shift in facial embroidery may change the entire expression, so face details should be reviewed carefully during sampling.
Silhouette comes next. Big ears, round head, square body, long tail, crown, horns, wings, scarf, cap, or special body shape can make the mascot recognizable even from far away. If the silhouette is lost, the plush may need the logo to explain who it is. A strong mascot plush should be recognizable even before someone reads the tag.
Color is also central. The main mascot color should stay close enough to the original identity, but fabric limitations must be respected. The final color should be reviewed on real material rather than judged only by digital reference.
Signature details should be protected when they create memory value. A small crown, a scarf, a belly mark, a striped shirt, a mini bag, or a special tail may be what makes the mascot unique. These details do not always need to be copied exactly. They need to be visible, stable, and repeatable in soft form.
A useful priority table:
| Detail Level | Examples | Treatment |
|---|---|---|
| Must Stay | Face, main color, silhouette, core expression | Protect during pattern and sample review |
| Should Stay | Logo, scarf, outfit, tail, hat, badge | Keep if clear and practical |
| Can Adjust | Shoe lines, back marks, small color blocks | Simplify or resize |
| Can Remove | Hidden micro text, fragile tiny props, crowded lines | Remove if they add cost without value |
Logo placement should be planned as part of the mascot design, not added at the end. Natural logo positions include shirt front, scarf, belly patch, foot embroidery, side woven label, hangtag, accessory, box, or insert card. The logo should be readable, but it should not overpower the mascot’s charm.
What Details Can Be Simplified?
Details can be simplified when they are too small, hidden, fragile, expensive to repeat, or unclear after stuffing. This is one of the most important steps in making a mascot plush look polished instead of messy. Simplification does not mean removing personality. It means making the mascot work better as a soft product.
Common details that can be simplified include:
Tiny fingers or toes.
Thin shoelaces.
Small back graphics.
Micro text.
Narrow clothing seams.
Complex gradients.
Tiny buttons.
Thin antennae.
Sharp hair spikes.
Multiple small color blocks.
Very small printed logos.
Loose mini props.
Many of these details look fine in flat artwork but become difficult in plush. A tiny logo may not read after embroidery. A sharp spike may become rounded. A thin tail may twist. Small fingers may look uneven. Several narrow clothing lines may crowd the body and raise sewing time without improving recognition.
Better plush-friendly options include:
Turn small fingers into mitten-style hands with stitch lines.
Use larger embroidered eyes instead of tiny facial marks.
Move small text to a hangtag or packaging.
Change complex gradients into clean fabric color blocks.
Use a woven label instead of tiny body embroidery.
Make a fragile prop larger and softer.
Reduce clothing details to the most recognizable lines.
Replace tiny hard parts with embroidery where suitable.
Simplification should be decided before sample work whenever possible. If changes happen after the first sample, they can affect pattern pieces, embroidery files, material cutting, sewing order, packing size, and timing. Early simplification feels intentional. Late simplification can create delay.
| Original Detail | Possible Issue | Plush-Friendly Choice |
|---|---|---|
| Five thin jacket lines | Crowded sewing or print | Keep two main color blocks |
| Tiny chest logo | Unreadable embroidery | Enlarge or move to woven label |
| Sharp hair spikes | Softened after filling | Use rounded but recognizable hair shape |
| Separate small prop | Attachment and safety review | Use embroidery or larger soft prop |
| Small fingers | Uneven sewing | Mitten hand with stitched divisions |
| Thin tail | Weak seam and twisting | Slightly thicken or reinforce |
| Gradient color | Hard fabric match | Use solid fabric or controlled print |
| Micro slogan | Cannot be read | Move to hangtag or box |
| Hidden back pattern | Low user value | Simplify or remove |
| Tiny buttons | Small-part concern | Embroider button shapes |
A well-simplified mascot plush often looks more premium than an over-detailed one. It has a clearer face, cleaner body, stronger shape, smoother sewing, and better repeatability. The final product should not feel like a reduced version of the mascot. It should feel like the mascot has been properly translated into soft form.
What Type Of Mascot Plush Works Best?

The right mascot plush format depends on how the campaign item will be used, carried, displayed, packed, shipped, and remembered. A desk plush creates stronger display value. A plush keychain gives daily visibility. A boxed mascot feels more like a gift. A blind box mascot series creates collection interest. The strongest choice is the one that fits the campaign goal, not simply the cutest sketch.
Mascot plush format should be chosen before artwork details are locked. Size, pose, logo position, fabric, filling, accessory strength, label setup, carton volume, and delivery method all change when the format changes. A 12 cm plush keychain and a 28 cm sitting mascot may use the same character, but the design rules are different. The keychain needs simplified facial details and a secure hanging loop. The sitting mascot needs better body balance, fuller filling, and stronger display posture.
A campaign team often starts with one mascot drawing and then asks, “Should this be a plush toy, a bag charm, a boxed gift, or a mini collection?” The decision should be based on the real usage scene:
Will it be handed out in high volume?
Will it be sold as a fan item?
Will it sit on a desk or shelf?
Will it hang from a bag or keyring?
Will it go inside a gift box?
Will it be mailed individually?
Will it be part of a multi-style collection?
Will it need barcode, SKU, FNSKU, warning label, care label, or carton mark control?
A large plush can create stronger emotional value, but it uses more fabric, filling, carton space, and shipping volume. A mini plush is easier to distribute, but facial embroidery, logo readability, and accessories become harder to control. A gift-box plush looks premium, but packaging can raise cost and freight volume. A blind box mascot series can create repeat interest, but each style needs accurate sorting, labeling, and packing control.
| Mascot Plush Format | Good Fit | Main Strength | What To Review Early |
|---|---|---|---|
| Sitting Mascot Plush | Desk gifts, retail display, member rewards, fan items | Strong face and body display | Sitting balance, filling, carton space |
| Plush Keychain | High-volume events, bag use, travel items | Easy to carry and keep visible | Small details, loop strength, logo clarity |
| Plush Bag Charm | Fashion, beauty, youth, lifestyle campaigns | Strong daily exposure | Hook quality, fabric wear, compact shape |
| Mini Mascot Plush | Gift sets, event kits, desk items | Cute scale and practical handling | Detail simplification, hangtag position |
| Gift-Box Plush | Holiday gifts, limited releases, loyalty rewards | Higher presentation value | Box fit, freight volume, ear or tail pressure |
| Blind Box Mascot | Character series, fan programs, mystery gifts | Collection and surprise appeal | SKU labels, mixed carton rules, style accuracy |
| Plush Pillow Mascot | Home, travel, lifestyle, comfort themes | Larger soft-touch value | Fabric use, filling, compression recovery |
| Plush Backpack Mascot | Functional campaign item | Daily use plus character value | Straps, lining, zippers, load areas |
A good format choice prevents waste. If the campaign needs 20,000 quick handouts, a large boxed mascot may create storage and delivery pressure. If the goal is a premium membership gift, a tiny charm may feel too light. If the mascot has a highly detailed face, an 8 cm charm may not show enough detail. If the mascot has a simple face and strong color, a small charm may work beautifully.
The strongest direction is usually found by matching format to function. The plush should be easy to use, easy to recognize, easy to pack, and good enough to keep.
Plush Toy vs Plush Keychain
A plush toy is better when the campaign needs emotional value, stronger display, better photo effect, or a gift-like feeling. A plush keychain is better when the campaign needs easy handout, compact packing, lower storage pressure, and daily carry visibility. Both formats can carry a mascot well, but they should not use the same design logic.
A plush toy gives more space for expression, body shape, clothing, fabric texture, and logo placement. It is suitable for member rewards, shelf display, fan gifts, seasonal programs, retail setups, and campaign kits. A 20–35 cm mascot toy can show the character’s eyes, mouth, outfit, ears, tail, or signature accessory more clearly. It also gives more room for softer fabric, fuller filling, and a more polished appearance.
A plush keychain works better when portability matters. It can stay on backpacks, keys, purses, luggage, pencil cases, employee bags, or event lanyards. This makes it useful when the campaign wants visibility after the event. However, small size brings limits. Tiny text, thin mouth lines, detailed logos, small fingers, layered clothing, and complex props may not read well at 8–12 cm.
A practical comparison:
| Decision Area | Plush Toy | Plush Keychain |
|---|---|---|
| Common Size Direction | 15–35 cm | 8–15 cm |
| Detail Space | Better for face, outfit, and body shape | Limited, needs cleaner design |
| Main Use | Gift, display, retail, fan item | Daily carry, event handout, bag charm |
| Logo Placement | Shirt, scarf, belly patch, foot, hangtag, box | Side label, tag card, small patch |
| Fabric Choice | More room for soft or textured fabric | Fabric should keep small shape clean |
| Packing | Polybag, hangtag, box, display carton | Small polybag, card tag, compact carton |
| Key Risk | Larger carton volume and shape recovery | Loop strength and tiny detail clarity |
| Strongest Value | Emotional attachment and display | Portability and repeated visibility |
For a mascot with a very expressive face, a plush toy often gives better results. For a mascot with a simple round body and bold color, a keychain may be enough. For campaigns with several touchpoints, both can work together: a larger plush for premium use and a keychain version for wider distribution.
Which Size Fits Campaign Use?
Mascot plush size should be chosen by detail clarity, usage scene, packing space, carton volume, transport cost, and how people will handle the item. Small plush is practical. Medium plush is balanced. Large plush is memorable but needs stronger planning. The right size is not the biggest one; it is the size where the mascot stays clear and useful.
Common size directions can be planned like this:
8–12 cm: good for keychains, blind box minis, bag charms, and mass handouts. Facial details must be simplified. Logos should move to tags, woven labels, or simple patches.
13–18 cm: good for mini mascot gifts, event kits, gift-with-purchase programs, and compact desk items. It gives more face space while still staying easy to pack.
20–25 cm: good for member rewards, desk display, mascot gifts, online product photos, and retail display. It gives a good balance between detail, touch, and carton control.
26–35 cm: good for premium gifts, fan items, seasonal gift sets, and mascot launches where plush presence matters. Cost, filling, packing, and freight need closer review.
35 cm and above: good for visual impact, photo props, store display, and special gifts. These sizes need careful carton planning because plush products are light but bulky.
| Size Direction | Good Fit | Design Advice | Packing Watch |
|---|---|---|---|
| 8–12 cm | Keychains, charms, blind box minis | Simplify face and logo | Keep loop secure and carton sorting clear |
| 13–18 cm | Event gifts, compact plush, gift sets | Keep main expression and color blocks | Avoid oversized hangtags |
| 20–25 cm | Desk plush, retail display, member reward | Good size for face and outfit details | Review box or carton fit |
| 26–35 cm | Premium gifts, fan items, photo value | More room for fabric and expression | Carton volume rises quickly |
| 35 cm+ | Display, photo props, large gifts | Strong visual presence | Shipping volume and recovery need review |
Size also changes logo readability. A 2 cm logo may be readable on a 30 cm mascot shirt but fail on a 10 cm plush charm. A mascot with detailed eyes may need either a larger product or a simplified embroidery plan. Long ears, large hats, wings, tails, and props can increase packing volume even when body height looks moderate.
A useful size test is simple: can the mascot still be recognized in a quick photo? Can the face still look clear after embroidery? Can the logo be read without crowding the body? Can the plush be packed without bending key features? If the size fails these checks, the design should adjust before sampling.
When Is Gift Packaging Needed?
Gift packaging is needed when the campaign depends on presentation, unboxing, retail display, holiday gifting, member rewards, limited releases, or premium perceived value. Simple polybag and hangtag packing can work well for fast event handout, but a gift box or retail box can make the mascot feel more complete when the opening experience matters.
Packaging should never be selected only for appearance. It must fit the plush shape. A tight box can crush ears, flatten cheeks, bend tails, or press clothing details. A large box may look better but increase carton volume and transport cost. A window box may show the face well, but the plush must sit in the correct position inside the box. A blind box adds surprise, but it also needs style codes, SKU labels, and sorting control.
Common packing choices include:
Polybag: light, practical, and efficient for event handouts or bulk delivery.
Hangtag: useful for mascot story, logo, barcode, care content, or campaign message.
Care label: important for product information and use guidance.
Warning label: needed when age direction, small parts, or region-specific rules require review.
Retail box: useful for store display and shelf presentation.
Gift box: suitable for premium rewards, holiday sets, and commemorative programs.
Blind box: useful for collectible series and surprise mechanics.
Display box: useful for counter display, store programs, or grouped mascot collections.
Master carton: important for bulk storage, sorting, and delivery handling.
| Packaging Type | Good Fit | Strength | Risk To Review |
|---|---|---|---|
| Polybag | High-volume handout, simple shipping | Low volume and practical handling | Limited presentation |
| Hangtag | Most mascot plush formats | Adds story, logo, barcode, care info | Should not cover the face |
| Retail Box | Shelf display, retail-ready setup | Better presentation and protection | Larger carton volume |
| Gift Box | Premium reward, holiday, VIP use | Strong gift feeling | Cost and box fit |
| Blind Box | Collectible mascot series | Surprise and repeat interest | SKU and packing mix-up risk |
| Display Box | Store counter or collection display | Group visibility | More packing coordination |
| Master Carton | Bulk delivery and storage | Protects and organizes shipment | Needs clear carton marks |
Gift packaging should be reviewed during sample stage, not after bulk products are finished. The plush and package should be tested together. The ears, tail, head, hat, or accessory should not be squeezed. Hangtag location should not block the expression. Barcode and SKU labels should be placed where they can be handled easily. For multi-style projects, carton marks and style labels should be clear enough to avoid mixing.
A good package protects the plush and helps the campaign feel intentional. A poor package can make a good plush arrive looking tired.
What Type Of Logo Placement Works?
Logo placement works best when it feels natural to the mascot and remains readable at the chosen size. Strong positions include a shirt, scarf, belly patch, foot embroidery, side woven label, hangtag, accessory, gift box, or retail box. The logo should support recognition without making the plush feel like a flat advertisement.
A logo that works on a business card or digital banner may not work on plush fabric. Thin lines, small text, gradients, and complex icons may lose clarity after embroidery or printing. Soft surfaces curve after stuffing, and long-pile fabric can cover details. For this reason, logos often need to be enlarged, simplified, moved, or carried by packaging instead of being forced onto the body.
Good logo placement depends on plush format:
Sitting mascot plush: shirt, belly patch, scarf, foot, side label, hangtag, box.
Plush keychain: woven side label, tag card, small patch, simple embroidery.
Gift-box plush: box print, ribbon, hangtag, inner card, subtle body mark.
Retail plush: hangtag, care label, barcode, SKU label, box panel.
Sports or fan mascot: jersey-style shirt, scarf, cap, badge, woven label.
Education mascot: soft embroidered badge, printed tag, care label, simple body patch.
A practical logo review should check:
Is the logo readable at the chosen size?
Does embroidery or printing suit the logo better?
Will plush fabric pile cover the logo?
Will stuffing curve distort the logo?
Can the logo appear in front-view photos?
Does the logo compete with the mascot’s face?
Is the logo safer on a label, tag, or box?
Can the same logo placement work across all styles?
| Logo Method | Good Fit | Watch Carefully |
|---|---|---|
| Embroidery | Simple logos, short text, strong durability | Needs enough size and clean placement |
| Printing | Flat graphics, clothing patterns, color shapes | Surface and fabric texture affect clarity |
| Woven Label | Small branding, side seam, charms | Needs correct size and seam position |
| Patch | Bold logo or badge effect | Adds sewing work and thickness |
| Hangtag | Story, barcode, campaign info | Must not hide face or key details |
| Box Print | Premium gift or retail display | Adds packing cost and file control |
| Foot Embroidery | Subtle branding | Works better on larger plush |
| Scarf Or Shirt Logo | Natural campaign identity | Needs outfit pattern planning |
The most effective logo placement often feels quiet but clear. People should see the mascot first, then notice the brand identity naturally. When the logo is too large, the plush may feel like an advertisement. When it is too small, it fails its role. The right placement makes the mascot lovable and identifiable at the same time.
How Does The Sample Process Work?

The sample process turns mascot artwork into a real plush item that can be touched, measured, reviewed, revised, packed, and approved before the larger run begins. It checks the mascot’s face, size, shape, fabric, color, filling, logo position, accessories, labels, and packing direction. A clear sample process reduces the chance of expression errors, color mismatch, weak structure, unclear logo placement, or packing problems later.
A mascot plush sample is not only a preview. It is the first real test of whether the mascot works in soft form. Artwork can show perfect lines and bright colors, but plush fabric behaves differently. Stuffing changes the face shape. Fabric pile can hide small embroidery. A logo that looks clear on a screen may become unreadable on a curved plush body. Long ears may bend inside a box. A small prop may look cute but become hard to attach securely.
The sample stage helps these issues appear early, when changes are still manageable. Eye position can be moved. The mouth can be thickened. The body can be widened. The filling can be adjusted. The logo can move from the body to a scarf, shirt, side label, hangtag, or box. Packing can be resized before larger quantities are prepared.
For mascot plush campaigns, sample review should connect design, use, and timing. A plush made for a fan event needs expression accuracy. A plush charm needs small-detail clarity and loop strength. A boxed gift needs the plush and package to fit together. A school-related mascot needs safer detail choices and label review. A retail item needs hangtag, barcode, SKU, carton mark, and packing control.
Custom plush samples usually require a sample fee because each sample may involve pattern work, material preparation, embroidery or printing, cutting, sewing, stuffing, shaping, accessory setup, packing review, and revision work. When a clear single-style order reaches 2,000pcs, the sample fee can be refunded or deducted under the confirmed project terms.
A strong sample process usually covers these steps:
Review mascot artwork, size, quantity, fabric, packing, target region, and deadline.
Translate flat artwork into plush structure through pattern work.
Prepare fabric, filling, thread, embroidery or printing files, and accessories.
Make the first physical sample.
Check face, body shape, color, softness, logo, accessories, and packing.
Revise details that affect recognition, touch, safety, or presentation.
Confirm the approved sample as the working reference for the larger run.
| Sample Stage | What Happens | What To Check |
|---|---|---|
| Artwork Review | Mascot files, logo, size, quantity, packing, deadline | Feasibility, risk, missing details |
| Pattern Work | Flat artwork becomes soft structure | Head, body, limbs, ears, tail, posture |
| Material Setup | Fabric, filling, thread, accessories | Color, pile, touch, stitch visibility |
| Craft Setup | Embroidery, printing, appliqué, labels | Face, logo, clothing, signature details |
| First Sample | Physical plush is made | Overall look, size, softness, balance |
| Revision | Details are adjusted | Expression, shape, fabric, filling, packing |
| Packing Review | Bag, tag, box, carton direction | Face protection, label position, carton fit |
| Approval | Final sample is confirmed | Reference for the larger run and reorders |
How Does A Factory Make A Sample?
A mascot plush sample usually starts with file review. The sample team checks mascot artwork, front view, side view, back view, logo file, color reference, target size, quantity, fabric direction, accessory needs, packing idea, region, and deadline. This step decides whether the design can move forward directly or whether the mascot needs simplification before pattern work.
Pattern work comes next. The pattern controls the plush shape: head volume, body thickness, ear angle, limb shape, tail position, sitting balance, seam placement, and how the face will look after filling. A simple round mascot may need fewer pattern pieces. A mascot with a big head, thin arms, shoes, clothing, or a special pose needs more careful pattern planning.
After the pattern is ready, materials and craft details are prepared. This may include plush fabric, filling, embroidery thread, printed parts, appliqué, keyring, zipper, hook, magnet, patch, care label, hangtag, or box materials. The pieces are cut, embroidered or printed, sewn, filled, shaped, trimmed, and cleaned.
The first sample often reveals practical issues. Eyes may sit too low. The mouth may be too thin. The head may feel too heavy. The body may need more filling. The logo may need to be larger. The fabric color may look different under normal light. These findings are normal. A good sample process uses them to improve the plush before larger quantities begin.
What Should The Sample Confirm?
The sample should confirm whether the mascot plush looks right, feels right, fits the campaign use, and can be repeated with stable results. It should not be judged only by whether it looks cute. It should be checked as a real product that will be handled, packed, shipped, displayed, carried, gifted, or sold.
The sample should confirm the mascot’s recognition details first. Face expression, eye position, mouth curve, head shape, body silhouette, main color, logo placement, and signature feature should feel close to the intended mascot. If those details are weak, the plush may become a generic toy instead of a campaign character.
The sample should also confirm physical details. Size should be measured. Fabric should be touched. Filling should be pressed. The plush should be checked from the front, side, and back. If it needs to sit, hang, stand, or fit in a box, that should be tested before approval. For a plush keychain, the loop or hook should be reviewed. For a boxed mascot, the ears, tail, hat, or accessory should not be crushed.
A practical sample checklist includes:
Mascot likeness: face, color, shape, signature detail.
Size: height, width, thickness, sitting or hanging size.
Fabric: pile, softness, stretch, color effect.
Filling: fullness, softness, body support, recovery.
Craft: embroidery, printing, appliqué, logo clarity.
Accessories: placement, strength, safety direction.
Packing: polybag, hangtag, box, carton fit.
Labels: care label, warning label, barcode, SKU label if needed.
A sample should also show what can reasonably vary in soft products. Plush fabric, filling, sewing, and hand shaping may create small differences. The approved sample helps define the target look and the details that must stay tightly controlled.
How Long Does Plush Prototyping Take?
Plush prototyping time depends on artwork clarity, mascot complexity, material preparation, embroidery or printing work, accessory setup, packing development, and revision rounds. A simple mascot with clear artwork, standard fabric, and basic embroidery can move faster. A detailed mascot with special colors, clothing, small props, exact facial expression, or gift packaging needs more review time.
The time is not only sewing time. It includes design review, pattern work, fabric sourcing or matching, embroidery file preparation, cutting, sewing, stuffing, shaping, internal checking, feedback, and possible revision. If the plush includes several styles, each style may need its own pattern, material notes, embroidery files, sample review, packing notes, and label files.
Sampling may take longer when:
Only one front view is available.
Side or back details are unclear.
The mascot has many small facial details.
Specific fabric colors need close review.
The plush has clothing, shoes, hats, tails, or props.
Accessories such as hooks, zippers, magnets, or sound parts are included.
The packing needs a gift box, retail box, blind box, or display box.
Label files, barcode, SKU, or warning details need review.
Several mascot styles are being developed together.
The easiest way to protect timing is to send complete files at the start: mascot artwork, logo, color references, front/side/back views, target size, quantity, fabric direction, craft details, accessories, packing idea, target region, and event date. Clear files reduce guessing and help the sample team focus on the real product.
Fast prototyping only helps when the sample is accurate enough to guide the larger run. A rushed sample with unresolved face, color, size, or packing issues can create more delay later.
Why Is The Approved Sample Important?
The approved sample is important because it becomes the physical reference for the larger run. It shows the agreed target for face, shape, size, fabric, filling, embroidery, logo placement, accessories, labels, and packing. Without a clear approved sample, each stage may rely on interpretation, and small changes can spread across the order.
An approved mascot plush sample should be connected to working records. These may include pattern version, fabric notes, color references, embroidery files, printing files, thread colors, filling level, accessory list, label files, packing instructions, carton marks, and quality focus details. These records help keep the larger run close to the approved look.
The approved sample helps prevent several common issues:
Face drift: eyes, mouth, nose, or expression moving away from the approved look.
Shape drift: head, body, ears, tail, or limbs changing during the larger run.
Fabric drift: pile, color, hand feel, or texture changing without review.
Filling drift: plush becoming too flat, too hard, or uneven.
Logo drift: placement, size, or clarity changing after approval.
Packing drift: tags, labels, boxes, or carton marks being placed incorrectly.
For multi-style mascot campaigns, the approved sample is even more important. A mascot family, blind box series, fan collection, or seasonal set may include several styles with different colors, faces, labels, and packing rules. Each style needs its own approved reference so that SKU labels, boxes, cartons, and style records do not get mixed.
| Approved Sample Record | What It Controls | Risk Without It |
|---|---|---|
| Pattern Version | Shape, size, seam placement | Body or face changes |
| Fabric Notes | Color, pile, touch, stretch | Wrong shade or hand feel |
| Embroidery File | Face, logo, stitch density | Expression changes |
| Printing File | Clothing, graphics, color detail | Blurred or misplaced graphics |
| Filling Reference | Softness, fullness, weight feel | Flat, stiff, or uneven plush |
| Accessory List | Parts, position, attachment | Missing or weak details |
| Label Files | Care, warning, barcode, SKU | Packing or retail delay |
| Packing Instruction | Bag, tag, box, carton mark | Crushed plush or wrong sorting |
| Quality Focus | Main visible and structural risks | Important defects missed |
The approved sample is also valuable for repeat campaigns. If the same mascot returns for another season, approved sample photos, pattern notes, fabric records, embroidery files, label files, and packing instructions can make the next review smoother. Material batches may still need checking, but the project does not need to start from zero.
How To Plan Price And Bulk Quality?

Mascot plush price and bulk quality should be planned together, not as two separate tasks. Price is shaped by size, structure, fabric, filling, embroidery, printing, accessories, labels, packing, quantity, test needs, and delivery timing. Bulk quality depends on approved sample control, material records, sewing checks, filling consistency, needle detection, packing review, and clear shipment preparation.
A campaign plush often has a fixed event date, launch date, retail window, or warehouse deadline. This makes early planning important. A low early cost may look attractive, but if it causes face distortion, weak seams, wrong labels, poor packing, or late delivery, the real cost becomes much higher. A smart plan protects the mascot’s face, touch, identity, safety direction, packing, and delivery path before the larger run begins.
The best price plan starts by defining the plush’s role.
Is it a high-volume event gift?
Is it a premium reward?
Is it a retail mascot item?
Is it a plush keychain for daily carry?
Is it a boxed gift?
Is it a blind box series?
Is it for children, families, fans, internal events, or retail display?
Is it one mascot, or several SKUs?
Is the schedule flexible, or tied to a fixed date?
Once the role is clear, cost decisions become easier. A large fan mascot plush may deserve more cost on face embroidery, fabric feel, and filling. A high-volume trade show charm may need simple structure, clear logo, secure loop, and efficient packing. A child-related plush may need safer accessory choices, label planning, seam review, and test support. A boxed gift may need packaging review before the plush size is locked.
| Planning Area | Decide Early | Why It Matters |
|---|---|---|
| Product Role | Gift, charm, retail item, reward, collectible | Sets the right cost level |
| Size | Height, width, thickness, hanging or sitting size | Affects fabric, filling, detail clarity, carton space |
| Structure | Sitting, standing, hanging, boxed, functional | Affects pattern, sewing, filling, packing |
| Fabric | Pile height, texture, softness, color | Controls hand feel and mascot look |
| Face Craft | Embroidery, printing, appliqué, thread color | Controls expression and recognition |
| Logo Position | Shirt, scarf, tag, box, belly patch, side label | Balances identity and charm |
| Accessories | Keyring, hook, zipper, magnet, sound part, clothing | Adds cost, assembly time, and safety review |
| Packing | Polybag, hangtag, gift box, retail box, blind box | Affects presentation, storage, delivery |
| Labels | Care label, warning label, barcode, SKU, FNSKU | Supports retail, warehouse, and region needs |
| Quantity | Pieces per design and per SKU | Affects setup spread and material planning |
| Delivery | Event date, launch date, warehouse deadline | Affects sampling, bulk work, and transport choices |
A strong cost plan does not mean choosing the cheapest possible route. It means using budget where it protects the mascot’s real value. For most mascot plush projects, the value sits in face likeness, body shape, color identity, hand feel, secure seams, proper labels, packing protection, and on-time delivery. Decorative details that cannot be seen clearly after stuffing can often be reduced.
How Much Does Mass Plush Production Cost?
Mass plush production cost depends on the real product plan. A simple 10 cm plush keychain and a 30 cm boxed mascot toy may carry the same mascot, but their cost structure is completely different. Size, shape, fabric, filling, face craft, accessory count, packing, labels, quantity, test support, and schedule all change the final cost.
The main cost areas usually include:
Pattern work.
Sample development.
Fabric and filling.
Embroidery or printing.
Cutting and sewing.
Accessory assembly.
Stuffing and shaping.
In-line checking.
Needle detection when required.
Final product review.
Packing materials.
Labels and carton marks.
Shipment preparation.
A round mascot with one main fabric, simple embroidered eyes, and polybag packing is usually easier to control. A mascot with a shaped head, detailed face, layered clothing, shoes, tail, logo patch, hangtag, warning label, barcode, and gift box needs more work. Even if both are 20 cm tall, the second design carries more pattern work, more material preparation, more sewing steps, more checking, and more carton space.
Cost also changes by order structure. One mascot at 5,000pcs is different from ten mascot styles at 500pcs each. A multi-style series can create stronger campaign value, but each style needs its own pattern, sample, fabric notes, embroidery files, label setup, packing rules, and quality reference. Shared planning can help: same fabric base, same hangtag size, same care label format, same box structure, or same carton rules.
| Cost Driver | Lower-Cost Direction | Higher-Cost Direction |
|---|---|---|
| Size | 8–18 cm mini plush or charm | 26–35 cm+ gift or display plush |
| Shape | Round, seated, simple body | Large head, thin limbs, special pose |
| Fabric | Available standard plush | Special texture, closer color review, premium soft fabric |
| Face | Simple embroidery | Detailed multi-color embroidery |
| Outfit | Simple shirt or scarf | Layered clothing, shoes, many fabric colors |
| Logo | Hangtag or woven label | Embroidered body logo, patch, custom accessory |
| Accessories | No hard parts or simple keyring | Magnet, zipper, sound part, removable item |
| Packing | Polybag and hangtag | Retail box, gift box, blind box, display box |
| Quantity | Higher single-style quantity | Many low-quantity styles |
| Timing | Normal planning time | Fixed event date with limited revision space |
Several practical choices can reduce cost without weakening the mascot:
Choose a size where the face stays clear but the carton does not become too large.
Keep the main color and simplify low-impact color blocks.
Use embroidery for eyes, mouth, and visible logo areas that need durability.
Move small text to hangtag, packaging, or woven label.
Avoid tiny removable accessories unless they add real value.
Share fabric, label size, packing style, and carton rules across related styles.
Confirm box size before the final sample is approved.
The most reliable pricing comes after reviewing real project files. One mascot image can start an early review, but a stable quote needs size, quantity, fabric direction, craft details, accessories, packing, labels, region, and delivery date.
What Is The MOQ For Plushies?
For Heyzizi, standard MOQ starts from 500pcs per design. This fits most custom mascot plush projects because every design needs its own pattern work, sample development, material preparation, cutting, embroidery or printing, sewing, stuffing, checking, packing, and shipment preparation.
MOQ should be understood as a production planning level, not only a number. Custom plush work includes setup before the larger run begins. Pattern work, sample work, fabric sourcing, embroidery files, label setup, packing preparation, and quality planning all take time. When quantity is too low, these shared costs become heavy per unit.
For campaign planning, MOQ affects several areas:
Unit cost.
Material purchasing.
Feasibility of special fabric or custom color.
Accessory preparation.
Label and hangtag setup.
Box or blind box development.
SKU planning.
Sample fee recovery.
Delivery schedule.
Heyzizi’s sample fee can be refunded or deducted when the single-style bulk order reaches 2,000pcs. This matters when a mascot needs real development work: pattern creation, fabric review, embroidery file setup, sample correction, and approval before the larger run.
For multi-style mascot sets, MOQ is usually reviewed per design. A five-style mascot family at 500pcs per style is different from one mascot at 2,500pcs. Each style needs its own sample, approval, material notes, label files, packing references, and quality checks. If the series uses shared fabric, shared hangtags, shared care labels, or shared box structure, the whole project becomes easier to manage.
| Order Plan | Practical Meaning | Planning Note |
|---|---|---|
| 500pcs per design | Standard starting level | Suitable for many first custom mascot projects |
| 1,000pcs per design | Better setup spread | Useful for event, retail, or reward programs |
| 2,000pcs single style | Sample fee may be refunded or deducted | Good when the plush has a clear bulk plan |
| Multi-SKU 500pcs each | More variety, more file control | Needs clear labels, boxes, and carton rules |
| Repeat order | Past records support review | Fabric batch and sample notes still need checking |
If the campaign quantity is uncertain, start with the plush’s role. A mass giveaway, premium reward, retail item, and collector release should not use the same quantity logic. Quantity should match the way the plush will be used, packed, distributed, and repeated.
Which Safety Certificates Are Required?
Safety certificate needs depend on the target region, age group, product structure, material, accessories, packaging, and sales channel. A mascot plush for adult event use may have different needs from a plush for children, education, retail display, or regulated sales channels. Test planning should be reviewed by project before final material and accessory choices are locked.
Common standards that may be discussed for plush products include EN71, CE, ASTM F963, CPSIA, 16 CFR 1610, REACH, Prop 65, ISO 8124, and UKCA. Not every plush item automatically needs every standard. The correct path depends on where the product will be used, who will receive it, which materials are selected, and whether the plush includes small parts or functional parts.
Safety planning should begin early when the mascot plush includes:
Hard eyes or noses.
Buttons.
Magnets.
Sound modules.
LED parts.
Batteries.
Zippers.
Keyrings.
Removable clothing.
Small props.
Weighted filling.
Long cords or loops.
Child-related use.
For younger users, embroidered features may be a cleaner choice than some hard parts. Weighted plush needs extra review around internal filling, seam closure, leakage prevention, and body structure. Plush backpacks need strap, zipper, lining, and load-area review. Plush keychains need hanging-loop strength and small-part planning.
Labels also belong in the safety and handling plan. Care labels, warning labels, age-grade information, barcode labels, SKU labels, FNSKU labels, and carton marks should be discussed before packing starts. A plush may look correct but still face delays if the label file is missing, incorrect, or placed too late.
| Review Item | Why It Matters | When To Review |
|---|---|---|
| Target Region | Different regions may need different standards | Before final material choice |
| Age Direction | Child-related use needs closer safety planning | Before sample approval |
| Small Parts | Eyes, noses, buttons, charms, magnets | During design and sample review |
| Fabric And Filling | Material safety and touch | Before bulk material purchase |
| Seam Strength | Helps prevent opening or loose stuffing | During sample and bulk checks |
| Needle Detection | Helps control metal foreign object risk | Before final packing or shipment |
| Warning Label | Supports safe-use communication | Before packing files are locked |
| Third-Party Testing | Supports required sales or distribution needs | Based on product and region |
Testing should not be left until the end. If a test need appears after fabric, accessories, or labels are already locked, changes can affect timing and cost. Early safety review keeps the mascot plush path cleaner.
What Are The Best Shipping Methods?
The best shipping method for plushies depends on quantity, carton volume, destination, deadline, budget, and packing style. Express is useful for samples or urgent small shipments. Air freight can support time-sensitive medium-volume orders. Sea freight is more practical for larger bulk orders with enough planning time. The final method should be reviewed together with carton size and delivery deadline.
Plush items are usually light but bulky. Freight cost may be affected more by volume than weight. A 30 cm boxed mascot plush can take much more space than a 12 cm plush charm in compact packing. A gift box can improve presentation but may increase carton volume. A large pillow-style mascot can create strong comfort value but needs careful compression and recovery review.
Common delivery choices include:
Express: suitable for samples, urgent small shipments, launch review pieces, or replacement items.
Air freight: suitable when time is tight and the volume is larger than a sample shipment.
Sea freight: suitable for larger quantities when there is enough time before the campaign date.
Customer forwarder: useful when the receiving side already has a logistics arrangement.
DDP review: can be discussed based on destination, order size, product type, packing, and logistics conditions.
The delivery plan should start from the campaign date and work backward. Enough time should be reserved for sample approval, material preparation, bulk production, packing review, quality checks, carton marking, export handling, and transit. When shipping is planned too late, options become limited and cost may rise.
| Shipping Method | Best Use | Strength | Watch Carefully |
|---|---|---|---|
| Express | Samples, urgent small shipments | Fast and direct | Higher cost for bulky plush |
| Air Freight | Medium-volume urgent orders | Faster than sea | Cost rises with carton volume |
| Sea Freight | Larger bulk orders | More practical for volume | Needs longer planning time |
| Forwarder Pickup | Existing logistics setup | Easier with arranged delivery chain | Pickup timing and documents |
| DDP Review | Certain destination needs | Can simplify receiving when suitable | Must be checked by region and order details |
Packing affects shipping more than many teams expect. Before locking the packing method, review:
Plush size.
Box size.
Carton quantity.
Compression recovery.
Gift box strength.
Label placement.
Carton mark requirements.
Warehouse delivery rules.
Event or launch deadline.
A plush campaign succeeds when price, quality, safety, packing, and delivery are planned as one connected path. The product should look like the mascot, feel good in hand, arrive in the right packing, and stay consistent across the larger run. When these details are reviewed early, the final plush is more likely to support the campaign instead of creating last-minute pressure.