 Skip to content
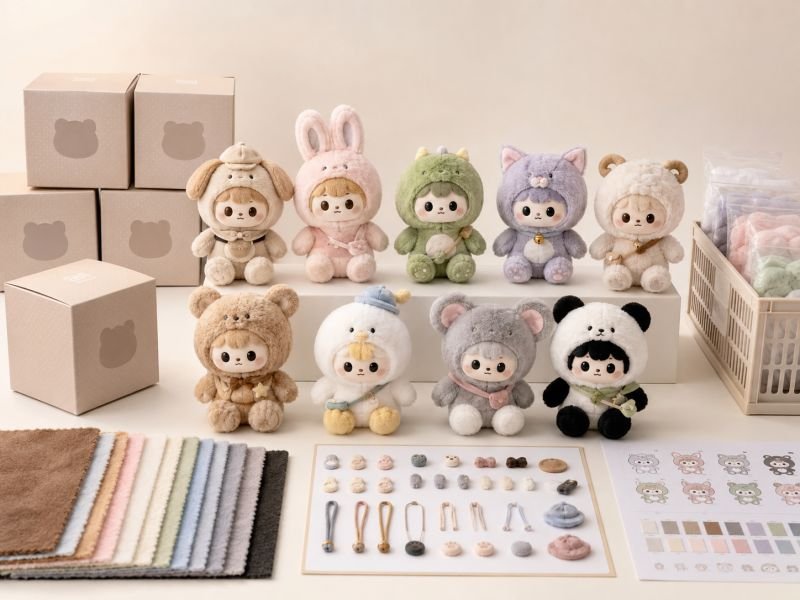
A blind box plush toy often wins attention in the first few seconds. The box is picked up. The artwork creates curiosity. The sealed package promises surprise. Then the box opens, and the soft toy inside either feels worth the wait, or the whole experience drops instantly. That small moment depends on many choices made much earlier: box depth, inner bag opacity, plush compression, barcode position, hidden style control, carton layout, and how well each style fits the same package.
For custom blind box plush toys, packaging is not just a printed shell. It must hide the exact style, protect the soft shape, keep every plush clean, support labels and scanning, control common and hidden styles, and survive storage, transport, and opening. The biggest mistakes usually come from wrong box size, weak inner protection, visible style clues, unclear style codes, poor label planning, and sample boxes that are never tested with real plush samples.
The packaging may look perfect on a flat design file. But a flat file cannot show whether rabbit ears will press against the lid, whether a keyring will scratch the plush face, whether a darker style can be seen through the inner bag, or whether one secret design feels heavier in the hand. Once printed boxes and bulk plush toys are ready, these problems become expensive to fix. The safer path is to test the package as a real product system before large-scale work begins.
What Makes Blind Box Plush Packaging Different?
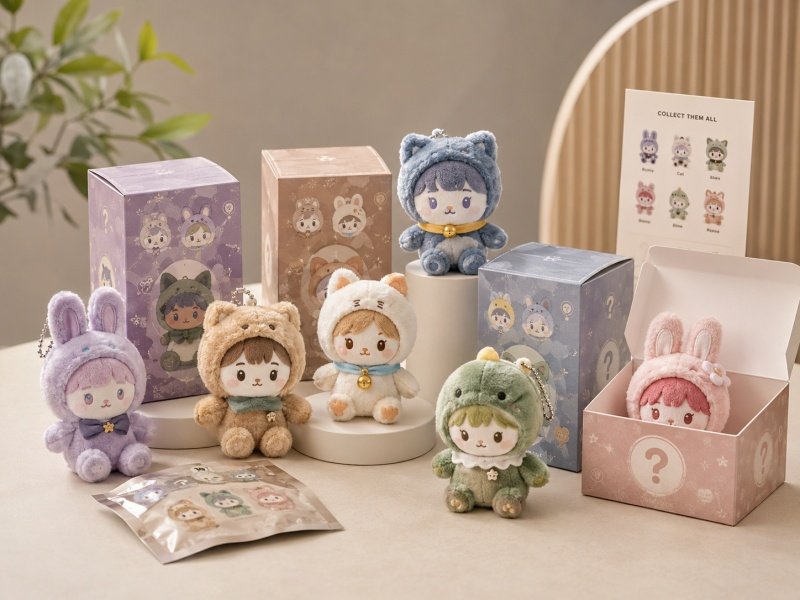
Blind box plush packaging is different because it has to do two jobs at once: protect a soft toy and keep the exact style hidden until opening. A regular plush package can show the toy directly. A blind box package has to protect the mystery, control style clues, hold labels, support carton sorting, and still make the opening feel clean and exciting.
This is where many plush projects become more complicated than they first appear. A plush toy is not a hard figure. It has fabric pile, filling, seams, soft ears, tails, bows, keyrings, hangtags, and sometimes small accessories. These details can be squeezed, bent, scratched, or revealed through the package if the structure is not tested properly.
A blind box also has a fairness problem. Every unit should feel similar enough from the outside. If one style is heavier, one box bulges at the corner, one inner bag shows a bright colour, or one code reveals the hidden version, the surprise is weakened. That does not only affect the opening moment. It can also affect repeat interest, store handling, online reviews, and restock confidence.
A complete blind box plush package usually includes more than an outer printed box:
| Package Part | Main Job | What Can Go Wrong |
|---|---|---|
| Outer Box | Presents the series and hides the exact plush | Box size reveals shape or feels too empty |
| Inner Bag | Blocks colour and keeps plush clean | Bag is too thin, too tight, or not opaque |
| Insert Card | Shows collection map, story, or character name | Card bends, scratches plush, or reveals style too early |
| Hangtag | Carries brand, character, care, or scan details | Tag presses into plush or takes too much box space |
| Barcode Area | Supports retail scanning and stock handling | Code placed on folds, curves, or artwork-heavy areas |
| Style Code | Helps internal sorting | Exact style code appears where it should not |
| Display Tray | Holds multiple boxes neatly | Tray does not match final unit box size |
| Outer Carton | Protects bulk shipment | Carton marks do not match packed quantity or style mix |
The package should be planned with real plush samples, not only flat artwork. A flat dieline can look beautiful, but it cannot show whether a 12cm rabbit plush will recover after three days in the box, whether a keyring will scratch the face, or whether a hidden style with a scarf feels different by hand.
A good blind box plush package should pass these basic checks:
- The exact style cannot be seen through the box or inner bag.
- The box shape does not change noticeably by style.
- The plush face, ears, tail, and accessories are not crushed.
- The product can be scanned and sorted without exposing the style.
- The inner reveal feels neat, not messy.
- The box fits the shipping carton without heavy pressure.
- The package design still works when all styles are packed together.
What Does Blind Box Packaging Mean?
Blind box packaging means the product is sealed or concealed so the exact style stays unknown until opening. The outside package can show the series theme, possible characters, approximate size, logo, age information, warning text, barcode, or collection artwork, but it should not reveal which plush style is inside.
For plush toys, blind packaging is more than “no window.” A package can be sealed and still fail if it leaks clues through colour, weight, shape, code, sound, or box deformation. The packaging has to hide both visual and physical clues.
Common blind packaging structures include:
| Structure | Best Use | Strength | Watch Area |
|---|---|---|---|
| Printed Paper Box | Most mini blind plush series | Good shelf look and easy outer branding | Must fit all styles without bulging |
| Opaque Inner Bag | Extra reveal and colour protection | Helps hide bright fabrics and keeps plush clean | Should not squeeze ears or face |
| Foil Inner Bag | Strong concealment | Blocks colour and light well | Can feel noisy or less soft if not matched well |
| Sleeve Box | Premium small series | Smooth opening feel | More fitting and material work |
| Drawer Box | Gift-style collectible line | Strong reveal experience | Higher cost and more space |
| Display Tray | Retail counter or shelf | Keeps boxes organised | Needs final unit size before design |
| Mailer Box | Online drop or direct shipping | Better shipping protection | Less suitable for store shelf display |
The best blind package gives enough information to feel reliable while keeping the final reveal intact. People should understand the series, size, and general product type. They should not know whether they are holding the common cat, rare bear, or secret rabbit.
A blind box plush package usually needs two identities:
| Identity Type | Seen By Final User | Purpose |
|---|---|---|
| Series Identity | Yes | Shows collection name, artwork, barcode, and general product information |
| Exact Style Identity | No, unless visible release is planned | Helps sorting, packing, ratio control, and internal records |
This separation is important. The outer package can be the same for all styles, while internal records keep each plush style organised during production and packing. That protects both the surprise and the workflow.
Why Does Packaging Affect Sales?
Packaging affects sales because it sets the expectation before the plush is seen. The box is the first promise. If it looks clean, sturdy, well-sized, and collectible, the toy inside feels more valuable before opening. If it looks weak, oversized, crushed, or confusing, the plush has to work harder to win back trust.
For blind box plush toys, the package influences at least seven commercial details:
| Area | Packaging Influence |
|---|---|
| Shelf Attention | Strong artwork helps the series stand out in a small display area |
| Opening Emotion | Inner bag, card, and clean reveal make the moment feel complete |
| Perceived Value | Right box size prevents the plush from feeling too small |
| Repeat Interest | Collection maps and style cards encourage set completion |
| Damage Reduction | Proper space protects ears, face, tails, bows, and soft shape |
| Store Handling | Barcode and label placement support scanning and sorting |
| Online Feedback | Good protection reduces crushed-box and flattened-plush complaints |
The first opening moment is practical and emotional at the same time. The box opens. The inner bag comes out. The card appears. The plush is removed. In those few seconds, several small details decide how the product feels:
- Is the box clean or dented?
- Does the inner bag feel intentional or cheap?
- Does the plush come out fluffy or flattened?
- Is the face visible and cute right away?
- Does the card explain the series?
- Does the package feel full or empty?
- Does the style still feel like a surprise?
Blind box plush packaging also affects store behaviour. A clean unit box stacks better. A scannable barcode speeds checkout. A display tray helps the collection look organised. A clear carton mark helps warehouse receiving. These details may not appear in product photos, but they affect whether a series runs smoothly after it leaves production.
A useful package should protect both the product and the feeling around it. Mystery creates the first pull. The plush quality keeps the interest. The package ties the two together.
Blind Box Packaging Vs Regular Plush Packaging
Regular plush packaging is usually built around visibility, gifting, protection, or shelf display. Blind box plush packaging is built around concealment, repeat opening, style control, and series management. The difference changes box structure, label planning, packing method, and sample testing.
A regular plush can often use a hangtag, polybag, window box, gift box, or open display because showing the toy helps people decide. A blind box plush must hide the exact toy, so the package has to create desire without revealing the style.
| Packaging Detail | Regular Plush Packaging | Blind Box Plush Packaging |
|---|---|---|
| Visibility | Product can often be seen | Exact style should stay hidden |
| Main Experience | Choose the visible toy | Open and discover the toy |
| Box Size | Can vary by plush design | Better with one shared unit size |
| Inner Bag | Optional | Often useful for colour and shape concealment |
| Label Code | Usually straightforward | Needs separation between series code and exact style code |
| Style Sorting | Usually simple | Common, rare, hidden, and mixed ratio may need control |
| Sample Test | Product fit and protection | Product fit, secrecy, weight, shape, and code control |
| Risk | Damage, dust, weak display | Style leak, wrong ratio, crushed plush, barcode issue |
A visible plush package can place the product in front and let the toy do the selling. A blind box cannot do that. The outside artwork must create enough interest in the series as a whole. This is why blind box artwork often shows the full character family, silhouettes, marks, collection map, or theme story.
Blind packaging also needs stronger consistency. If one plush style uses a different outer box, people may guess the style. If the hidden version has a thicker package, the secret may not stay secret. If the barcode is style-specific and visible, the mystery can disappear.
A regular plush package can be designed style by style. A blind box plush package should be designed collection by collection.
Who Needs Custom Blind Box Packaging?
Custom blind box packaging is useful when the plush collection depends on surprise, collecting, rarity, limited editions, character stories, or repeated opening. It fits original character lines, licensed IP plush, mascot series, fan drops, museum gifts, tourism souvenirs, retail toy programs, seasonal collections, and event releases.
It is especially useful when the product has:
- Several plush styles in one set.
- Common, rare, and hidden designs.
- A need for one shared outer package.
- A collection card or character card.
- A retail display tray.
- A launch date or event deadline.
- Barcode, SKU, or warehouse label needs.
- Plans for restock or a second series.
Different use scenes need different package decisions:
| Use Scene | Package Priority | Better Choice |
|---|---|---|
| Retail Counter | Shelf attention and display order | Printed unit box + display tray |
| Online Drop | Protection and clean unboxing | Strong unit box + inner bag + outer carton planning |
| Fan Merchandise | Collection feeling and shareability | Character card + hidden style control |
| Museum Shop | Story and souvenir value | Printed box + local story card |
| Event Gift | Cost and deadline | Simple blind box or opaque pouch |
| Premium IP Release | Higher presentation value | Better paper, card, inner reveal, stronger structure |
| Plush Keychain Series | Metal part protection | Inner bag and space for chain placement |
Not every plush needs blind packaging. A single mascot plush for a company event may work better in a visible bag or gift box. A premium plush doll may benefit from a window box because the product should be seen. A blind box format makes sense when the surprise is part of the product value.
The decision should begin with the intended experience:
- Should the exact style be hidden?
- Should people collect more than one?
- Will the package be handled in stores?
- Will it ship through e-commerce?
- Is there a hidden version?
- Does the package need to support restock?
- Are labels and barcodes required?
- Does the plush shape vary across styles?
If the answer to several of these is yes, custom blind box packaging should be planned early.
When Should Packaging Be Planned?
Packaging should be planned before plush sample approval. Box size, inner bag, label space, barcode position, hidden style code, display tray, and carton layout can change plush size, pose, accessory design, cost, and delivery timing.
The best timing is not after the plush is finished. It is during product development, while size and structure can still be adjusted. A rabbit plush may need softer ears. A dinosaur tail may need to curve closer to the body. A keychain may need the metal ring placed away from the face. These details are easier to fix before the sample is approved.
A practical timeline looks like this:
| Stage | Packaging Work |
|---|---|
| Concept Sketch | Decide blind box, pouch, card, tray, or gift box direction |
| Size Planning | Check whether all styles can share one outer size |
| First Plush Sample | Test early box fit with the most difficult style |
| Revised Sample | Adjust ears, tail, accessory, or box depth if needed |
| Package Mock-Up | Check white box, inner bag, and label area |
| Printed Sample | Review artwork, barcode, warning text, and opening feel |
| Approval | Lock box structure, print file, label plan, and carton rule |
| Bulk Packing | Follow style code, ratio, card, inner bag, and carton marks |
| Shipment | Check carton strength, quantity, and outer mark accuracy |
Late package planning creates avoidable problems. If the plush has already been approved and the box is later found too small, several things may happen:
- The box size must be changed.
- The printed artwork may need resizing.
- The display tray may no longer fit.
- Carton quantity may change.
- Shipping volume may increase.
- The plush may need structure adjustment.
- The delivery schedule may be affected.
A simple rule works well: anything that touches the plush, hides the style, carries a label, changes carton size, or affects opening should be planned before final sample approval.
Which Box Size Mistakes Cause Problems?
Box size mistakes cause problems when the package is planned from flat artwork instead of real plush volume. A blind box should be based on the largest and most difficult style in the full series, including ears, tail, belly depth, keyring, hangtag, inner bag, and recovery space. If the box is too tight, plush shape gets damaged. If it is too large, the product feels smaller and freight volume rises.
Box size looks like a simple decision, but it can affect almost every part of a blind box plush project. It affects how the toy looks after opening, whether the mystery stays fair, how many pieces fit into one shipping carton, how much storage space is needed, how the package feels in the hand, and whether the product looks valuable on a shelf.
A plush toy is not measured like a hard plastic figure. It has soft volume. The fabric pile adds thickness. The filling expands. The ears may fold. A tail may push backward. A keyring may need space so it does not scratch the face. A hangtag may bend if the package is too shallow. A collection card may press against the plush if the layout is not tested.
For blind box plush, the biggest box-size risk is not only damage. It is inconsistency. If one style creates a corner bulge and another style sits loose inside, people may guess the style by touching or comparing boxes. That is especially risky when a hidden style has a special accessory, larger head, longer ears, or a different pose.
Box size should be checked through real packed samples, not only digital files. A box that looks clean on screen may fail when a 12cm plush with soft ears, inner bag, hangtag, and card is placed inside. The right size should protect the toy, preserve the reveal, avoid waste, and keep carton packing efficient.
A practical blind box size review should look at these areas:
| Box Size Area | What To Check | Why It Matters |
|---|---|---|
| Inner Height | Plush height plus ears, hair, hat, or loop | Prevents top pressure and bent parts |
| Inner Width | Arms, wings, scarf, or side details | Prevents side wall bulging |
| Inner Depth | Nose, belly, tail, sitting pose | Protects face and body shape |
| Inner Bag Space | Bag thickness around the plush | Prevents tight wrapping and wrinkles |
| Card Space | Collection card, character card, insert | Avoids bent cards and pressure on plush |
| Metal Part Space | Keyring, hook, chain, bell if used | Prevents scratches and sound clues |
| Recovery Space | Room for plush to regain shape | Improves first look after opening |
| Carton Layout | Units per carton and box direction | Affects storage and shipping volume |
The best box is usually the smallest safe box, not the smallest possible box. A package that saves a little space but damages the plush face is not a good saving. A package that feels premium but wastes too much room may increase costs without improving the product. The right size sits between protection, mystery, visual value, and logistics efficiency.
How To Set Box Size?
Box size should be set after checking real plush dimensions in three directions: height, width, and depth. The measurement should include all soft and hard details, such as ears, tail, scarf, hat, keyring, hangtag, inner bag, and insert card. The largest or most difficult style should guide the package, not the neatest style.
A simple way to start is to measure the plush in its natural, uncompressed state:
| Measurement | Include These Details |
|---|---|
| Height | Head, ears, hair, bow, hat, top loop |
| Width | Arms, wings, side hair, scarf, wide clothing |
| Depth | Nose, belly, tail, sitting angle, back accessory |
| Packed Thickness | Inner bag, hangtag, card, soft wrapping |
| Hard Parts | Keyring, hook, charm, magnet, sound part if any |
For mini blind box plush between about 8cm and 12cm, even a few millimetres of extra depth can change how the face recovers after opening. For 12cm to 15cm plush collectibles, the box depth becomes more important because the belly, tail, and sitting angle take up more space. For plush keychains, metal parts should not be squeezed against the fabric.
A practical box-size process:
- Measure every plush style after the sample is stuffed.
- Identify the tallest, widest, and thickest style.
- Pack each style with the planned inner bag.
- Add card, hangtag, keyring, and any insert.
- Close the box without pushing hard.
- Check whether the face or ears press against the box.
- Leave the packed sample for a short storage test.
- Open and check recovery, face shape, fabric pile, and accessory position.
- Compare all styles to see whether one box feels different from the others.
A box should close smoothly. If the box needs pressure to close, it is too tight. If the plush moves loudly inside when shaken gently, it may be too loose or needs better inner control. If one style changes the outside shape, the package may reveal the style.
Why Oversized Boxes Feel Cheap
Oversized boxes can make a blind box plush feel less valuable because the package promises more volume than the toy delivers. When the box opens and the plush sits at the bottom with too much empty space, the reveal feels weak. The product may be cute, but the package makes it look smaller than expected.
Oversized packaging creates both visual and practical problems:
| Oversized Box Problem | Real Result |
|---|---|
| Too much empty room | Plush moves around and looks messy after opening |
| Large box, small plush | The toy feels less valuable |
| More carton volume | Fewer units fit per shipping carton |
| Larger display footprint | Fewer units fit on a shelf or tray |
| More paper use | Package may feel wasteful |
| Weak opening moment | The reveal feels less satisfying |
| More movement inside | Fabric pile may become messy during transport |
For example, if a unit box becomes 15% larger in each direction, the total volume can rise much more than expected because height, width, and depth all change together. In bulk shipments, this can reduce carton efficiency quickly. A box that looks only slightly larger on one sample may create many more cartons across thousands of units.
The better solution is not to make the box big for “premium feeling.” Premium feeling can come from:
- Better front artwork.
- Cleaner printing.
- A stronger paperboard choice.
- A neat inner bag.
- A collection card.
- A well-sized display tray.
- A box that opens smoothly.
- A plush that fills the package nicely.
Oversized packaging also weakens the blind experience if different styles move differently inside the box. A small round style may slide freely, while a large-eared style stays fixed. This can create different shake sounds and hand feel.
A good package should feel full but not forced. The plush should look naturally matched to the box when opened.
Why Tight Boxes Damage Plush
Tight boxes damage plush because soft toys need room for fabric pile, filling, face shape, and accessories. When the package is too shallow or narrow, it can flatten the face, bend ears, twist tails, crease fabric, press hangtags into the body, and leave pressure marks on the plush surface.
Tight boxes can look efficient at first because they reduce package volume. But if the plush comes out with a flattened face or bent ears, the saving becomes a product-quality problem. The opening moment matters. People expect the plush to look cute immediately, not after being massaged back into shape.
Common tight-box problems include:
| Area Affected | What Happens |
|---|---|
| Face | Nose, mouth, or cheeks become flattened |
| Eyes | Embroidery may look uneven on squeezed fabric |
| Ears | One or both ears stay bent after opening |
| Tail | Tail twists or folds in the wrong direction |
| Belly | Filling shifts and the body looks lumpy |
| Fabric Pile | Creases or pressure lines appear |
| Keyring | Metal scratches or dents the plush |
| Hangtag | Card edge presses into fabric |
| Box Wall | The package bulges and reveals style shape |
A tight box also creates secrecy risk. If a rabbit style pushes the top panel but a bear style does not, people may guess the rabbit before opening. If a hidden style has a scarf or special accessory that changes the box feel, the secret becomes easier to detect.
A short storage test is useful. Pack the plush in the box for 24–48 hours, then open it and check recovery. This does not replace full transport testing, but it helps show whether the package is too aggressive. If the face stays flat or ears do not recover, the box, stuffing, or plush shape needs review.
A good box should hold the plush gently. It should not squeeze the toy into shape.
How To Fit Large Ears And Tails
Large ears, tails, wings, hats, bows, scarves, and keyrings should be reviewed before the box size is locked. These parts often decide whether the blind box works or fails. The best solution is usually to adjust the plush structure and package space together, instead of forcing one difficult style into a box made for simpler designs.
Large soft parts need three checks:
| Feature | Fit Risk | Safer Direction |
|---|---|---|
| Long Ears | Bend, press lid, reveal shape | Softer filling, slight curve, fold-friendly angle |
| Thick Tail | Pushes back wall, changes depth | Curve closer to body or reduce stuffing |
| Wide Wings | Press side walls | Make wings softer or reduce width |
| Tall Hat | Needs extra height | Lower the shape or use soft structure |
| Big Bow | Gets crushed | Fix position and reduce thickness |
| Scarf | Twists inside box | Attach loose ends or position neatly |
| Keyring | Scratches plush | Place away from face inside inner bag |
| Hangtag | Bends or presses fabric | Choose better tag position or smaller tag |
A character should not lose its identity just to fit the box. A rabbit still needs ears. A dinosaur still needs a tail. A mascot may still need a hat or scarf. But these features should be shaped for soft-product packaging.
For blind box series, all styles should ideally share the same outer box size. Using a different unit box for one long-ear style may solve fit but can destroy the mystery. A better approach is to make the long-ear style fit the shared structure through pose, softness, folding angle, or box depth.
Real examples:
| Design Situation | Packaging-Friendly Adjustment |
|---|---|
| Rabbit ears too tall | Let ears lean back softly instead of standing straight |
| Dinosaur tail too long | Curve tail along the body line |
| Bear scarf too bulky | Use thinner fabric or stitch scarf ends in place |
| Keychain ring scratches face | Pack ring behind the plush or inside a small sleeve |
| Hat presses box lid | Reduce stuffing in hat or increase top clearance |
| Winged plush too wide | Make wings flatter and softer |
The most important rule is to test difficult styles first. If the largest style works, smaller styles are easier to manage. If only the simplest style is tested, box problems may appear too late.
What Should A Sample Box Test?
A sample box should test the package as a finished blind box unit. It should check fit, plush recovery, style secrecy, box strength, label space, barcode scanning, inner bag opacity, insert card fit, carton layout, and how the plush looks after staying inside the box.
A real sample box test should include every style, not just the main design. The rare and hidden styles should be checked too, especially if they include special fabric, accessory, embroidery, or a different shape.
A useful test list:
| Test Item | What To Check | Why It Matters |
|---|---|---|
| Fit Test | Every style fits without force | Prevents crushed plush and box bulging |
| Recovery Test | Plush looks good after unpacking | Protects first impression |
| Face Test | Eyes, nose, mouth, cheeks stay shaped | Keeps character expression accurate |
| Ear/Tail Test | Long parts recover naturally | Avoids bent or awkward shapes |
| Inner Bag Test | Bag hides colour and does not squeeze | Protects mystery and plush surface |
| Shake Test | Plush does not move too much | Avoids messy opening and sound clues |
| Mystery Test | Style cannot be guessed by hand | Protects blind experience |
| Barcode Test | Code scans on flat area | Reduces retail or warehouse trouble |
| Card Test | Insert fits without bending | Keeps collection detail clean |
| Carton Test | Boxes fit safely in outer carton | Supports transport and storage |
| Pressure Test | Box edges stay clean after stacking | Reduces crushed-package risk |
The test should follow real handling:
- Pack the plush with the planned inner bag.
- Add card, hangtag, and any insert.
- Close the unit box fully.
- Compare all styles by touch and weight.
- Store packed samples for 24–48 hours.
- Open and check plush shape recovery.
- Scan barcode on the finished package.
- Place packed boxes into the outer carton.
- Check carton count, direction, and pressure.
- Review whether one style feels easier to identify.
A package should not be approved only because the print looks good. The printed artwork is only one part. The real test is whether the package works with the plush, labels, cards, carton, and mystery rule together.
Box Size Mistake Checklist
Before box size is approved, the full series should be checked against a simple mistake list. This helps catch small issues before packaging artwork, display trays, cartons, and packing rules are locked.
| Mistake | Warning Sign | Better Action |
|---|---|---|
| Box based on one style only | Other styles fit poorly | Test all styles before approval |
| Box too tight | Face, ears, or tail stay crushed | Increase space or adjust plush structure |
| Box too large | Plush looks small after opening | Reduce box size or improve inner layout |
| Inner bag ignored | Final packed toy becomes thicker | Test with real inner bag |
| Card added late | Card bends or presses plush | Reserve card space early |
| Keyring not positioned | Metal scratches plush | Control ring position in packing |
| Hidden style not tested | Secret style feels different | Test hidden version separately |
| Barcode added late | Code lands on fold or curve | Reserve scan area before artwork lock |
| Carton layout ignored | Fewer pieces fit than expected | Check carton count before final size |
| Display tray made too early | Unit boxes no longer fit tray | Lock unit size before tray design |
Box size should be treated as a product decision, not a packaging afterthought. For blind box plush toys, the right box protects shape, keeps the surprise, controls cost, supports labels, and makes opening feel more valuable.
What Label And Barcode Errors Should You Avoid?

Label and code errors can turn a good blind box plush series into a messy packing, scanning, and receiving problem. The box may look beautiful, the plush may feel soft, and the hidden style may be exciting, but if the scan code fails, the outer carton does not match the packing list, or the hidden style code appears on the retail-facing surface, the launch can become harder than expected.
For custom blind box plush toys, labels do more than carry product information. They help each unit move through printing, sewing, packing, carton sorting, store receiving, warehouse storage, online fulfilment, and repeat orders. A normal plush product may only need a care label, hangtag, and outer carton mark. A blind box plush series often needs a more careful system because the outside should hide the exact style while the production and packing records still need to know what is inside.
The biggest mistake is mixing “public information” and “internal information.” Public-facing information can include the series name, product type, approximate size, logo, general code, warning text, and scan code. Internal information can include exact style code, hidden style code, ratio plan, packing carton number, and warehouse separation record. When these two layers are mixed carelessly, the blind box can lose mystery or the packing team can lose control.
A useful way to separate label information is below:
| Information Type | Should It Be Visible On Outer Unit Box? | Main Use |
|---|---|---|
| Series Name | Yes | Shows collection identity |
| General Product Type | Yes | Explains what is inside without revealing style |
| Retail Scan Code | Usually yes | Helps scanning and stock handling |
| Warning Text | If required | Supports destination and use requirements |
| Care Information | Often on sewn label or tag | Gives material and care guidance |
| Exact Style Code | Usually no | Internal sorting and packing |
| Hidden Style Code | No | Secret style control |
| Ratio Rule | No | Packing team and record use |
| Carton Mix Record | No, or controlled | Shipment and receiving control |
| FNSKU | If required by channel | Warehouse fulfilment identification |
Small label mistakes can create large delays because labels are often checked late. Once boxes are printed, sticker rolls are prepared, cartons are marked, and units are packed, changing a code or warning area becomes slow and costly. Label planning should begin before the box artwork is locked.
A blind box plush label system should protect five things:
- The mystery of the exact style.
- The ability to scan or receive units correctly.
- The separation of common, rare, and hidden styles during packing.
- The accuracy of carton quantity and destination records.
- The product information needed for the final destination and sales channel.
Which Labels Are Needed?
Blind box plush toys may need sewn care labels, warning labels, barcode labels, SKU labels, FNSKU labels, hangtags, insert cards, display tray labels, and outer carton marks. The exact label set depends on the plush structure, age group, destination, sales channel, warehouse rules, and whether the product is sold as one blind series or tracked by exact style.
A complete label plan can look like this:
| Label Or Mark | Common Position | What It Does | Common Mistake |
|---|---|---|---|
| Care Label | Sewn into plush seam | Shows material, care, origin, or required product info | Label placed where it looks ugly or irritates handling |
| Warning Label | Box, hangtag, sewn label, or insert | Carries age or safety information when needed | Added too late and squeezed into poor layout |
| Barcode | Outer box or retail label area | Allows scanning at store or inventory system | Placed on fold, curve, dark artwork, or glossy texture |
| SKU Label | Box, carton, or internal record | Helps product or style tracking | Exact style code visible on blind unit |
| FNSKU | Unit package if required by fulfilment channel | Supports certain warehouse receiving systems | Missing, unreadable, or placed over key artwork |
| Hangtag | Attached to plush or packed inside | Adds identity, story, or basic product info | Too large and presses into the plush |
| Collection Card | Inside box | Shows style map or character story | Reveals exact style too early |
| Display Tray Label | Counter display or PDQ tray | Helps store presentation | Does not match unit box artwork |
| Carton Mark | Outer shipping carton | Shows PO, quantity, carton number, destination | Carton content does not match label |
Care labels should be discussed with the plush structure. A tiny plush charm may not have much room for a large sewn label. A 12cm collectible plush can usually carry a small seam label, but its placement still matters. If the label sticks out awkwardly, it can affect photos, comfort, or product appearance.
Warning text and barcode areas should be reserved before box artwork is final. A common mistake is designing a beautiful box first, then trying to force legal text, barcode, SKU, distributor details, or FNSKU into whatever blank space remains. That usually creates a crowded back panel or a sticker that covers important artwork.
A clean label plan should confirm:
| Before Artwork Lock | Why It Matters |
|---|---|
| Which code goes on the outer box | Avoids exposing exact style |
| Whether the item uses one series code or style-level code | Affects mystery and inventory handling |
| Where barcode will be placed | Keeps scan surface flat and readable |
| Whether FNSKU is needed | Prevents last-minute relabeling |
| Whether warning text is required | Avoids layout changes after printing |
| Whether care label is sewn or attached | Affects plush seam and appearance |
| Whether cartons are mixed or single-style | Affects carton mark and packing record |
| Whether hidden styles need internal codes | Protects ratio control |
Labels are not decoration. They are part of how the plush series travels from packing table to shelf, warehouse, event, or online fulfilment.
Barcode Vs SKU Vs FNSKU
Barcode, SKU, and FNSKU are often mixed up, but they do different jobs. A barcode is used for scanning. A SKU is usually an internal product or style code. An FNSKU is used by certain fulfilment systems to identify a unit inside their warehouse process. Blind box plush packaging should define which code is public and which code stays internal.
A simple comparison:
| Code Type | What It Means | Common Use | Blind Box Risk |
|---|---|---|---|
| Barcode | A scannable code linked to product information | Store scan, inventory, checkout | Wrong code can cause scan or stock issues |
| SKU | Internal stock keeping unit | Product planning, packing, warehouse records | Exact style SKU may reveal the plush |
| FNSKU | Fulfilment network unit code for certain channels | Platform warehouse receiving and storage | Missing or wrong code can delay receiving |
| Style Code | Exact plush design code | Sorting common, rare, hidden styles | Dangerous if visible to final receiver |
| Carton Code | Carton-level tracking | Shipment and receiving | Wrong carton code creates counting trouble |
For blind box plush toys, there are two common code structures:
| Code Structure | How It Works | Best For | Watch Area |
|---|---|---|---|
| One public code for the whole blind series | All outer boxes share the same scan code | True blind selling, retail mystery format | Exact style tracking must stay internal |
| Style-level internal codes | Each plush style has its own internal code | Packing ratio, hidden style control, quality trace | Code must not appear where it reveals the style |
One public series code keeps the mystery cleaner. The outside box says “this is one unit from this blind collection.” The inside content is unknown until opening. Internal records still separate A01, A02, A03, rare style, and hidden style during packing.
Style-level tracking may be needed in some cases, but it has to be handled carefully. If exact-style labels are placed on the outer box, the blind experience may be lost. If exact-style labels are hidden inside carton records only, the packing team can still control quantity without revealing the style.
Barcode placement also matters. A barcode should be easy to scan and not placed in a poor area.
| Barcode Placement Mistake | Possible Problem |
|---|---|
| On a fold line | Code bends and scans poorly |
| On a box corner | Scanner cannot read evenly |
| On glossy foil area | Reflection may reduce readability |
| Over busy artwork | Code contrast becomes weak |
| Too small | Scan failure risk rises |
| Too close to edge | Code may be cut or distorted |
| Covered by sticker overlap | Code becomes unreadable |
| On textured or curved surface | Scanner may fail |
A better barcode area is flat, clean, high-contrast, and reserved from the start of the layout. The code should not fight with artwork. It should not be an afterthought.
How To Label Hidden Styles
Hidden styles should be labelled for internal control but not in a way that reveals the secret before opening. The outer unit package should usually match the common styles. The exact hidden style identity should stay in internal records, carton mix records, or controlled packing sheets.
A hidden style still needs traceability. Without internal control, it becomes difficult to manage quantity, ratio, inspection, and restock. But if the hidden style name, code, colour, or sticker appears on the retail-facing package, the surprise is gone.
A clean hidden style label structure can work like this:
| Layer | Visible On Unit Box? | Example Use |
|---|---|---|
| Series Code | Yes | Same code for all blind units |
| Product Name | Yes | Collection name or plush series name |
| General Barcode | Yes, if needed | Scans as one blind box unit |
| Exact Style Code | No or controlled | A01, A02, A03, A04, A05 |
| Hidden Style Code | No | A06-H or internal hidden code |
| Packing Ratio Sheet | No | Shows common, rare, hidden quantities |
| Carton Mix Record | Controlled | Tracks how hidden units are distributed |
| Final Packing Photos | Controlled | Helps order review and shipment record |
Hidden-style labels should be designed around secrecy. A label that is convenient for packing but visible later can cause problems. For example, “Secret Rabbit,” “A06-Hidden,” or “Rare Blue” printed on the unit box makes the product easy to identify. Even a small sticker code can become decoded if collectors compare units.
Safer hidden style methods include:
- Same outer box for all styles.
- Same visible barcode for the blind series if the channel allows it.
- Internal style records for packing.
- Hidden style separated with coded sheets, not obvious labels.
- Carton-level records that stay controlled.
- No exact style name on the retail-facing package.
- No unique sticker colour for hidden units.
- No different inner bag that reveals the secret after opening the box but before opening the bag.
A hidden style can be traceable without being exposed. The key is to separate the retail experience from the packing record.
What Carton Marks Should Show
Carton marks should give enough information for shipping, receiving, and quantity checking, but they should not expose unnecessary hidden style details on the final unit package. A good carton mark supports counting, storage, destination control, and carton traceability.
For blind box plush series, carton marks become more important because cartons may contain mixed styles. Some cartons may be mixed according to a ratio. Some may hold common styles only. Some may contain hidden style units in controlled quantities. If carton marks are unclear, receiving and later stock checks become difficult.
A practical carton mark can include:
| Carton Mark Item | Purpose |
|---|---|
| Product Name | Identifies the project |
| Item Code Or Series Code | Links carton to the correct collection |
| PO Number | Connects carton with order document |
| Carton Number | Example: 1/80, 2/80, 3/80 |
| Quantity Per Carton | Helps receiving count quickly |
| Gross Weight | Needed for shipping and receiving |
| Net Weight | Helps product weight reference |
| Carton Size | Supports storage and shipment planning |
| Destination | Warehouse, store, event location, or forwarder route |
| Handling Mark | Keep dry, do not crush, this side up if needed |
| Style Mix Code | Internal use when cartons contain mixed styles |
Carton marks should match the packing list. If the packing list says 60 units per carton but the carton mark says 72, receiving problems may happen. If cartons are mixed, the carton mark or controlled carton record should show how the mix is managed.
A good carton record may use a separate internal sheet:
| Carton No. | Total Units | Common Units | Rare Units | Hidden Units | Notes |
|---|---|---|---|---|---|
| 1 | 60 | 54 | 5 | 1 | Mixed carton |
| 2 | 60 | 55 | 4 | 1 | Mixed carton |
| 3 | 60 | 56 | 4 | 0 | Mixed carton |
| 4 | 60 | 54 | 5 | 1 | Mixed carton |
This kind of record helps control ratio without printing obvious hidden information on every retail unit.
Common carton mark mistakes include:
| Mistake | Possible Result |
|---|---|
| No carton number | Hard to trace missing or damaged cartons |
| Wrong quantity mark | Receiving count becomes confusing |
| No destination mark | Sorting risk rises |
| Style mix not recorded | Hidden ratio becomes hard to verify |
| Carton mark differs from packing list | Warehouse may hold or shipment |
| Hidden style carton too obvious | Secret may leak before release |
| Weak handling mark | Cartons may be stacked or stored poorly |
| No moisture warning for long transport | Packaging condition may suffer |
A blind box plush carton mark should be clear enough for logistics but discreet enough to protect the surprise.
Do Retail Channels Need Warnings?
Retail and online plush products may need warning text, age information, care labels, barcode labels, product identity, material information, origin details, and packaging warnings depending on destination, age grade, product structure, accessories, and sales channel. These details should be reviewed before box artwork is printed.
Plush toys with small parts, keyrings, magnets, sound parts, detachable accessories, long cords, or plastic bags may need more careful label planning. Products intended for younger users often need stricter review than collectible plush made for older fans or display use.
Warning and label areas to check:
| Area | What To Review |
|---|---|
| Age Grade | Whether age information is needed |
| Small Parts | Whether small part warnings apply |
| Plastic Bag | Whether suffocation warning is needed |
| Material Info | Whether fabric and filling information is required |
| Care Info | How cleaning or care should be stated |
| Origin Info | Whether origin statement is required |
| Product Identity | Whether product name and description are clear |
| Barcode | Whether retail scan code is required |
| Platform Label | Whether FNSKU or channel label is required |
| Language | Whether the destination needs specific languages |
| Testing Link | Whether label text should match testing documents |
Label needs vary by destination and product use. A plush keychain for older fans may not carry the same warning needs as a plush toy for young children. A toy sold in one country may need different text from one sold in another. A product sent to a warehouse may need platform labels that are not needed for an event giveaway.
A safer preparation list:
- Confirm the destination country or region.
- Confirm intended age group.
- Check whether small parts are included.
- Check whether the plush has keyrings, magnets, sounds, or detachable parts.
- Confirm whether a sewn care label is needed.
- Confirm whether warning text should be on box, tag, insert, or bag.
- Reserve a flat barcode area.
- Confirm whether FNSKU or other warehouse labels are needed.
- Confirm language requirements.
- Keep label files consistent with packing list and carton marks.
The label design should not be left to the last few days before printing. Warning text, barcode areas, and platform labels can change box layout. If they are added late, they may cover artwork, reduce readability, or delay package approval.
Common Label Mistakes Before Printing
Many label problems happen before the package is printed, not during packing. The artwork may look finished, but the code area is too small, warning text is missing, exact style code is exposed, or the label position conflicts with the fold line. These issues are much easier to fix before printing begins.
A pre-print label check can prevent expensive rework:
| Mistake Before Printing | Why It Matters | Better Action |
|---|---|---|
| Barcode area too small | Scanner may fail | Reserve enough flat space early |
| Code placed on fold | Printed code may bend | Move to flat panel |
| Exact style name on box | Mystery is lost | Use series-level public code |
| Warning text missing | Destination review may fail | Confirm label needs before artwork lock |
| FNSKU forgotten | Warehouse relabeling may be needed | Confirm channel needs early |
| Care label not planned | Sewn label may look awkward | Confirm label size and seam position |
| Hangtag too large | Tag may press into plush | Test inside package |
| Insert card reveals style | Surprise ends too early | Use neutral collection card if needed |
| Carton mark not matched | Receiving issue may occur | Match carton mark with packing list |
| Hidden code too obvious | Secret style can be found | Keep hidden code controlled |
A good print file should include:
- Final box dieline.
- Barcode area.
- Warning text area.
- Product information area.
- Logo and collection name.
- Space for any required sticker.
- Inner card artwork.
- Display tray artwork if used.
- Carton mark format.
- Version control for all files.
Version control is important. Blind box packaging often has several files: unit box, inner card, hangtag, display tray, carton mark, barcode label, FNSKU label, and packing sheet. If one old file is used by mistake, the package may carry wrong information.
Label And Code Review Before Bulk Packing
Before bulk packing starts, labels and codes should be checked against real units, not only files. The final box, label, inner bag, card, carton mark, and packing list should all match. This is the last chance to catch wrong code placement, missing warning text, hidden style exposure, or carton quantity mismatch.
A practical pre-packing review:
| Review Item | What To Check |
|---|---|
| Unit Box | Correct artwork version and box size |
| Barcode | Scans correctly and matches the product record |
| SKU | Does not reveal exact style unless intended |
| FNSKU | Present if required and applied to correct surface |
| Care Label | Correct size, content, and sewing position |
| Warning Label | Correct text and readable position |
| Inner Card | Correct collection card and no early style leak |
| Hidden Style Code | Controlled internally, not visible outside |
| Carton Mark | Matches packing list and shipment details |
| Carton Quantity | Actual packed units match carton mark |
| Packing Ratio | Common, rare, and hidden styles follow the approved rule |
A final code check should include both visual review and scan testing. A barcode that looks fine may still fail if printed too small, distorted, placed on a fold, or covered by glossy coating. A carton mark that looks clear may still be wrong if it does not match the packing list.
A good final review protects three things:
- The product can move through stores or warehouses without scanning trouble.
- The hidden style stays hidden until opening.
- The shipment can be counted, traced, and received correctly.
Label and code work may not feel exciting, but it is one of the easiest places to prevent avoidable problems. In blind box plush packaging, clean label planning keeps the series organised without ruining the surprise.
How To Check Packaging Before Bulk Production

Packaging should be checked with real plush samples, real box samples, real inner bags, real cards, real labels, and real carton layout before bulk production starts. A printed box can look perfect on a table, but it still needs to prove that it can protect the plush, hide the style, scan correctly, fit cartons, and follow the approved packing ratio.
For blind box plush toys, packaging approval is not only about colour and artwork. The box has to work as a complete unit. It must hold the plush without crushing the face. It must keep ears, tails, scarves, keyrings, and hangtags in good shape. It must hide the style from touch, weight, sound, shape, and colour clues. It must carry barcode, SKU, FNSKU, warning, or care information where required. It must also work inside the shipping carton.
Many packaging issues appear only after the plush is actually packed. A box may close well with one style but bulge with another. An inner bag may look opaque until a dark or bright plush is placed inside. A barcode may scan on a flat label file but fail when printed across a fold. A collection card may bend inside the box. A hidden style may feel heavier because of a special accessory. These problems should be found before large-scale packing begins.
Packaging should be checked at three levels:
| Level | What Needs To Be Checked | Why It Matters |
|---|---|---|
| Unit Package | Box fit, inner bag, card, labels, opening feel | Protects each plush and keeps the reveal clean |
| Series Control | Style code, hidden style, rare style, packing ratio | Keeps the collection organised and secret |
| Carton Setup | Carton quantity, carton mark, compression, shipment route | Reduces receiving errors and transport damage |
A package is ready only when it works across all three levels. A beautiful unit box is not enough if carton marks are wrong. A correct carton mark is not enough if the hidden style is easy to identify. A good printed design is not enough if the plush comes out flattened.
What To Review In A Sample?
A packaging sample should be reviewed as a finished blind box unit, not as a separate printed box. The real plush sample should be placed inside with the planned inner bag, insert card, hangtag, label, and any accessory. The box should then be closed, handled, stored, opened, and checked again.
A useful sample review starts with the most difficult styles, not the easiest one. If the collection includes a rabbit with tall ears, a dinosaur with a tail, a plush keychain with metal hardware, and a hidden style with an accessory, those styles should be tested first. If the hardest styles fit well, the simpler styles are easier to handle.
| Sample Review Area | What To Check | Warning Sign |
|---|---|---|
| Box Fit | Every style fits without force | Box needs pressure to close |
| Face Shape | Eyes, mouth, cheeks, nose stay clean | Face looks flat or distorted |
| Ears And Tails | Long parts recover naturally | Ear stays folded or tail twists |
| Inner Bag | Hides colour and protects fabric | Colour or outline can be seen |
| Insert Card | Fits without bending | Card presses against plush |
| Hangtag | Does not damage shape | Tag edge leaves pressure mark |
| Keyring Or Hook | Does not scratch plush | Metal touches face or fabric |
| Barcode Area | Scans on finished package | Code is on fold or curved area |
| Box Closure | Flaps close neatly | Lid bulges or opens slightly |
| Opening Feel | Plush comes out cleanly | Product looks messy after opening |
| Mystery Check | Style cannot be guessed easily | Weight, sound, or shape gives clue |
| Carton Fit | Unit boxes fit safely | Boxes are squeezed in carton |
A real sample review should include basic handling:
- Pack the plush exactly as planned.
- Close the box fully.
- Shake it lightly to check movement and sound.
- Compare all styles by hand.
- Place the packed unit under strong light to check colour leakage.
- Leave the packed unit for 24–48 hours.
- Open it and check shape recovery.
- Scan the barcode after the label is applied.
- Place several packed boxes into the shipping carton.
- Check whether carton pressure damages unit boxes.
The 24–48 hour storage check is useful because some problems do not appear immediately. A face may look fine right after packing but become flat after pressure. Ears may bend after staying against the box lid. A box corner may slowly bulge because the tail is pushing against it. A barcode sticker may lift if applied over a fold or coating.
A sample package should not be approved only by looking at front artwork. It should be tested like a real product that has to be packed, stored, shipped, opened, and judged.
How Long Does Packaging Sampling Take?
Packaging sampling time depends on box structure, dieline readiness, artwork quality, paper material, printing method, surface finish, inner bag, labels, insert cards, display tray, carton test, and revision rounds. A simple tuck-end blind box can move faster. A package with drawer structure, foil inner bag, display tray, multiple labels, and hidden style controls needs more checking.
A practical packaging sampling process often looks like this:
| Step | What Happens | What Can Delay It |
|---|---|---|
| Structure Review | Box type, opening method, and size are chosen | Plush size not confirmed |
| Dieline Setup | Box layout is prepared | Ears, tail, card, or inner bag not measured |
| White Box Sample | Blank box is made for fit check | Structure too tight or too loose |
| Artwork Placement | Front, back, side panels, barcode, warning text are arranged | Label space not planned |
| Material Review | Paperboard, coating, inner bag, card paper are checked | Material choice changes late |
| Printed Sample | Artwork, colour, finish, and folding are reviewed | Colour or finish not approved |
| Plush Fit Test | Real plush samples are packed inside | Plush shape or box size needs revision |
| Label Test | Barcode, SKU, FNSKU, warning, care label are checked | Code fails scan or layout changes |
| Carton Test | Unit boxes are placed into shipping carton | Carton count or strength changes |
| Approval | Final box, labels, cards, and carton rules are confirmed | Hidden style or ratio not locked |
A white box sample is especially useful. It is a blank structural sample that helps check size, folding, and fit before printed samples are made. If the white box already crushes the plush or leaves too much empty space, the structure should be adjusted before spending time on printed artwork.
A simple packaging sampling path may include:
| Package Type | Review Focus |
|---|---|
| Basic printed blind box | Dieline, artwork, barcode, plush fit |
| Blind box with inner bag | Box fit, bag opacity, colour hiding, opening |
| Box with insert card | Card size, bending risk, opening order |
| Box with display tray | Unit box size, tray fit, shelf presentation |
| Box with FNSKU | Label area, scan position, warehouse requirement |
| Hidden style packaging | Style secrecy, code control, ratio record |
The timeline should remain flexible because packaging depends on plush sample approval. If the plush size changes, the box may change. If the box changes, the dieline and artwork may change. If barcode or warning text is added late, the layout may need adjustment. The safest timing is to review packaging while the plush sample is still being finalised, not after every plush detail is already locked.
What QC Checks Are Needed?
Packaging QC should check material quality, print colour, folding accuracy, box strength, glue strength, inner bag opacity, label placement, barcode readability, insert card accuracy, carton strength, packing ratio, and final packed appearance. For blind box plush toys, QC should also check whether the package reveals the style before opening.
Packaging QC is not only a box inspection. It should connect the plush, box, inner bag, card, labels, and carton together. The final packed unit must pass as a full product.
| QC Stage | What To Check | Common Issue |
|---|---|---|
| Incoming Box Check | Print colour, paperboard, folding, cutting | Wrong colour, weak board, rough edges |
| Inner Bag Check | Opacity, size, sealing, cleanliness | Bag shows colour or squeezes plush |
| Card Check | Size, print, style map, quantity | Wrong card or card bends inside box |
| Label Check | Barcode, SKU, FNSKU, warning, care label | Wrong label or unreadable code |
| Pre-Packing Check | Correct plush, correct inner bag, correct card | Style and card mismatch |
| Packed Unit Check | Box closes well and plush is not crushed | Bulge, pressure mark, messy opening |
| Mystery Check | No clue by shape, sound, colour, weight | Hidden style can be guessed |
| Carton Check | Quantity, carton mark, carton strength | Count mismatch or weak carton |
| Final Appearance | Clean box, no dents, no stains | Crushed corners or dirty surface |
A packed unit check should include these details:
- The correct plush style is inside the correct inner bag.
- The inner bag hides colour and outline.
- The insert card does not reveal the style too early.
- The box closes without bulging.
- The barcode scans after printing or label application.
- The visible code does not reveal the exact style.
- The care label and warning label are correct where needed.
- The plush face, ears, tail, and accessories are not pressed.
- The outer box has no stains, crushed edges, or loose glue.
- The carton quantity matches the packing list and carton mark.
Needle detection and safety-related checks should follow product requirements and destination needs, especially before final packing and shipment. For plush toys, the package should not be used to hide product issues. The plush itself should already be checked for stitching, filling, cleanliness, accessories, labels, and overall appearance before it goes into the box.
A practical packed-unit inspection table can look like this:
| Check Item | Pass Condition | Needs Review |
|---|---|---|
| Box closure | Closes naturally | Needs force or pops open |
| Plush recovery | Looks good after opening | Face or ears stay crushed |
| Barcode | Scans easily | Fails scan or poor contrast |
| Inner bag | Fully hides style | Colour or outline visible |
| Insert card | Clean and correct | Wrong card or bent edge |
| Hidden code | Not visible outside | Exact style can be decoded |
| Carton mark | Matches packing list | Quantity or PO mismatch |
| Unit condition | Clean and neat | Dented box or dirty surface |