 Skip to content
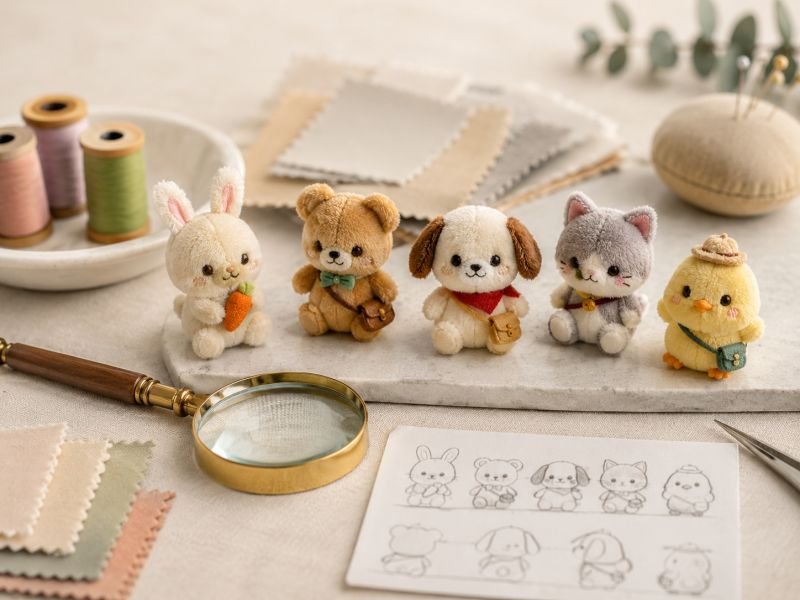
A mini plush toy has very little space to tell a full story. A face, logo, outfit, character mark, color block, and small accessory may all need to fit into a product that is only 8cm, 10cm, or 12cm tall. On a screen, those details may look sharp. After fabric cutting, sewing, filling, shaping, and packing, some lines may become crowded, hidden, thick, or slightly distorted. That is why small plush development is never just about shrinking a larger design.
To keep details clear on custom mini plush toys, the design should be simplified before sampling, key facial and brand features should be enlarged, and each detail should use the right craft. Embroidery works well for clean eyes and simple icons, printing helps color-rich artwork, applique supports bold shapes, and packaging can carry small text that does not fit on the plush body.
The most successful mini plush products usually do not keep every tiny line from the original drawing. They keep the parts people remember first: the expression, the shape, the color, the touch, and one or two signature details. A strong mini plush feels clear in the hand, recognizable in a photo, and consistent across repeat orders. The challenge is knowing what to protect, what to simplify, and what should never be forced into a tiny fabric surface.
Why Do Mini Plush Details Get Lost?
Mini plush details get lost because every part of the design must survive a physical process: fabric cutting, seam allowance, embroidery thickness, printing limits, stuffing pressure, shaping, and packing. A thin smile, tiny logo, small jacket trim, or narrow character mark may look sharp in artwork, but it can become unclear when placed on a soft, curved, textured surface. Detail clarity begins before sampling, not after production has already started.
A mini plush toy has very little space for visual storytelling. On an 8cm, 10cm, or 12cm plush, the face, body shape, logo, clothing, color blocks, accessories, and labels may all compete for attention. If every detail from the original artwork is reduced at the same percentage, the product usually becomes crowded. The face may feel smaller, the mouth may disappear into the pile, the logo may bend around the belly, and small outfit lines may turn into visual noise.
The real issue is not only size. It is size combined with material behavior. Plush fabric has thickness. Pile has direction. Thread has volume. Seams need space. Filling pushes the surface outward. Packing may press the toy for days or weeks before display. These factors do not appear in a flat drawing, but they strongly affect the finished piece.
A clean mini plush design usually protects four things first:
The expression people notice immediately.
The silhouette that makes the character recognizable.
The strongest color blocks.
One or two signature marks that carry identity.
Everything else should be reviewed carefully. Some details can be enlarged. Some can be simplified. Some should move to a hangtag, woven label, insert card, or retail box. This is not reducing value. It is making the product easier to recognize, easier to repeat, and easier to appreciate in real life.
| Detail Type | Common Problem On Mini Plush | Better Direction |
|---|---|---|
| Eyes | Too close, too small, uneven after stuffing | Enlarge slightly, simplify highlights, keep away from seams |
| Mouth | Thin line disappears into fabric pile | Use thicker embroidery or cleaner printed shape |
| Logo | Letters blur or bend on curved areas | Use icon, patch, woven label, hangtag, or box |
| Tiny text | Nearly impossible to read clearly | Move to packaging, care label, or insert card |
| Outfit seams | Too many lines make the toy look busy | Keep major color blocks, reduce small trims |
| Small patterns | Dots or stripes merge after sewing | Increase spacing or reduce pattern quantity |
| Accessories | Small pieces may feel weak or unsafe | Enlarge, soften, stitch securely, or simplify |
| Back details | Often less visible but still adds cost | Keep only needed marks or move story to packaging |
Small plush development works best when the design is treated as a new product, not a shrunken copy. If the original character was designed for a poster, animation screen, sticker, or large plush, it needs translation. That translation should protect recognition, hand feel, safety, and repeatability.
What Makes Mini Plush Hard To Read?
Mini plush is hard to read because the available surface is small, while each detail still needs physical space. Embroidery thread has width. Printed artwork needs a stable surface. Applique edges need stitching space. Seams need allowance. Filling gives the body volume. None of these parts can be reduced to zero.
A common problem appears when artwork is reviewed only on a screen. A design file can be zoomed in until every line looks perfect. The actual plush cannot be zoomed in when it is hanging from a bag, sitting in a retail display, or packed inside a blind box. If a detail is only clear when viewed close up, it is probably too small.
Several details often become unclear after production:
Fine embroidery lines become heavier than expected.
Small printed marks soften on textured fabric.
Low-contrast colors blend together.
Logos bend when placed on rounded surfaces.
Seams pull nearby details inward.
Long-pile fabric hides thin stitches.
Small accessories cover or crowd the body.
Packing may flatten ears, bows, faces, or loops.
A useful early check is simple: print the artwork at the planned plush size and view it from about 40–60cm away. This distance is close to how people see a small plush on a shelf, in a photo, or attached to a backpack. If the face, logo, or key mark is not clear at that distance, it should be adjusted before sampling.
Mini plush does not reward excessive detail. It rewards clear choices. A product with fewer strong details often looks more polished than one with many weak marks.
Why Do Small Faces Change So Easily?
Small faces change easily because expression depends on tiny distances. The space between the eyes, the height of the mouth, the curve of the brow, and the position of the nose all affect emotion. On a large plush, a 2mm shift may look minor. On an 8cm plush, the same shift can change the whole personality.
This is why mini plush faces should never be treated as simple decoration. The face is usually the emotional center of the product. If the face feels wrong, the plush feels wrong even when the fabric, size, and stitching are acceptable.
Several production factors can change the face:
If the head is overfilled, the embroidery may spread outward and make the face look flatter.
If the head is underfilled, wrinkles may appear around the eyes or mouth.
If the eyes sit too close to side seams, the face may look squeezed.
If the mouth line is too thin, it may disappear into the pile.
If the brow angle is too sharp, a cute character may look angry.
If shine marks are too small, they may become rough dots instead of bright highlights.
For character projects, the face should be reviewed from both front and side. A face that looks correct from the front may still sit on a head shape that feels too flat, too narrow, or too thick. Side thickness matters because filling changes the way the front surface curves.
A practical face review should include:
Eye size and distance.
Eye height compared with the original character.
Mouth length and curve.
Brow angle.
Nose position.
Cheek shape after filling.
Distance from seams.
Expression in natural light.
Expression in phone photos.
If the plush belongs to a series, facial consistency becomes even more important. Several characters displayed together should feel like one collection. The eyes, line weight, mouth style, and face proportions should follow a shared visual standard, even when each character has its own personality.
How Does Size Affect Logo Clarity?
Size affects logo clarity because most logos are designed for flat surfaces, not tiny curved plush bodies. A logo may look clean on a website, paper tag, or package, but become difficult on an 8–12cm toy. Thin letters, narrow spacing, small symbols, and complex emblems often lose clarity when reduced.
The body area also matters. A belly, foot, sleeve, or back panel may not stay flat after filling. A logo placed on a rounded belly can stretch slightly. A logo near a seam may look tilted. A logo on long-pile fabric may lose sharp edges. A logo on a dark or textured surface may not have enough contrast.
Here is a useful logo planning guide:
| Logo Style | Risk Level On Mini Plush | Cleaner Option |
|---|---|---|
| Simple icon | Low to medium | Embroidery, patch, print, woven label |
| Short wordmark | Medium | Woven label, clean patch, hangtag support |
| Long wordmark | High | Hangtag, box, insert card |
| Thin-letter logo | High | Simplify, thicken, or move off plush body |
| Detailed emblem | High | Use a simplified icon version |
| Slogan or campaign line | Very high | Place on packaging or printed card |
| Barcode or SKU text | Not suitable | Use label, hangtag, or carton system |
A good mini plush does not need to carry every brand message directly on the body. The product can use a simple icon on the toy, a woven label on the side, a full logo on the hangtag, and complete information on the box. This creates a cleaner product and better readability.
Logo clarity should be checked in product photos too. Many small plush products are first judged through photos. If the logo looks blurry, tilted, or crowded in photos, it may look even weaker in real handling.
Are Tiny Lines Suitable For Plush?
Tiny lines can work on plush only when they are thick enough, placed correctly, and matched with a suitable craft. Very thin lines often fail because thread, pile, seam movement, and filling pressure make them look different from the original artwork.
A thin printed line may become soft on fabric. A thin embroidered line may become raised and heavier. A narrow applique line may be difficult to cut and stitch cleanly. A seam line may make nearby detail bend. This is why tiny lines should be reviewed by function, not by habit.
Useful questions during line review include:
Does this line define the character?
Will people notice if it is removed?
Can the same idea be shown through fabric color?
Will the line stay visible at actual size?
Will it compete with the eyes or mouth?
Will it be too close to a seam?
Would it work better on a hangtag or box?
Some lines should stay. For example, a mouth, eyebrow, animal marking, or mascot symbol may be essential. Other lines can often be reduced. Clothing wrinkles, tiny pocket outlines, shoe details, small fur marks, and repeated decoration lines may not add much once the toy becomes three-dimensional.
A simple example: a small character jacket may have six drawn seam lines in the original artwork. On a 10cm plush, those lines may crowd the body. A cleaner version may use two fabric color blocks, one collar shape, and one simple patch. The outfit still reads clearly, but the toy looks softer and more refined.
Tiny lines should not be copied automatically. They should earn their place.
When Should Details Be Enlarged?
Details should be enlarged when they affect recognition, expression, or product value. Eyes, mouth, mascot marks, main icons, body color blocks, and signature accessories often need more visual space than the original artwork suggests. This is normal because plush has thickness, curve, and texture.
Enlargement is especially helpful when:
The plush is below 12cm tall.
The face has several small parts.
The logo contains letters.
The fabric has medium or long pile.
The design uses similar colors.
The detail sits near a seam.
The product will be used as a keychain or charm.
The item will be packed tightly.
The product will be photographed for online sales.
Enlargement should be selective. Making everything bigger creates a crowded look. The better method is to enlarge what people notice first and reduce what competes with it. The face may need a larger eye area. The body may need a cleaner color block. The logo may need to become an icon. Tiny text may need to move to packaging.
A practical size review can follow this process:
Set the planned plush height, such as 8cm, 10cm, or 12cm.
Print the artwork at the real height.
Check the face from 40–60cm away.
Circle any details that cannot be read clearly.
Mark which details must stay on the plush.
Move weak text or secondary marks to packaging.
Adjust the face and main marks before sampling.
This early check can save time during sample revision. It is much easier to enlarge an eye, simplify a logo, or remove tiny lines before the first sample than to correct hundreds or thousands of pieces later.
Why Flat Artwork Changes After Stuffing?
Flat artwork changes after stuffing because the plush body becomes three-dimensional. A circle on flat fabric may become an oval on a curved head. A straight logo may bend around a belly. A mouth may shift slightly when the face expands. An applique patch may look flatter or rounder depending on filling pressure.
Stuffing also changes tension. More filling can make the toy feel firm and full, but it may stretch face features. Less filling can feel soft, but it may create wrinkles or weak shape. Mini plush needs a careful balance because the body is small and the details are close together.
The most affected areas are:
Face panels.
Belly logo areas.
Rounded heads.
Small arms and legs.
Ears and tails.
Attached loops or keychain tabs.
Clothing pieces.
Patch areas.
This is why the first physical sample matters. A digital mockup can show placement, but it cannot fully show how the fabric moves after stuffing. The approved sample should confirm whether the details still look clear after the toy has its real thickness and hand feel.
Why Fabric Pile Direction Matters?
Fabric pile direction matters because plush fabric reflects light differently depending on how the fibers lie. The same fabric color may look lighter, darker, warmer, or cooler when panels are cut in different directions. On mini plush, this can make facial areas, color blocks, and logo zones look uneven.
Pile direction can also hide small details. If embroidery sinks into longer pile, the line may look softer. If printed artwork sits on a textured surface, edges may look less sharp. If two panels have different pile directions, the face may appear uneven even when the color is technically the same.
Important fabric checks include:
Pile length around the face.
Fabric direction on front panels.
Color appearance under indoor light.
Embroidery visibility on the selected fabric.
Print clarity on the selected fabric.
Color matching between panels.
Recovery after compression.
For mini plush with important face or logo details, shorter-pile or smoother fabric is often easier to control. Long-pile fabric can be lovely for softness, but it should be used carefully when the design depends on tiny lines.
Why Does Packing Affect Detail Clarity?
Packing affects detail clarity because mini plush toys can be pressed, bent, or flattened during storage and shipping. A tight polybag may press the face. A small box may bend ears or accessories. A metal keyring may leave marks on fabric if not positioned well. A hangtag may push against the embroidery. A blind box insert may hold the toy unevenly.
Packing should protect the details that made the sample attractive. If the face arrives flattened or the ear folds over the eye, the product loses part of its value before it reaches the shelf.
Common packing risks include:
Face compression.
Bent ears or tails.
Folded bow or accessory.
Flattened belly logo.
Keyring pressure marks.
Tag rubbing against embroidery.
Dust or fiber transfer.
Shape loss after long storage.
For mini plush, packing should be reviewed with the actual sample. The toy should be placed in the planned polybag, box, display tray, or blind box structure. After a short compression check, the product should still recover well. If it does not, the packing method may need adjustment.
Clear details do not end at sewing. They must survive packing, transport, storage, display, and handling.
Which Details Should Be Simplified?

The details most worth simplifying are tiny text, thin decorative lines, small outfit trims, crowded patterns, narrow logo elements, and fragile accessories. Mini plush toys look clearer when the face, silhouette, main color blocks, and signature features stay strong. Personalization should focus on details that can remain readable after cutting, sewing, filling, shaping, inspection, packing, and repeated handling.
A small plush has limited visual space. On an 8cm, 10cm, or 12cm item, every millimeter has a job. If the design carries too many face lines, clothing trims, small marks, and text elements, the finished piece may look busy rather than detailed. The goal is not to remove personality. The goal is to keep the parts that people recognize first and reduce the parts that create clutter.
Simplification is especially important for mini plush keychains, bag charms, blind box plush, mascot gifts, and small collectible plush. These items are often viewed quickly: in a hand, on a backpack, inside packaging, in a display tray, or in product photos. If the design only looks clear when enlarged on a screen, it may need adjustment before sampling.
A helpful way to review a small plush design is to divide all details into four levels:
| Detail Level | What It Does | Examples | Best Treatment |
|---|---|---|---|
| Must-keep identity | Makes the character recognizable | Face, head shape, ears, main color, signature mark | Enlarge, protect, check carefully |
| Support detail | Adds style and richness | Outfit collar, belly patch, simple badge | Simplify and keep clean |
| Optional decoration | Adds texture but not identity | Tiny seams, wrinkles, shoe lines, small spots | Reduce or remove |
| Information detail | Explains text, story, care, code, series name | Long logo, slogan, barcode, care info | Move to tag, label, card, or box |
The strongest small plush designs usually do not copy every drawn line. They translate the drawing into a soft object. A poster can hold many fine details because it is flat. A sticker can use sharp printing because it stays smooth. A plush toy has body volume, pile direction, seam allowance, thread thickness, and stuffing pressure. These physical factors change what should stay and what should move elsewhere.
For example, a character may have a jacket with tiny buttons, pocket lines, zipper teeth, sleeve marks, and a name tag. On a 25cm plush, many of these details may work. On a 10cm charm, they can compete with the face. A cleaner version may keep the jacket color, one collar shape, one chest symbol, and a small woven side label. The full character name and story can appear on the hangtag or box. The toy becomes easier to read, and the whole set still feels complete.
A simple test helps: reduce the artwork to the planned size and view it from 40–60cm away. If the eye shape, mouth, silhouette, and main mark are clear, the core design is strong. If the viewer needs to lean in to understand the product, the layout needs less noise and more spacing.
What Details Matter Most?
The most important details are the ones that make the plush recognizable within a few seconds. For a character, this usually means eyes, mouth, head shape, ears, hairstyle, body proportion, main color blocks, and one signature feature. For a mascot, it may be the smile, body shape, color identity, belly mark, or a special accessory. For a small charm, silhouette matters even more because the item may be seen from a distance.
A practical priority order for mini plush:
Face expression.
Head shape.
Main body silhouette.
Color blocks.
One signature mark.
Logo or visual identity element.
Main outfit feature.
Accessory or charm part.
Back detail.
Small decorative lines.
The face deserves extra attention because it carries emotion. If the face is right, people can accept simplified clothing. If the face is wrong, even beautiful fabric will not save the product. Eyes and mouth should have enough space, strong contrast, and clean placement away from seams.
The silhouette is just as important. A character with special ears, a round body, a long tail, or a unique head shape should keep those features clear. When the outline is strong, the plush remains recognizable even from the back or side.
A useful design review can mark every detail with one of three labels:
Keep: essential to recognition.
Adjust: useful but needs scale or craft changes.
Move: better placed on tag, label, card, or box.
This keeps the plush body clean while allowing the complete product set to carry more information.
Which Lines Can Be Removed?
Lines can be removed when they do not change the identity, expression, or main style of the toy. Common removable lines include tiny clothing wrinkles, very thin pocket outlines, shoe stitching, small sleeve marks, extra fur strokes, repeated dots, miniature zipper teeth, and low-contrast separation lines.
Flat artwork often uses lines to explain shape. Plush can explain shape through fabric panels, color changes, seams, and filling. Once a toy becomes three-dimensional, some drawn lines are no longer needed. Keeping all of them may make the product look rough instead of premium.
A strong line review should consider:
Does this line change who the character is?
Can the same idea be shown through fabric color?
Will the line remain clear at actual size?
Will it sit too close to a seam?
Will it compete with the face?
Will it increase cost without improving recognition?
Can the idea move to packaging?
For a small animal plush, three tiny paw lines may merge into one dark patch after embroidery. A cleaner paw may use one soft oval shape. For a mascot jacket, five printed seam lines may become messy on a 10cm body. A collar panel and one bold chest mark may work better. For a plush keychain, a tiny back pattern may rarely be seen, so it may not deserve the same attention as the front expression.
Removing weak lines also helps production stability. Fewer tiny details mean fewer chances for misplacement, thread buildup, print blur, and inspection disputes. The product still feels designed, but the main features become easier to control across larger quantities.
How Should Eyes And Mouths Be Adjusted?
Eyes and mouths should be adjusted for size, spacing, line weight, contrast, and emotion. On mini plush, face details often need to be slightly larger and cleaner than the original drawing. Small shine marks, thin eyelashes, tiny teeth, tongue shapes, blush dots, and eyebrow curves should be reviewed carefully because they can crowd the face.
A good face adjustment keeps the emotion, not every micro-line. A cheerful character should still feel cheerful. A shy character should still feel gentle. A confident mascot should not become angry because the brow was stitched too low or too sharply.
Common face changes include:
Increase eye size slightly for better recognition.
Reduce the number of shine dots.
Thicken the mouth line.
Simplify open-mouth shapes.
Move eyes farther from seams.
Increase contrast between face fabric and embroidery.
Reduce tiny cheek or blush marks.
Change complex eyes into cleaner stitched shapes.
Face details should also match the craft. Embroidery works well for simple eyes and mouths, but too much thread in a small area can make the face stiff. Printing can show softer shapes, but the fabric must support clean edges. Applique can create bold eyes or face patches, but it needs enough size for clean stitching.
A face sample should be checked under natural light and in phone photos. Many small plush items are seen first through photos. If the face looks uneven or unclear in a simple photo, it may need adjustment before approval.
How To Personalize A Stuffed Animal?
A stuffed animal can be personalized through face style, body shape, fabric color, embroidery, printing, applique, woven labels, hangtags, custom clothing, accessories, care labels, retail boxes, gift packaging, and collection cards. For mini plush, personalization should not mean putting every message on the toy body. The best result often spreads identity across the plush, label, and package.
Personalization can be divided into three practical groups:
| Personalization Type | Better Placement | Why It Works |
|---|---|---|
| Emotional identity | Face, shape, color blocks | Makes the toy memorable |
| Visual identity | Small logo, patch, woven label, hangtag | Keeps branding clean |
| Product information | Care label, card, box, outer carton | Keeps small text readable |
If the item is an IP character plush, the face and signature feature should come first. If it is a mascot gift, the expression, main color, and one simple logo element may be enough. If it is a blind box plush, the silhouette and character variation matter more than long text. If it is a retail charm, the loop, keyring position, label, and display effect also need attention.
Long wording should usually stay off the small plush body. A campaign name, product story, collection title, barcode, age label, care content, or full brand description will be clearer on hangtags, insert cards, labels, or boxes. This allows the plush itself to stay soft and collectible.
For multi-style projects, personalization should also be repeatable. Logo location, label size, fabric direction, face style, and packaging format should follow a clear standard. This helps the whole collection look consistent even when each style has different colors or accessories.
How Can Brand Features Stay Clear?
Brand features stay clear when they are simplified, placed on stable areas, supported by strong contrast, and checked at real size. A logo does not need to be large to be effective. It needs to be readable, balanced, and suited to the plush surface.
The first step is choosing the right version of the brand mark. Many logos have several forms: full wordmark, icon, badge, symbol, or short initials. On mini plush, a simple icon often works better than a long name. Thin letters and complex emblems may look sharp in a file but lose clarity on textured fabric.
A practical placement guide:
| Brand Element | Better Option On Mini Plush | Notes |
|---|---|---|
| Full logo | Hangtag, box, insert card | Best for clear reading |
| Simple icon | Embroidery, print, patch, woven label | Good when size allows |
| Initials | Woven label or small patch | Cleaner than long text |
| Brand color | Main fabric or accessory color | Strong without adding clutter |
| Slogan | Card or box | Avoid tiny text on plush |
| Collection name | Hangtag or blind box | Keeps toy surface clean |
| Care and warning text | Care label | Should remain readable |
Placement matters as much as the logo itself. A belly may curve after filling. A foot may be too small. A sleeve may twist. A back area may be less visible. A side woven label may look cleaner than a tiny chest print. A hangtag may show the full identity without affecting the character.
Brand clarity should be reviewed in three ways:
At actual size.
In product photos.
After packing.
If the mark looks clear only before stuffing or only in close-up artwork, it may not be strong enough. A better solution may be a simplified logo on the plush and complete information on the package.
Which Outfit Details Should Stay?
Outfit details should stay when they help people understand the character, theme, or collection style. A collar, scarf, cape, hat, bow, vest, belt, or main color block may add strong identity. Tiny seam lines, buttons, lace edges, shoe marks, and small printed folds often need reduction on mini plush.
Small outfits create three kinds of pressure:
Visual pressure: too many lines crowd the body.
Craft pressure: tiny pieces take time to cut, place, sew, and inspect.
Shape pressure: extra layers can make the toy stiff or bulky.
For an 8–12cm plush, a full outfit may need to become a simplified outfit. A jacket can become a color panel with one collar. A dress can become a single fabric block with one bow. A superhero suit can keep the main chest mark and color split, while tiny stripes move to packaging artwork. A school uniform can keep the collar and tie, while small pocket lines are removed.
A good outfit review should ask:
Does this part change the character?
Is the detail visible at the final size?
Will the fabric layer make the toy too stiff?
Can it be shown through color instead of stitching?
Will it affect stuffing or hand feel?
Can the story appear on the hangtag instead?
Mini plush outfits work best when they look intentional, not overloaded. One clean bow can look better than five tiny trims. One clear chest mark can look better than many weak lines.
Which Details Should Move To Packaging?
Details should move to packaging when they are too small for the plush body but still important for storytelling, retail display, compliance, or collection identity. Packaging is not just protection. It can carry information that would make the toy look crowded.
Good details to move include:
Full character name.
Collection title.
Campaign slogan.
Long brand name.
Story copy.
Care instructions.
Barcode or SKU.
Warning information.
Age label.
QR code.
Character artwork.
Color variant name.
Backstory or scene setting.
This is especially useful for blind box plush, collectible series, event plush, and character merchandise. The plush can stay simple and cute, while the box, card, or hangtag carries richer visual content. A small toy with strong packaging often feels more complete than a toy overloaded with tiny marks.
Moving details to packaging can also reduce production risk. Tiny text on fabric may blur. Text on a printed card can remain sharp. A complex full-color character scene may not work on plush, but it can look beautiful on a box. A barcode cannot sit nicely on a soft toy body, but it belongs naturally on a label or package.
The plush body should carry emotion. The packaging can carry explanation.
How Much Detail Is Too Much?
There is too much detail when the face no longer stands out, the silhouette becomes unclear, small lines merge, the logo cannot be read, or the toy looks better in enlarged artwork than in actual size. A mini plush should feel clear without forcing people to inspect it closely.
Warning signs include:
The eyes compete with nearby decoration.
The mouth is hard to see.
The logo needs explanation.
The outfit has more lines than color blocks.
Small marks merge after reduction.
The front view feels crowded.
The plush looks different in every photo angle.
Packing hides or bends key features.
A practical real-size check helps avoid this. Place the artwork at planned size. Step back slightly. Take a phone photo. If the face, shape, and main mark are still clear, the design is likely moving in the right direction. If not, simplify before sampling.
The best mini plush designs often have fewer details than expected. But those details are larger, cleaner, better placed, and easier to repeat. That is why they feel more refined in hand.
Which Craft Works Best?
The best craft for custom mini plush toys depends on the shape, size, surface, color count, durability need, and visual priority of each detail. Embroidery is often strong for eyes, mouths, brows, noses, and simple icons. Printing helps with soft color artwork, gradients, and fine surface graphics. Applique works well for bold patches and large shapes. Woven labels are useful when a logo needs clean edges but the plush body is too small or too curved.
No single craft solves every small-detail problem. A mini plush may need three or four methods working together. For example, an 11cm mascot plush can use embroidery for the face, applique for a belly patch, short-pile fabric for cleaner surface control, and a woven side label for identity. A blind box plush may use printed fabric for colorful character marks, embroidery for the mouth, and a small hangtag for text that would be too tiny on the toy.
The right craft should be chosen by asking five practical things:
Can this detail stay clear at the final size?
Will the surface be flat, curved, furry, or compressed?
Does the detail need to feel soft, raised, bold, or flat?
Will it stay clean after stuffing and packing?
Can the same effect be repeated across the whole order?
Many small plush problems happen when artwork is copied into production without craft translation. A thin smile may be too weak for printing on plush pile, but too thick if embroidered with the wrong stitch. A complex logo may be unreadable on the belly, but clear as a woven side label. A small color mark may look beautiful as applique on a 25cm plush, but bulky on an 8cm charm.
A smart craft plan gives each detail a job. The face should carry emotion. The logo should stay readable. Color blocks should support recognition. Accessories should add charm without creating safety or packing trouble. The whole product should feel clean in the hand and clear in photos.
| Detail Need | Strong Craft Choice | Why It Works | Main Risk |
|---|---|---|---|
| Clean eyes | Embroidery | Durable, expressive, easy to compare | Too much thread can stiffen a tiny face |
| Simple mouth | Embroidery or printing | Keeps expression readable | Thin lines may disappear |
| Multi-color face detail | Printing | Handles more colors with less thickness | Fabric texture may soften edges |
| Bold belly mark | Applique or embroidery | Creates strong visual contrast | Can add bulk on small bodies |
| Simple logo icon | Embroidery, woven label, patch | Keeps identity visible | Needs enough space |
| Full logo text | Woven label, hangtag, box | Cleaner than tiny plush-body text | May not sit on the front view |
| Clothing shape | Fabric panel or applique | Shows outfit without too many lines | More pattern work |
| Repeated small pattern | Printing or simplification | Better than many tiny stitches | Can blur if too dense |
| Tiny slogan | Hangtag or package | Keeps wording readable | Should not be forced onto fabric |
The strongest result usually comes from removing the weakest details, enlarging the important ones, and assigning the right craft to each area. A mini plush does not need every possible decoration. It needs the right visible details in the right places.
Embroidery vs Printing: Which Is Clearer?
Embroidery is clearer for simple, bold, durable details. Printing is clearer for colorful, flat, graphic details. The better choice depends on the artwork and the plush surface. A black embroidered smile on a pale short-pile face can look very clean. A detailed eye with several colors may look too heavy if fully embroidered on a small head, so printing or simplified embroidery may work better.
Embroidery has a raised texture. This can make eyes, brows, and mouths feel premium and long-lasting. It also helps facial details remain visible after handling. The risk is thickness. On mini plush toys, a small area can become crowded if the embroidery file has too many colors, too many direction changes, or very dense stitches.
Printing allows finer color artwork with a flatter result. It can support gradients, blush, small patterns, and softer face styles. The risk is fabric behavior. On plush pile, printed edges may soften. On curved areas, printed artwork may stretch slightly after filling. On dark or textured fabric, contrast may not be strong enough.
A useful comparison:
| Feature | Embroidery | Printing |
|---|---|---|
| Best for | Eyes, mouths, brows, simple icons | Color artwork, blush, gradients, patterns |
| Surface feel | Raised thread | Flatter graphic |
| Durability | Strong when stitched well | Depends on method and fabric |
| Color complexity | Limited by thread density | Better for multi-color artwork |
| Tiny letters | Risky | Still risky; often better on labels |
| Long-pile fabric | May sink into pile | May lose edge clarity |
| Small curved areas | Can pull fabric | Can distort after filling |
| Best fabric surface | Short-pile or smooth plush | Short-pile, stable, cleaner surface |
For a mini plush face, embroidery often works best when the design is simplified: clean eyes, one or two highlight details, readable mouth, and enough spacing from seams. Printing works best when the face style needs softer colors or more graphic detail. Sometimes the best face uses both: embroidered eyes and mouth with printed blush or small markings.
For logos, embroidery can work if the icon is simple and the size is large enough. Printing may work for a clean shape on a stable surface. But full text logos often work better on a woven label, hangtag, or box, especially when the toy is below 12cm.
When Is Applique Better?
Applique is better when a detail needs a strong shape, bold contrast, or a layered plush look. It works well for belly patches, chest marks, animal face patches, ears, simple badges, collars, scarves, capes, and large color blocks. It gives structure and visibility without relying only on thread or ink.
Applique is useful when the detail is too large for embroidery but needs more physical presence than printing. For example, a white belly patch on a colored mascot may look cleaner as applique than as a large embroidered area. A simple heart or star may look stronger as a sewn patch. A panda-style eye patch or animal muzzle may also work well as applique because the shape helps define the character.
The key is scale. Applique needs enough size for clean cutting, placement, and edge stitching. On an 8cm plush, a very small applique badge may be difficult to sew neatly. On a 12cm plush, the same badge may work if simplified. Narrow curves, tiny letters, small separated shapes, and thin outlines are usually not suitable for applique.
Good applique planning should check:
Is the shape large enough to cut cleanly?
Will the edge stitching crowd the detail?
Does the added layer make the toy too stiff?
Will the patch sit flat after stuffing?
Is the patch away from heavy seam pressure?
Will the color contrast stay strong?
Can the piece be aligned consistently?
Applique should not be used everywhere. Too many patch layers can make a mini plush feel stiff, thick, and busy. It works best as a highlight craft for important visual areas. One clean belly patch may look charming. Five tiny applique pieces on a small outfit may look rough and slow down production.
A practical example: for a 10cm animal charm, applique may be ideal for a large muzzle shape, while the nose and mouth use embroidery. The brand mark may move to a woven label. This keeps the face clear and avoids heavy stitching across the whole front.
Is Woven Label Useful For Logos?
A woven label is very useful when a logo must stay clean but the plush body does not offer enough flat space. Mini plush toys often have rounded bellies, small feet, narrow arms, curved backs, and soft pile. These areas are not always friendly to full logos. A woven label can keep edges sharper and text more controlled.
A woven label can be placed on the side seam, lower body, back, clothing, accessory loop, hangtag system, or package. For small plush keychains and bag charms, a side seam label often looks neat because it adds identity without crowding the face. It can also help keep the front view clean for photos and display.
Woven labels are helpful for:
Simple icons.
Short wordmarks.
Private label plush lines.
Mini plush charms.
Collectible plush series.
Retail packaging sets.
Mascot programs.
Multi-style plush projects.
The label should fit the toy size. If it is too large, it can overpower the character. If it is too small, it may not solve the readability problem. The label material should also feel comfortable and not scratch the toy surface or interfere with packing.
| Logo Need | Better Placement | Reason |
|---|---|---|
| Full brand name | Hangtag, box, card | More readable than tiny fabric text |
| Simple logo icon | Woven label, patch, embroidery | Works if size allows |
| Collection name | Hangtag or box | Keeps the toy clean |
| SKU or barcode | Label or packaging | Should stay scannable |
| Campaign slogan | Card or box | Avoids clutter on plush |
| Small identity mark | Side woven label | Clean and repeatable |
A woven label is not only a visual detail. It can also help organize a product line. When the same label position appears across several styles, the collection feels more consistent. This is useful for mascot series, blind box plush, and seasonal gift lines where each style has a different color or face but the identity system stays the same.
What Type Of Fabric Holds Details?
Short-pile and smoother plush fabrics usually hold small details better than long-pile fabrics. A stable surface helps embroidery sit cleaner, printing edges look sharper, applique lie flatter, and logo placement stay more readable. Long-pile fabric can feel very soft and cute, but it may hide thin stitches, blur printed marks, and cover tiny lines.
Fabric choice should be made according to the most important detail. If the face needs very clean eyes and a sharp mouth, the face panel may need shorter-pile fabric. If the body needs a fluffy animal feel, the body may use a softer or longer-pile fabric while the face area remains more controlled. Mixing fabric textures can work well when planned carefully.
Important fabric factors include:
Pile length.
Pile direction.
Backing stability.
Color contrast.
Stretch.
Recovery after compression.
Embroidery visibility.
Print performance.
Hand feel.
Compatibility with filling and shaping.
Pile direction deserves special attention. Plush fabric can look lighter or darker depending on fiber direction. If panels are cut inconsistently, the toy may appear to have color differences even when the same fabric is used. On small plush faces, this can make the expression look uneven.
For mini plush details, these fabric choices often work better:
| Detail Priority | Fabric Direction |
|---|---|
| Sharp face embroidery | Short-pile face fabric |
| Soft animal look | Medium-pile body fabric with simplified details |
| Printed markings | Smooth, stable surface |
| Logo patch | Firm area with enough support |
| Applique edges | Fabric that does not fray easily |
| Clear photo effect | Balanced pile and strong contrast |
| Packed recovery | Fabric with good bounce-back |
The softest fabric is not always the clearest fabric. A very fluffy surface may feel lovely but hide the mouth or logo. A smoother surface may protect details but feel less furry. For mini plush, the best fabric is usually the one that balances touch, shape, and readability.
Which Craft Raises The Price?
Craft cost rises when a detail requires more setup, more colors, more stitch time, more material layers, more hand placement, tighter alignment, or extra checking. Small size does not always mean low cost. A tiny plush with complex face embroidery, custom fabric, mini outfit, applique patch, keychain hardware, woven label, and gift packaging may require more careful work than a larger simple plush.
Embroidery cost is affected by stitch count, stitch density, color changes, size, placement, and complexity. A simple eye may be efficient. A small eye with multiple highlights, lashes, gradients, and tiny color fills may take more time and may not look better after stitching.
Printing cost is affected by artwork preparation, print method, color needs, placement, and fabric suitability. Small repeated marks may need careful positioning. All-over printed fabric may involve extra material preparation. Printing can be efficient for some details, but it still needs testing if the surface is textured.
Applique cost is affected by fabric pieces, cutting, positioning, stitching, waste, and alignment. One large patch can be reasonable. Many tiny patches can raise labor and checking time quickly. Mini accessories can also affect cost because small parts may require more careful stitching and safety review.
Common cost drivers include:
Multi-color embroidery in a small area.
Dense face stitching.
Tiny lettering.
All-over printed fabric.
Many applique pieces.
Custom clothing.
Mini bows, hats, scarves, or capes.
Metal keyrings or hooks.
Special labels.
Retail boxes or blind boxes.
Multiple style variations.
Extra sample revisions.
More inspection steps.
A smarter way to control cost is to spend on the details people notice first. The face, silhouette, main fabric, and one signature mark usually deserve priority. Weak decorative lines can be reduced. Long text can move to packaging. A clean woven label can replace a difficult tiny logo. This keeps the product attractive without wasting effort on details that will not read well.
Which Craft Is Best For Mini Plush Faces?
Mini plush faces usually work best with simplified embroidery, clean printing, or a controlled mix of both. The best choice depends on the face style. A simple cute face with black eyes and a small smile often works beautifully with embroidery. A character with colorful eyes, blush, cheek marks, or soft graphic shading may need printing for some areas.
Face craft should protect emotion first. A plush face does not need to copy every tiny eye highlight or eyelash from the original drawing. It needs to keep the character feeling right. On small heads, fewer stronger face details often look better than many fine ones.
A good mini face plan may use:
Embroidery for main eyes.
Embroidery for mouth and brows.
Printing for blush or soft cheek color.
Applique for large eye patches or muzzle shapes.
Short-pile fabric for the face panel.
Enough spacing between face features and seams.
Face embroidery should avoid excessive density. If too much thread sits in one small area, the face can become stiff or puckered. If the mouth is too thin, it may disappear. If the eye highlights are too tiny, they may look like random dots. These issues are easier to fix at the sample stage than after larger production begins.
Which Craft Is Best For Mini Plush Logos?
Mini plush logos work best when the logo is simplified and placed where it can stay readable. A simple icon may work with embroidery, printing, applique, or a woven label. A long wordmark, detailed emblem, or slogan usually works better on a hangtag, card, or box.
The best logo craft depends on logo size:
| Logo Size And Style | Better Craft |
|---|---|
| Small simple icon | Embroidery or woven label |
| Short initials | Woven label or patch |
| Medium clean logo | Printing or embroidery if surface is stable |
| Long wordmark | Hangtag or box |
| Detailed emblem | Simplified patch or packaging |
| Slogan text | Card, box, or hangtag |
Logo placement should avoid heavy curves, thick seams, and long-pile fabric. A belly logo may look cute, but it can distort after filling. A foot logo may be too small. A chest logo may compete with the face. A side label may be cleaner and more consistent.
For many mini plush toys, the most polished solution is simple: put a small identity mark on the plush and the full logo on the packaging. The toy stays cute, while the complete identity remains clear.
How Should Crafts Be Combined?
Crafts should be combined according to visual priority. The face may use embroidery, the body may use fabric color blocks, the main patch may use applique, and the identity mark may use a woven label. A mixed craft plan creates a clearer result than forcing every detail into one method.
A practical combination for a mini mascot plush may look like this:
Face: embroidery for eyes and mouth.
Cheeks: light printing.
Belly: applique patch.
Logo: woven side label.
Outfit: fabric color block.
Story: hangtag or box.
This type of plan keeps the plush body balanced. The face stays expressive. The body stays soft. The logo stays readable. The packaging carries information that would be too small on the toy.
Craft combination should also be reviewed for hand feel. Too much embroidery or too many applique layers can make the toy hard. Too much printing may reduce a soft natural look. Too many accessories may create packing and safety issues. The best craft mix should feel natural when the plush is held, not just attractive in artwork.
A strong mini plush uses craft with restraint. Each method should improve clarity, not simply add decoration.
How Does A Factory Make The Sample?

A custom mini plush sample is made by turning artwork into a real soft product through size review, pattern making, material selection, embroidery or printing setup, cutting, sewing, stuffing, shaping, detail checking, and revision. The sample is not only a preview. It confirms whether the face, logo, body shape, fabric, accessories, packaging, and small details can work before larger production begins.
For mini plush toys, the sample stage is where detail clarity is won or lost. A drawing can look clean because every line sits on a flat surface. A real plush has thickness, seams, pile direction, filling pressure, and hand-shaped volume. Once the plush is only 8cm, 10cm, or 12cm tall, these factors become even more sensitive. One small change in eye position, mouth thickness, fabric pile, or stuffing level can change the final expression.
A good sample process should not rush straight into sewing. It should first check whether the design can physically work at the planned size. If the face is too small, the logo has too many letters, the jacket has too many tiny lines, or the accessory is too fragile, these risks should be found before fabric is cut.
A custom plush sample usually involves real development work, including pattern making, material preparation, embroidery or printing, cutting, sewing, stuffing, shaping, accessory placement, packaging review, and possible revisions. That is why custom samples usually require a sample fee. For projects with a clear bulk plan, the fee may be deducted or refunded when the single-style bulk order reaches 2,000 pcs, depending on the agreed project terms.
A clear sampling process helps reduce three common risks:
The design looks cute in artwork but unclear as a small plush.
The sample looks good, but the details cannot repeat well later.
The toy fits the visual plan but fails in packing, labels, or handling.
A sample should answer practical product questions, not only “Does it look nice?” It should show whether the item feels right in the hand, recovers after packing, keeps the face clear in photos, holds the logo cleanly, and can be checked against an approved reference.
| Sample Stage | What Happens | Detail Risk To Check |
|---|---|---|
| Artwork review | Check views, size, colors, logo, accessories | Too many small details |
| Size planning | Confirm height, width, thickness | Face area too small |
| Pattern making | Create fabric panel shapes | Seams too close to face or logo |
| Material selection | Choose plush fabric, filling, accessories | Pile hides embroidery or print |
| Craft setup | Prepare embroidery, printing, applique, labels | Lines too thin or too dense |
| Cutting | Cut panels according to pattern | Fabric direction affects color and pile |
| Sewing | Join panels and attach details | Shape twists or small parts shift |
| Stuffing | Fill body to target shape and hand feel | Face stretches or wrinkles |
| Shaping | Adjust ears, limbs, body, face balance | Silhouette becomes uneven |
| Packing test | Check bag, box, hangtag, keyring, carton fit | Face or accessory gets pressed |
A strong sample does not need to keep every line from the original drawing. It needs to keep the correct expression, clear shape, safe structure, stable craft, and a product feel that can be repeated.
What Files Should Be Sent?
The best files for mini plush sampling include front view, side view, back view, detail views, target size, color references, logo file, material preference, craft notes, accessory details, packing plan, quantity, and delivery timing. A single front image can start discussion, but it rarely gives enough information for accurate mini plush development.
Useful files include:
Front view artwork.
Side view artwork.
Back view artwork.
Close-up face details.
Logo file in vector format if available.
Color reference or Pantone reference.
Target height, width, and thickness.
Reference photos for shape or hand feel.
Fabric preference, such as short-pile, soft plush, or smoother surface.
Preferred filling feel, such as soft, medium, or firm.
Embroidery, printing, applique, or woven label notes.
Accessory details, such as keyring, loop, hook, bow, scarf, zipper, sound module, or removable part.
Packaging plan, such as polybag, hangtag, retail box, blind box, display box, or gift box.
Quantity per design and number of styles.
Target launch date or warehouse deadline.
Side and back views are especially important for mini plush. A front drawing does not show head thickness, body depth, tail shape, ear angle, back markings, or how the plush should stand or hang. For plush keychains and bag charms, the loop or metal ring position should be marked early because it affects balance.
If the design uses a logo, the file should be clean. A low-resolution image may look fine on a screen but create confusion during embroidery, printing, or label setup. If the logo includes tiny text, a simplified icon version should be prepared as an option.
For character plush, detail views help avoid wrong interpretation. A close-up face file can show the intended eye shape, mouth curve, cheek mark, nose position, and expression. Without those views, the sample may need more revision.
A good file package reduces guessing. Less guessing means fewer changes, cleaner detail control, and a faster path to an approved sample.
How Does Pattern Making Protect Details?
Pattern making protects details by deciding where the plush has space, volume, seams, curves, and surface tension. A pattern is not only a cutting template. It controls whether the face has enough room, whether the belly can hold a logo, whether the ears sit at the correct angle, and whether the body looks balanced after stuffing.
On mini plush toys, pattern work is very sensitive. Small pattern changes can strongly affect the final look. If the face panel is too narrow, the eyes may sit too close together. If the side panel is too thick, the front view may look squeezed. If the head is too flat, the toy may lose softness. If the belly is too rounded, a logo may bend after filling.
Pattern making affects:
Face area size.
Eye and mouth placement.
Distance between features and seams.
Head thickness.
Body width.
Arm, leg, ear, and tail shape.
Belly surface for logo or patch.
Loop or keyring balance.
Packing recovery.
Mini plush details should be planned around seam placement. A seam too close to the eye may pull the fabric and change expression. A logo near a curved seam may look tilted. A small applique patch may pucker if placed on an area with too much tension.
A useful pattern review should compare the artwork with the real expected shape:
Does the head have enough front surface for the face?
Will the eyes stay away from seam pressure?
Can the belly hold a mark without distortion?
Will the ears remain visible after packing?
Does the side view look too flat or too bulky?
Will the toy hang straight if it has a keyring?
Does the bottom shape support sitting or display?
The pattern should protect the most important details first. For a mini mascot, that may mean giving the face slightly more area. For a plush charm, that may mean adjusting the body thickness so the front view still reads clearly. For a blind box plush, that may mean keeping all characters in the same base proportion while adjusting each face and accessory.
How Long Does Sampling Take?
Sampling time depends on artwork completeness, product size, structure complexity, fabric availability, embroidery or printing setup, accessory development, packaging needs, feedback speed, and revision depth. Simple mini plush samples can move more quickly, while complex character plush, multi-style series, custom hardware, special fabric, or gift-box projects need more time.
A realistic sampling schedule should allow room for both making and reviewing. Mini plush details often need one revision because the first sample reveals things that artwork cannot show: face spacing, stuffing level, fabric pile, logo clarity, hand feel, and packing recovery.
Main factors that affect sampling time include:
Number of design views provided.
Number of styles.
Character complexity.
Face detail difficulty.
Logo clarity.
Embroidery color count.
Printing method.
Fabric sourcing.
Accessory sourcing.
Mini outfit structure.
Packing design.
Label requirements.
Testing or age-grade planning.
Revision count.
Internal approval speed.
A simple 10cm plush with clean eyes, one fabric, no complex accessories, and a simple polybag can be easier to sample. A 10cm plush with multi-color eyes, tiny clothing, a keyring, woven label, custom hangtag, blind box, and several SKU styles needs more development steps.
The fastest sampling route is not always the safest. If the first sample is approved without checking face expression, logo clarity, accessory placement, and packing fit, problems may appear later. A better route is to spend enough time confirming the details that will matter most in bulk production.
A practical sample review timeline often includes:
Initial file review.
Size and craft discussion.
Pattern development.
Material preparation.
Embroidery or printing setup.
First sample making.
Photo or video review.
Physical sample review.
Revision notes.
Revised sample if needed.
Final approval.
The schedule should also consider shipping time for physical samples. Photos and videos help, but mini plush details often need hand inspection. Touch, firmness, pile direction, and packing recovery are difficult to judge from images alone.
When Should A Revised Sample Be Made?
A revised sample should be made when the first sample has problems that affect recognition, expression, structure, safety, packaging, or repeatability. Not every tiny difference needs a new sample, but face problems, logo issues, wrong shape, unsuitable fabric, weak accessories, or poor packing recovery should be corrected before approval.
A revised sample is usually worth making when:
The eyes do not match the intended expression.
The mouth is too thin, too thick, too high, or too low.
The head shape feels too flat, narrow, or bulky.
The logo is unclear, bent, or too close to a seam.
The fabric pile hides face or body details.
The embroidery feels too dense or stiff.
The print looks soft, faded, or distorted.
The body does not sit, stand, or hang correctly.
The filling is uneven or changes the expression.
The accessory feels fragile or poorly placed.
The keyring or loop makes the plush hang crooked.
The packaging presses the face or bends small parts.
The revision should be specific. Vague feedback such as “make it better” usually causes slow progress. Clear comments work better:
Increase eye width by about 10%.
Move the mouth 2–3mm lower.
Use shorter-pile fabric on the face panel.
Reduce stuffing in the cheek area.
Move the logo from belly to woven side label.
Simplify the jacket lines.
Enlarge the bow and reduce small stitch lines.
Change the loop position to improve hanging balance.
Replace tiny printed text with hangtag text.
Revision should focus on the parts that affect the final product most. If a back detail is slightly different but rarely seen, it may not need a full new sample. If the face is wrong, a revised sample is usually important. The face, silhouette, logo clarity, and packing result deserve stricter control because they directly affect how the plush is seen and handled.
Sample revision is also the right stage to control cost. If a detail looks weak but adds high cost, it can be simplified. If a small decoration does not improve the product, it can move to packaging. If embroidery is too dense, printing or applique may be tested. These decisions are easier before final approval.
What Is A Golden Sample?
A Golden Sample is the approved physical reference used to guide bulk production. It confirms the final size, shape, fabric, color direction, face expression, embroidery, printing, applique, accessories, filling level, labels, and packaging fit. For mini plush toys, this reference is very important because small details can shift easily during production.
A Golden Sample should not be treated as just a nice sample. It is the standard that later pieces should follow as closely as possible. The production team can compare bulk pieces against it for face position, stitch thickness, body shape, hand feel, logo placement, and packing result.
A strong Golden Sample should confirm:
Front, side, and back appearance.
Final height, width, and thickness.
Face expression.
Eye and mouth placement.
Logo or label position.
Fabric type and pile direction.
Embroidery or printing method.
Applique shape if used.
Accessory size and placement.
Filling firmness.
Sitting, standing, or hanging balance.
Hangtag, care label, and packaging position.
Carton or display packing direction.
For a multi-style plush series, each design should have its own approved reference. If several characters share the same body, the shared pattern can help consistency, but each face, color, accessory, and label still needs a clear record. This helps reduce mix-ups when there are many SKUs, hidden styles, blind box versions, or seasonal updates.
The Golden Sample should also be supported by production records. Useful records include:
Pattern version.
Embroidery file.
Printing file.
Fabric name and color reference.
Filling standard.
Accessory details.
Label files.
Packaging files.
Inspection focus.
Approved sample photos.
Special notes for repeat orders.
When repeat production is planned, these records become valuable. Fabric batches may need review, and some materials may change over time, but clear records make it easier to protect the original look.
What Should Be Checked Before Sample Approval?
Before approving a mini plush sample, the whole product should be checked as a real item, not just as a cute photo. A sample may look fine from the front but fail in hand feel, side thickness, logo clarity, hanging balance, packing fit, or label placement.
Important checks include:
Does the face match the intended emotion?
Are the eyes symmetrical?
Is the mouth clear at actual size?
Does the head shape feel right from the side?
Is the logo readable?
Are tiny lines still needed?
Does the fabric hide or support details?
Is the filling level balanced?
Are the ears, limbs, tail, or accessories secure?
Does the plush sit, stand, or hang as planned?
Does the product look good in phone photos?
Does the packaging press any key detail?
Are hangtags, care labels, and barcodes placed correctly?
Is the sample suitable for the planned quantity?
A photo check is useful, but a hand check is still important. Small plush products are held, squeezed, hung, packed, and displayed. If the toy feels too hard, too flat, too loose, or too fragile, the issue should be reviewed before approval.
A simple approval checklist can help:
| Check Area | What To Confirm |
|---|---|
| Face | Expression, eye spacing, mouth line, symmetry |
| Shape | Head, body, side thickness, ears, limbs |
| Details | Logo, marks, outfit lines, accessories |
| Fabric | Pile length, color, touch, direction |
| Craft | Embroidery, printing, applique, labels |
| Filling | Firmness, evenness, recovery |
| Safety | Small parts, sharp edges, secure attachments |
| Packing | Polybag, box, hangtag, label, carton fit |
| Photos | Front, side, back, close-up, packed view |
Sample approval should happen only after the main risks are understood. If a small detail looks unclear at this stage, it is unlikely to improve by itself later. The sample stage is the best time to fix it.
How Can A Sample Reduce Bulk Risk?
A sample reduces bulk risk by turning design assumptions into visible, touchable decisions. It confirms whether the product can keep its shape, detail, craft, hand feel, and packing effect before larger production begins. For mini plush, this is especially important because small visual changes can feel much larger than expected.
A good sample helps reduce risk in several areas:
Artwork interpretation.
Face expression.
Logo clarity.
Fabric choice.
Filling level.
Accessory strength.
Packaging fit.
Label placement.
SKU consistency.
Repeat order records.
Without a proper sample, bulk production may follow unclear instructions. That can lead to uneven faces, wrong logo placement, unexpected fabric feel, weak accessories, or packing damage. With an approved sample and clear records, each stage has a physical target.
The sample also helps with decision-making. If the logo is too small, it can move to a woven label. If the face embroidery is too thick, the file can be simplified. If the fabric hides the mouth, a shorter pile can be used. If the packaging flattens the ears, the box or inner placement can change. Every corrected detail lowers later risk.
For small plush programs with repeat plans, the sample and its records become even more useful. New colors, new characters, new sizes, and seasonal versions can be developed faster when the approved base style is documented clearly.
How Are Details Controlled In Bulk?

Mini plush details are controlled in bulk through approved sample comparison, stable pattern files, confirmed embroidery or print files, material checks, in-line inspection, final inspection, needle detection when required, and packing review. The goal is not only to make one good sample. The real test is whether hundreds or thousands of pieces can keep the same face, shape, logo placement, filling level, and clean finish.
A mini plush sample can look charming on its own, but bulk production brings a different challenge. Once cutting, embroidery, sewing, filling, shaping, labeling, and packing are repeated many times, small variations may appear. One eye may sit slightly higher. One mouth may look thicker. One logo may move closer to a seam. One toy may feel softer than the approved piece. On a large plush, these differences may be less obvious. On a small plush, they can be noticed quickly.
This is why detail control cannot depend on memory or verbal notes. It needs a physical reference, clear files, inspection steps, and production records. The approved sample should guide each stage. The pattern should show where panels, seams, and features belong. The embroidery or printing file should stay fixed after approval. The filling level should match the desired hand feel and shape. Packing should protect the face and prevent flattening during storage or shipping.
Mini plush bulk control also needs realistic tolerance thinking. Soft products are not metal parts. A plush toy has fabric movement, handwork, thread tension, pile direction, and filling variation. The goal is controlled consistency, not impossible mechanical sameness. A strong project sets clear priorities: face expression, logo position, body shape, clean stitching, safe accessories, proper labels, and packable form.
A simple bulk control map may look like this:
| Production Stage | What Can Go Wrong | What Should Be Checked |
|---|---|---|
| Material arrival | Color shift, wrong pile, weak backing | Fabric color, touch, pile direction, usability |
| Cutting | Panel shape deviation | Pattern size, cutting direction, fabric waste |
| Embroidery or printing | Thick lines, shifted features, unclear logo | File version, placement, color, clean edges |
| Sewing | Uneven seams, twisted shape | Seam strength, symmetry, panel alignment |
| Stuffing | Too flat, too hard, uneven body | Shape, weight feel, face distortion |
| Shaping | Crooked ears, uneven limbs | Front view, side view, balance |
| Final check | Loose thread, dirty surface, unclear detail | Appearance, craft, label, accessory |
| Packing | Crushed face, bent accessory, wrong label | Bag fit, hangtag, box, carton mark |
For mini plush toys, the best inspection is not only a defect search. It is a detail comparison. The final piece should still carry the same emotion as the approved sample. If a character looked happy in the sample but blank in bulk, the project has lost value even if the sewing is technically acceptable. The face, silhouette, and key marks need to stay alive across the whole order.
How Does QC Check Small Features?
QC checks small features by comparing production pieces against the approved sample and confirmed files. The most important areas are face expression, eye position, mouth shape, logo clarity, fabric direction, seam alignment, stuffing level, accessory position, cleanliness, labels, and packing. For mini plush, a small error can quickly change the look, so visual comparison must be direct and careful.
Key checks often include:
Eye height and spacing
Mouth curve and stitch thickness
Nose position
Logo size and placement
Embroidery color and density
Printed edge clarity
Fabric pile direction
Ear, arm, leg, or tail symmetry
Loose threads and fabric marks
Surface cleanliness
Label and hangtag accuracy
Packing appearance
QC should not only inspect the front. Side and back views matter too. A mini plush keychain may look fine from the front but hang crooked because the loop is not centered. A character may look good in hand but lose shape inside a tight box. A logo may be clear before packing but pressed after shipment preparation. Good inspection catches these problems before the product leaves the line.
Do Mini Plush Toys Need Needle Detection?
Mini plush toys may need needle detection depending on project requirements, product type, age grade, sales region, internal quality rules, and production setup. Needle detection is especially important for soft products because sewing needles are used throughout production. Even with careful line management, a final safety check helps reduce risk before packing and shipment.
Needle detection is usually connected with:
Children’s plush toys
Educational plush products
Plush keychains and small accessories
Retail plush programs
Products with many sewing steps
Projects with strict internal safety rules
Orders that require third-party inspection support
A needle control system should not rely only on the final machine pass. Safer production habits also matter: broken needle records, sewing station checks, worktable control, and careful handling during repair work. If a product contains small accessories, magnets, sound units, zippers, hooks, or weighted filling, those parts should also be reviewed according to the project’s safety needs.
For mini plush, safety and appearance should work together. A tiny accessory may look cute but become risky if it is too small, too sharp, weakly attached, or difficult to inspect. When safety and detail conflict, safety should come first. A plush toy can still be attractive with a simplified accessory, but a risky part can damage the whole program.
How To Preserve Plush Toys After Delivery?
Plush toys stay in better condition when they are kept dry, clean, lightly shaped, and protected from heavy compression. Mini plush toys should not be stored for long periods under heavy cartons or in tightly packed spaces, because small faces, ears, loops, bows, and accessories may become flattened or bent. For retail and gifting use, preservation starts with correct packing.
Helpful preservation practices include:
Keep cartons in a dry indoor area.
Avoid direct sunlight for long storage.
Do not place heavy goods on top of plush cartons.
Let vacuum-packed or compressed pieces recover before display.
Keep white or pale plush away from dusty surfaces.
Avoid strong odors, moisture, and heat.
Protect hangtags, loops, keyrings, and small accessories from bending.
For mini plush collectibles, the display condition matters as much as the toy itself. A clean face, smooth fabric, straight ears, and tidy hangtag make the product feel more valuable. If the plush is packed in a blind box, gift box, or display carton, the inner space should hold the toy without crushing the key details. A box that is too tight may save space but harm the face. A box that is too loose may let the plush move and bend accessories.
After shipment, some plush toys may need gentle reshaping. Light hand-fluffing, repositioning the ears, smoothing the pile, and allowing the filling to relax can improve appearance before display or photography.
How To Clean A Tiny Plush?
A tiny plush should be cleaned gently, with the care label and material structure checked first. Spot cleaning is usually safer than soaking, especially when the plush has embroidery, printing, glue parts, metal keyrings, sound modules, weighted filling, special fabric, or delicate accessories. Small plush toys can lose shape if they are rubbed too hard or dried incorrectly.
A gentle cleaning method may include:
Remove loose dust with a soft brush or lint roller.
Test a small hidden area before cleaning visible parts.
Use a slightly damp cloth for light marks.
Blot the stain instead of rubbing hard.
Keep water away from electronic or metal parts.
Use minimal moisture around printed details.
Air dry fully in a ventilated area.
Reshape the plush while it dries.
Do not use high heat unless the care label allows it.
Machine washing is not always suitable for mini plush. Small parts may twist, fabric may mat, embroidery may pull, and filling may clump. For plush keychains, bag charms, or blind box collectibles, spot cleaning is often the safer choice. If a product needs to be washable for its use scene, that requirement should be discussed during development, because fabric, filling, stitching, and accessories may need different planning.
Cleaning advice should also be reflected in care labels. A beautiful plush can still create complaints if the care information is unclear. For retail or child-related products, care label planning should be reviewed early with the product structure and target sales region.
Can You Use Dawn Dish Soap On Plushies?
Dawn dish soap can be used carefully on some plushies for light spot cleaning, but it should be diluted, tested on a hidden area first, and used in a very small amount. It should not be treated as a universal plush cleaner. Some fabrics, prints, dyes, adhesives, accessories, metal parts, electronic parts, and special fillings may react poorly to water or detergent.
A safer approach is:
Mix a tiny amount of mild dish soap with water.
Test on a hidden seam or back area.
Dampen a cloth, not the whole toy.
Blot the stained area gently.
Wipe again with a clean damp cloth.
Avoid soaking the filling.
Air dry completely.
Brush the pile gently after drying if needed.
Dawn or similar mild dish soap may help with surface oil or light dirt, but too much soap can leave residue. Residue can make the fabric feel stiff or attract more dust. Strong scrubbing can damage pile, blur printed details, or pull embroidery threads. For mini plush with a keyring, chain, sound module, battery part, magnet, or glued accessory, water should be used with extra care.
For plush products made for retail, gifts, education, or collectibles, the best cleaning method should match the final materials. If washable performance matters, it should not be added as an afterthought. It should be considered during fabric selection, filling choice, accessory planning, label content, and sample review.
Closing: Clear Details Start Before The First Sample
Clear mini plush details are not created by one single trick. They come from a chain of practical decisions: the artwork is simplified, the face is protected, key marks are enlarged, weak lines are removed, fabric is chosen carefully, embroidery and printing are matched to the right details, the sample is reviewed honestly, and bulk production follows the approved reference.
A small plush may only be 8cm, 10cm, or 12cm tall, but it carries a lot of responsibility. It may represent an original character, a mascot, a retail collection, a fan gift, a blind box series, a campaign item, or a private label product line. If the face feels right, the logo is clean, the shape is memorable, and the product survives packing well, the mini plush becomes much more than a small toy. It becomes a repeatable product with real commercial value.
For a new custom mini plush project, the most useful starting materials are:
Front, side, and back artwork
Close-up face details
Target size and thickness
Quantity per design
Fabric or hand-feel preference
Logo file and color reference
Preferred craft notes
Accessory details
Packing plan
Target sales region
Launch or delivery schedule
Heyzizi can review custom mini plush toys, plush keychains, plush bag charms, mascot plush, IP character plush, blind box plush, and multi-SKU plush programs based on artwork, size, material, craft, packing, quality needs, and order planning. For project review, send your files and key requirements to info@heyzizi.com, and the development team can help check which details should stay, which should be adjusted, and how to make the product clearer before sampling.